I remember the first time I decided to install new carpeting in my living room. I was eager, excited, but quickly learned that a poor installation can turn a beautiful upgrade into a nightmare of wrinkles, uneven edges, and even early wear. That lightbulb moment made me realize it’s not just about choosing the right carpet, but about knowing the top tips for installation to ensure that beauty lasts for years. If you’ve ever felt overwhelmed by the seemingly endless tips and tricks out there, don’t worry — I’ve been there, and I’ve got you covered. Today, I’ll walk you through proven strategies that turn a DIY project into a professional-looking finish, saving you money and frustration in the long run.
Why Proper Carpet Installation Matters More Than You Think
Many homeowners underestimate the importance of a flawless installation. It’s tempting to think that once the carpet is laid out, it’ll just stay put and look good. But the truth is, even the most luxurious carpet can fall short of its potential if not installed correctly. Proper techniques prevent common issues like wrinkles, gaps, and uneven edges that can make your space look cheap and worn out faster. Plus, a well-installed carpet provides better insulation, noise reduction, and safety, especially in high-traffic areas. According to industry experts, poor installation can reduce a carpet’s lifespan by up to 30%, which is a huge investment lost. So, if you’re like me and want your home to look polished and last, understanding these key tips is essential.
Have you faced problems like wrinkling or uneven edges after a carpet install? You’re not alone. I once rushed through a DIY project and ended up pulling up the carpet twice. It was frustrating and costly — but I learned from my mistake. The good news is, with a few simple, expert-approved tips, you can avoid those pitfalls and achieve a flawless finish that stands the test of time.
In the sections ahead, I’ll share the essential steps that will elevate your carpet game — from preparing your subfloor correctly to choosing the right tools and techniques for stretching and securing your carpet. Whether you’re hiring a professional or tackling the project yourself, these insights will ensure your carpet looks beautiful and stays durable for years to come. Ready to become your own carpet installation hero? Let’s dive in!
Prepare Your Subfloor for Success
Start by removing old carpet and thoroughly cleaning the subfloor. Use a vacuum or a broom to clear debris, then inspect for moisture or uneven spots. Think of this step as laying a solid foundation for a house; without it, your carpet can develop wrinkles or gaps over time. I once skipped this step and ended up pulling up my carpet twice because of uneven surfaces. Taking the time now saves headaches later.
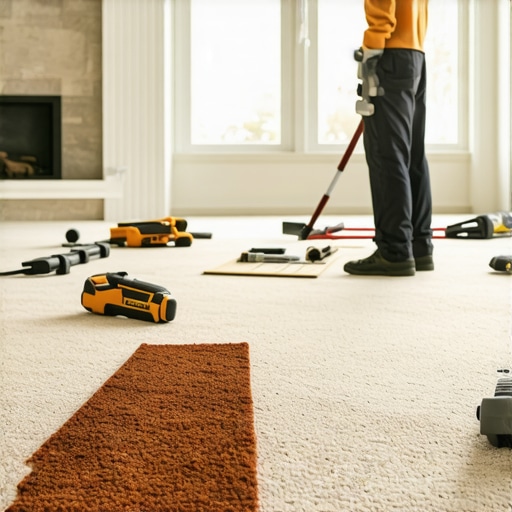
Choose the Right Tools and Materials
Invest in quality tools like a power stretcher, knee kicker, and carpet knife. Use a high-quality padding that matches your lifestyle—thicker for comfort, denser for durability. Remember, like a good pair of shoes, your tools and materials determine how well and how long your carpet performs. I learned this the hard way when I used cheap padding, which compressed quickly and showed signs of wear within months.
Measure and Cut Precisely
Accurately measure your room, adding a few extra inches for trimming. Use a straightedge and sharp carpet knife to cut the carpet, avoiding jagged edges. Think of this step as tailoring a suit—precision matters for a clean fit. When I measured twice and cut once, my edges aligned perfectly, avoiding unnecessary waste and rework.
Stretch and Secure the Carpet Properly
This is the core of a lasting installation. Use a power stretcher to pull the carpet tight, starting from the center and working towards the edges. Secure the edges with tack strips nailed into the subfloor. Imagine stretching a drumhead evenly; too loose and it flaps, too tight and it tears. I once rushed this step, resulting in wrinkles that took days to fix, so don’t skip or rush it.
Focus on the Edges and Corners
Use a knee kicker to push the carpet into corners and along walls, ensuring a snug fit. Trim excess carpet along the baseboards for a clean finish. This detail transforms a good job into a professional one. When I completed this step carefully, the final look was sleek and durable, with no loose or bulging areas.
Finish with Baseboards and Transition Strips
Reinstall or upgrade your baseboards to hide the edges and give a polished look. Transition strips help bridge the carpet with other flooring types smoothly. Proper finishing prevents the carpet from fraying or pulling away over time. I recommend checking out baseboards makeover tips for ideas to elevate your space.
Regular Maintenance Extends Longevity
Vacuum regularly and address spills immediately. Rotate furniture to prevent uneven wear. These simple habits keep your carpet looking fresh and durable for years. I learned that quick spot cleaning and routine vacuuming significantly prolongs the life of my investment.
While many homeowners focus on choosing the perfect carpet and the right tools, a crucial aspect often gets overlooked: the nuanced details of the installation process. These subtleties can make or break the longevity and appearance of your flooring, yet they are frequently misunderstood or ignored by even experienced DIYers and professionals alike. Today, let’s dig deeper into what most people get wrong about carpet installation, so you can avoid these pitfalls and achieve that flawless finish you desire.
Why Overlooking Subfloor Conditions Can Sabotage Your Carpet
One of the most common myths is that the subfloor doesn’t require meticulous attention once it’s clean. In reality, even minor unevenness or residual moisture can cause significant issues down the line. For example, small dips or bumps may seem insignificant but can result in wrinkling or bubbling that requires costly repairs. Industry experts emphasize the importance of testing moisture levels and leveling the subfloor before laying down carpet. Skipping this step often leads to premature wear and visible imperfections that diminish the overall aesthetic.
In my experience, investing in a proper subfloor assessment and correction can save you from endless rework, which is why I recommend consulting detailed guides like this resource to ensure your foundation is solid.
Advanced Mistake: Ignoring the Role of Proper Tension and Stretching
Many installers underestimate the importance of correct tensioning during the stretching process. Applying too little tension can leave the carpet loose, resulting in wrinkles or shifting over time. Conversely, over-stretching can damage the backing and cause rips or tears. Achieving the perfect balance requires understanding the nuances of stretching techniques. Using a power stretcher correctly—starting from the center and working outward—is critical for a smooth, durable finish. According to carpet installation experts, mastering tensioning is one of the most overlooked skills that distinguishes a professional job from a botched one.
How to Avoid Common Installation Traps
One sneaky mistake is rushing through edge finishing. Whether it’s trimming excess carpet or nailing down tack strips, neglecting these details can lead to loose edges, fraying, or gaps. I’ve seen many DIY projects where quick cuts resulted in jagged edges that looked unprofessional and wore out quickly. Take your time with these finishing touches, and consider upgrading your baseboards to hide imperfections. For creative ideas, check out baseboard makeover tips.
Finally, remember that regular maintenance extends the life of your carpet. Routine vacuuming, immediate spill cleanup, and furniture repositioning can prevent uneven wear and tear, ensuring your investment lasts. Have you ever fallen into this trap? Let me know in the comments what lessons you’ve learned from installation mistakes, and I’ll be happy to help troubleshoot further.
Keeping your carpet looking fresh and performing well over time requires more than just a good installation; it demands regular maintenance and the right tools to address issues before they escalate. From specialized cleaning equipment to periodic inspections, investing in the right resources can extend your carpet’s lifespan and preserve its aesthetic appeal for years. I personally swear by certain tools that have made my maintenance routine more effective and less tedious.
Invest in a High-Quality Carpet Cleaner
While vacuuming is the most routine task, a deep-cleaning machine designed for carpets can remove embedded dirt, allergens, and stains that regular vacuum cleaners can’t handle. I prefer a steam cleaner with adjustable settings because it sanitizes the fibers without harsh chemicals, which is better for my family and the environment. Regular deep cleaning, at least twice a year, prevents dirt buildup that can wear down the backing and fibers over time. For best results, choose a model with a HEPA filter and strong suction power, like the Bissell Big Green, which I’ve used with great success.
Use a Carpet Brush and Spot Cleaning Tools
For quick touch-ups and stubborn stains, I recommend keeping a set of handheld brushes and spot cleaning sprays on hand. These tools allow targeted cleaning without over-saturating the carpet, which can lead to mold or mildew if moisture gets trapped. I always keep a microfiber cloth and a gentle stain remover close by, so I can address spills immediately, preventing permanent damage. Remember, acting fast is crucial for maintaining your carpet’s appearance, especially in high-traffic areas.
Maintain Proper Humidity and Ventilation
Controlling indoor humidity levels with a dehumidifier or air conditioner reduces the risk of mold and fiber degradation. Proper ventilation helps dry out the carpet after cleaning or spills, preventing long-term damage. I check my home’s humidity regularly with a digital hygrometer, aiming for a level between 30-50%. This simple step can dramatically extend your carpet’s lifespan and improve overall indoor air quality.
Schedule Professional Inspections and Maintenance
While DIY tools are effective for regular upkeep, periodic professional inspections can identify issues invisible to the untrained eye. Experts can deep-clean, re-stretch, or repair areas prone to wrinkling or wear before they become major problems. I recommend scheduling a professional assessment at least once every couple of years—especially after significant renovations or if you notice uneven wear patterns.
Future Trends: Smart Maintenance Technology
Looking ahead, the integration of smart sensors and IoT devices into home flooring could revolutionize maintenance routines. Imagine a system that alerts you when humidity levels rise or dirt accumulates beyond a set threshold, prompting immediate action. As technology advances, I predict more homeowners will adopt these innovations to keep their carpets in pristine condition effortlessly.
How do I maintain my carpet over time?
The key is consistent, proactive care. Regular vacuuming combined with deep cleaning using a quality steam cleaner, targeted spot treatments, and controlling indoor humidity creates a comprehensive maintenance routine. Don’t forget to schedule professional checkups to catch issues early. By investing in the right tools and habits today, you’ll ensure your carpet remains beautiful and durable for years to come. Ready to elevate your maintenance game? Try using a HEPA-filtered steam cleaner this month and see the difference it makes in your carpet’s longevity and appearance.
When I first tackled a carpet installation, I thought choosing the right carpet was enough. Turns out, the real secret lies in the details—those subtle techniques that make or break the look and longevity of your flooring. Over the years, I’ve learned some invaluable lessons that aren’t found in typical guides, and I want to share them with you so you can avoid common pitfalls and achieve professional results.
The Hardest Lesson I Learned About Carpet Installation
- Never underestimate the importance of a perfectly prepared subfloor. I once skipped moisture testing and leveling, which led to wrinkling and bubbling within months. Now I always invest time in assessing and fixing the subfloor before laying down the carpet.
- Stretch with precision, not just muscle. Using a power stretcher properly ensures a tight, wrinkle-free fit. Rushing this step can cause permanent damage or require reinstallation.
- Finish edges meticulously—your baseboards and transition strips matter. Quick trims or ignoring gaps can make your entire project look amateurish and shorten its lifespan.
- Maintenance is key to lasting beauty. Regular vacuuming, prompt spill cleanup, and periodic professional inspections keep your carpet looking fresh and extend its lifespan beyond expectations.
My Essential Toolkit for Carpet Mastery
- High-quality power stretcher and knee kicker: These tools are game-changers for achieving a professional stretch and fit. I trust brands recommended by industry experts.
- Moisture meter and leveling tools: Critical for ensuring a stable base. Skipping this step can lead to costly repairs down the line.
- Premium padding and quality adhesives: They provide comfort and durability, making every step worth the investment.
- Effective cleaning and maintenance supplies: A HEPA-filtered steam cleaner and spot treatments keep your carpet pristine.
Step Into Your Carpet Confidence
Taking on a carpet installation might seem daunting, but with the right knowledge and tools, you can transform your space with confidence. Remember, it’s about more than just laying carpet—it’s about creating a foundation for comfort and style that lasts. If you’re ready to elevate your home’s look and durability, start with thorough preparation, precise execution, and ongoing care. Your future self will thank you for the effort, and your home will reflect that dedication every day.
What’s the biggest challenge you’ve faced in flooring projects? Share your story below, and let’s troubleshoot together!


One thought on “Top Carpet Install Tips for Lasting Elegance & Durability”
Emily Rodgers
January 3, 2026 at 6:20 pmThis post really struck a chord with me, especially the part about preparing the subfloor properly. I had a similar experience where rushing that step led to wrinkling a few months later, and it was quite frustrating to fix. Now, I always put extra effort into leveling and moisture testing, which has saved me a lot of headaches. I think the key takeaway for DIYers is that seemingly small details like subfloor prep and precise measuring can make a big difference in the long run. I’m curious, has anyone found particularly effective methods or tools for leveling uneven subfloors more efficiently? It would be great to hear some tips that make that step less time-consuming, especially for those of us working on larger rooms.