I remember the frustration vividly. I had just finished installing new hardwood floors in my living room, feeling proud and excited. But within six months, scratches, warping, and dullness started to appear. It was a wake-up call. I realized I had overlooked crucial installation details that could have extended the life of my floors. That experience sparked my journey into mastering the best flooring installation practices for durability and beauty.
Why Choosing the Right Installation Technique Matters More Than You Think
Flooring is more than just a surface to walk on; it’s the foundation of your home’s aesthetic and functionality. Proper installation ensures that your floors not only look stunning but also stand the test of time. According to industry experts, incorrect installation can reduce flooring lifespan by up to 50%. This is why investing time in learning top installation tips can save you money and headaches in the long run. Whether you’re considering hardwood, tile, or carpet, the right techniques can make all the difference. If you’ve ever faced uneven surfaces or quick wear and tear, you know how vital proper installation is. Are you tired of replacing or repairing your floors prematurely? Let’s explore how to get it right the first time.
Is Flooring Installation Actually Worth the Hype?
Absolutely. I once tried to cut corners by skipping certain steps, thinking I could save time and money. The result? Uneven edges, loose tiles, and a lot of frustration. It became clear that rushing or neglecting key details damages the entire project. The mistake taught me that quality installation isn’t just about aesthetics — it’s about durability. For expert guidance, you can check out comprehensive tips on flooring installation tips. Now, let’s dive into practical steps that will help you achieve long-lasting results in 2024, starting with the foundational elements of preparation and planning.
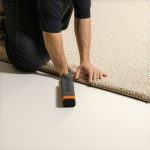
Prepare the Subfloor Like a Pro
Think of your subfloor as the foundation of a house; if it’s shaky, everything built upon it will suffer. I vividly recall my early days when I skipped proper subfloor prep, resulting in a warped hardwood floor within months. To avoid this, thoroughly clean the surface, remove any debris, and check for levelness using a long straightedge. Fill in low spots with suitable leveling compounds and sand down high spots. Ensuring a flat, clean, and dry surface is crucial for optimal adhesion and durability.
Acclimate Your Flooring Material
Ever tried to install flooring straight out of the box during a hot summer day? It’s like trying to fit a puzzle piece that’s been in the fridge—shrinkage or expansion will ruin the look. I learned this the hard way when I left hardwood planks in my garage for 48 hours, allowing them to reach room temperature and humidity. This step prevents future buckling or gaps. For best results, follow manufacturer guidelines on acclimation, typically 48-72 hours in the installation environment.
Plan Your Layout Carefully
Imagine building a puzzle without checking the picture first—chaotic and frustrating. I once started laying tiles without planning, resulting in uneven cuts and an unbalanced pattern. To prevent this, measure your space accurately, plan the direction of planks or tiles, and dry-lay materials to visualize the final look. Use chalk lines to mark your starting point and layout lines, ensuring symmetry and minimal waste. Proper planning saves money and time, giving your project a professional finish.
Use the Right Adhesives and Fasteners
Choosing the wrong glue or nails is like using a butter knife to cut steak—ineffective and risky. I initially used generic adhesive for my laminate flooring, which led to lifting after a few months. Always select adhesives and fasteners specified by the manufacturer for your flooring type. For hardwood, a high-quality wood glue and nails or staples are essential. For tiles, use the recommended thin-set mortar. Applying these correctly ensures a strong bond, preventing movement and prolonging lifespan. For detailed guidance, visit expert installation tips.
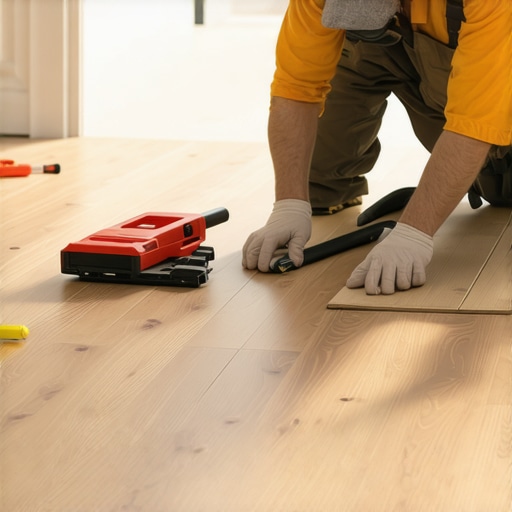
Employ Proper Installation Techniques
Installation methods vary, but consistency is key. For hardwood, stagger seams and avoid aligning joints directly over each other to increase strength. I learned this when I accidentally aligned all seams, which made the floor prone to cracking. Use spacers to maintain expansion gaps around the perimeter—this is like leaving breathing room for your floor to expand and contract with humidity changes. When laying tiles, start from the center and work outward, ensuring even grout lines. Precision in technique reduces future repairs and guarantees a flawless finish.
Finish with Quality Transitions and Baseboards
The details matter. I once neglected to install proper transition strips, which made the edges look unfinished and prone to damage. Use matching or contrasting baseboards and transition strips to protect edges and create a clean look. Secure baseboards properly and caulk gaps for a seamless appearance. These finishing touches elevate the overall aesthetic and protect your investment. For trendy ideas, explore baseboard trends in 2025.
While many DIY enthusiasts are eager to jump into flooring projects, let’s dig deeper into some misconceptions that can trip you up and reveal the advanced nuances that even seasoned homeowners often overlook. Understanding these details can mean the difference between a floor that lasts decades and one that needs premature replacement.
Myth: All Flooring Materials Are Installed the Same Way
This is a common misconception. Each flooring type—hardwood, tile, carpet, vinyl—has unique installation requirements. For example, hardwood requires precise acclimation and expansion gaps, while tile demands careful substrate preparation and proper mortar mix. Overlooking these specifics can lead to issues like warping, cracking, or bubbling. The key is to follow manufacturer guidelines tailored to each material, which many underestimate. For advanced installers, understanding the subtle differences in adhesives, moisture barriers, and subfloor compatibility is crucial for long-lasting results.
The Oops Factor: Ignoring Humidity and Temperature Fluctuations
This is a trap that even experienced DIYers fall into. Many think that installing flooring in a controlled indoor environment is enough, but neglecting seasonal humidity and temperature changes can cause serious problems later. For instance, hardwood floors left unacclimated in a dry summer or humid winter might expand or contract, leading to gaps or buckling within months. Experts recommend monitoring and adjusting the environment before, during, and after installation. This nuance is often missed but is vital for stability, especially in regions with significant climate variations.
What Most Get Wrong About Subfloor Preparation
Many believe that a quick clean is sufficient for a subfloor. In reality, even minor imperfections—like low spots, high spots, or residual debris—can compromise the entire flooring system. Advanced installers use a laser level or long straightedge to identify and correct these issues meticulously. Skipping this step may seem harmless initially but leads to uneven surfaces, creaking, or premature wear. Proper subfloor preparation includes moisture testing, leveling, and ensuring the surface is dry and free of any contaminants, which is often underestimated in DIY projects.
Have you ever fallen into this trap? Let me know in the comments.
Maintaining your flooring over time is crucial to keep it looking pristine and functioning well for decades. From specialized tools to routine check-ups, I’ve found that the right equipment and consistent care are game-changers. One of my top recommendations is investing in a high-quality flooring vacuum with adjustable settings, like the Dyson V15 Detect. It’s effective at removing dust and debris from textured surfaces without causing scratches, especially important for hardwood and tile floors. Regular vacuuming prevents grit from grinding into the surface, which can accelerate wear and tear.
Another indispensable tool is a microfiber mop paired with a pH-neutral cleaner tailored for your flooring type. I personally prefer the O-Cedar Microfiber Mop because it’s lightweight, durable, and effective at trapping dust without leaving streaks. Routine cleaning with these tools preserves the finish and prolongs the life of your floors.
For deeper maintenance, I recommend periodically checking the expansion gaps around the perimeter of hardwood floors. Use a small pry bar or a dedicated gap tool to ensure these spaces remain unobstructed. This allows your flooring to expand and contract naturally, preventing buckling or gaps. Additionally, applying a floor polish or rejuvenator every 2-3 years, such as Bona Floor Polish, can restore luster and provide a protective layer against scratches and stains.
Looking ahead, I predict that smart maintenance tools will become more prevalent. Imagine using IoT-enabled vacuum robots that monitor dirt levels and alert you when cleaning is needed. These innovations will make maintaining flooring easier and more efficient, especially in high-traffic areas.
How do I maintain my flooring over time?
Consistency is key. Schedule monthly routine cleanings, and annually perform a more thorough inspection, including checking for loose tiles or damaged grout. Remember to avoid using harsh chemicals or abrasive pads that can strip the finish. Instead, stick to recommended cleaning products and techniques. For hardwood floors, refinishing every 7-10 years is advisable, depending on wear. When scaling your flooring, consider integrating protective pads on furniture legs and area rugs in high-traffic zones to minimize damage and preserve your investment.
For expert guidance and the latest tools, visit this resource. Try incorporating a smart sensor-based maintenance system for your floors—it’s a small investment that pays off by extending your flooring’s lifespan and keeping it looking new longer.
Unveiling the Hidden Lessons That Transformed My Flooring Journey
One of the most profound lessons I learned was the importance of meticulous subfloor preparation. Skipping this step seemed harmless at first, but it led to uneven surfaces and early wear. Now, I always ensure the subfloor is perfectly level, clean, and dry before proceeding. Another key insight was understanding the nuances of acclimating flooring materials. I used to install hardwood straight from the box, only to face gaps and buckling months later. Allowing materials to reach the right temperature and humidity conditions has saved me countless headaches.
Thirdly, I discovered that proper layout planning is a game-changer. Dry-laying tiles and planks might seem tedious, but it prevents costly mistakes and ensures a professional finish. Lastly, I realized that investing in quality adhesives and fasteners, as recommended by manufacturers, dramatically increases the lifespan of the flooring. These lessons, though simple, are often overlooked by DIY enthusiasts but are crucial for durable results.