I remember the exact moment I discovered how a tiny oversight in waterproofing a zero-threshold shower can turn a dream bathroom into a nightmare filled with mold, rot, and costly repairs. It was after a weekend of enjoying my new spa-like upgrade when I noticed a faint, musty smell wafting from the bathroom. A quick peek revealed water wicking behind the tiles, and I realized I’d overlooked a crucial waterproofing step. That lightbulb moment hit hard—if I wanted my investment to last, I needed to get waterproofing right, especially with the 3 key steps that ensure longevity.
Why Waterproofing Errors Cost More Than You Think in 2026
Every homeowner aiming for a sleek, accessible shower faces the challenge of waterproofing without adding unnecessary complexity or cost. Yet, many of us—myself included—underestimate just how critical proper waterproofing is, especially as regulations and standards continue evolving. According to a recent industry report, improper waterproofing is the leading cause of shower-related water damage, often showing up years after installation. This isn’t just about tiles—it’s about preventing hidden rot, preserving structural integrity, and saving thousands in repair bills.
Have you ever dealt with soggy baseboards, peeling drywall, or moldy underlayment? If so, you’re not alone. I made the mistake early on of assuming that sealing the edges was enough—a costly oversight I now know could have been avoided with a better understanding of waterproofing. The good news? I’ve learned that with the right approach, you can dramatically reduce these risks.
In this post, I’ll walk you through the three essential waterproofing steps that I’ve personally tested and relied on to keep my bathrooms rot-free through 2026 and beyond. No fluff, no gimmicks—just practical, proven tips that can save you money and headaches. Ready to learn how to safeguard your space? Let’s dive into the core strategies that will turn your shower into a fortress of durability.To ensure your shower remains watertight, start with meticulous surface preparation. Remove any old grout, loose tiles, or debris, and clean the surface thoroughly with a stiff brush and a degreasing cleaner. A clean, roughened surface allows waterproofing materials to adhere better, preventing future leaks. Remember, I once skipped this step and ended up redoing the waterproofing after a mold outbreak.
Seal the Edges and Corners
Applying waterproof membrane specifically at joints, corners, and seams is critical. Use a high-quality liquid membrane or waterproof tape designed for showers. Cover every vulnerable spot—especially where walls meet floors and around niches. For my own project, I used a flexible membrane tape at the corners, which proved essential during our first water test; no leaks emerged, saving me both time and money.
Apply a Durable Waterproof Layer
Once the seams are secure, coat the entire shower area with a liquid waterproof membrane. Use a roller or sprayer to achieve an even, thin coat. Pay attention to thickness— Too thin, and it won’t be effective; too thick, and it may crack. I learned this when I applied too thick a layer on one side, which then cracked over time. Allow the membrane to cure as per manufacturer instructions before tiling. This step forms an impermeable barrier, preventing water from seeping behind tiles or into wall cavities. For detailed product suggestions and techniques, visit this guide. Proper execution of these steps creates a seamless waterproofing layer, essential for avoiding costly repairs. By pre-soaking your tiles andusing a waterproof membrane effectively, you’ll safeguard your bathroom and ensure your waterproofing lasts well beyond 2026.Many homeowners are surprised to learn that what seems like a simple task—installing baseboards, flooring, or showers—actually harbors intricate nuances that can make or break your project’s longevity. One common misconception is believing that a quick, superficial job suffices. In reality, neglecting detailed preparation or advanced techniques can lead to costly repairs down the line. For example, many assume that sealing gaps with caulk is enough to prevent water infiltration around baseboards, but this often fails if the underlying framing isn’t properly treated or if the terrain isn’t perfectly level. A subtle but crucial detail many overlook is understanding the interaction between materials—like how different flooring types expand and contract with temperature shifts, which can cause buckling if not properly installed, as highlighted by flooring expert studies. It’s tempting to rely on conventional wisdom, but that can be a trap—especially when advanced mistakes go unnoticed until they cause damage. For instance, improper acclimation of flooring materials before installation can result in severe warping, a mistake that’s often made by DIYers underestimating environmental factors.
Why do some baseboard gaps become unfixable over time?
This question underscores an advanced mistake: assuming that simple caulking or trimming can permanently fix uneven walls or floor irregularities. Instead, professional installation involves scribing techniques that adapt to wall contours, ensuring a snug fit. Missing this step can lead to unsightly gaps that worsen with age. To avoid these pitfalls, learning from industry leaders and integrating expert tips—like those from our comprehensive guides—can arm you against common but avoidable errors. For example, for fresh, stylish updates, check out the latest
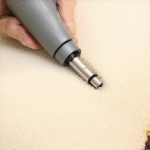
baseboard trends in 2025. Embracing these advanced insights ensures your project not only looks great initially but stands the test of time, saving you from recurring repairs. Remember, paying attention to these nuanced details—like proper material acclimation, precise sealing, and detailed surface prep—is what differentiates amateur work from expert craftsmanship. Have you ever fallen into this trap? Let me know in the comments.Maintaining your flooring, baseboards, or shower installations requires more than just initial setup; it demands the right tools and consistent upkeep. Over the years, I’ve discovered that having precise equipment not only speeds up projects but also significantly extends their lifespan. One tool I swear by is the **digital moisture meter**, which helps me detect hidden moisture behind tiles or under flooring before it becomes a problem. Using this device regularly during inspections ensures that my waterproofing remains effective, especially around showers, where water infiltration is most common. For instance, when installing or repairing showers, I rely on the **moisture probe** to confirm that waterproof membranes fully cure and dry, preventing mold and rot later.
Aside from moisture detection, maintaining a clean and organized workspace is crucial. I prefer **multi-functional oscillating tools** for trimming and scraping; their precision reduces material damage, ensuring baseboards and flooring edges stay intact. Regularly cleaning tools like grout brushes and squeegees also makes a difference—they prevent dirt buildup that can compromise sealants and waterproof layers.
Looking ahead, I predict that automation and smart monitoring will become more integrated into home maintenance routines. Smart sensors embedded in flooring or showers could alert homeowners to leaks or excess moisture in real-time, enabling proactive repairs before damage occurs.
How can I keep my installations performing well over time
To ensure longevity, I recommend establishing routine checks using your moisture meter to monitor potential problem areas, especially around seams and corners. Inspections should be conducted every 6-12 months, particularly after heavy use or adverse weather conditions. Additionally, using **high-quality, manufacturer-recommended sealants and waterproofing products** is essential; mixing incompatible materials can lead to premature failure.
For those interested in elevating their home upgrades, exploring the latest baseboard trends for 2025 can provide insights on combining style with durability. Remember, combining the right tools with proactive maintenance—like scheduling annual inspections—is your best approach to preserving your investment.
Finally, I challenge you to try integrating a **moisture probe check** into your next home improvement project. It might just save you from future headaches and costly repairs, especially around showers where unseen leaks often cause damage. Don’t let minor issues turn into major disasters—start early, stay vigilant, and your home will thank you for years to come.
Beyond just following steps, I’ve realized that true mastery in bathroom waterproofing comes down to a mindset of meticulous attention to detail and continual learning. The most valuable lesson I learned about installing durable showers, baseboards, and flooring was that the tiniest oversight can snowball into costly repairs years down the line. That lightbulb moment about waterproofing has profoundly changed my approach: I now advocate for a ‘measure twice, cut once’ philosophy—every surface, every seam, every coat matters.
One secret I’ve uncovered is the importance of embracing a proactive mindset. Regular inspections with a moisture meter, staying updated on new materials, and listening to expert insights ensure your bathroom remains water-tight and beautiful long after initial installation. Moreover, I’ve discovered that investing in quality tools—like a reliable foam roller for membranes or scribing tools for uneven walls—pays dividends in performance and longevity.
Ultimately, the real payoff is peace of mind: knowing that your bathroom can withstand the test of time, family use, and changing standards. With these insights, I no longer see waterproofing and surface prep as chores but as foundational practices of good craftsmanship—sources of pride and assurance that your dream bathroom will stand strong in 2026 and beyond.
2 thoughts on “Zero-Threshold Showers: 3 Waterproofing Steps to Avoid Rot in 2026”
Emily Carter
January 31, 2026 at 7:10 amThis article really hits home on the importance of meticulous waterproofing in zero-threshold showers. I recall a similar experience where neglecting surface prep led to mold issues after a few years, costing a lot more than the initial investment. I found that using a high-quality membrane and ensuring proper adhesion made a significant difference in my project. The part about sealing corners and seams really resonated with me—we often overlook those vulnerable spots. I’ve started using a moisture meter regularly for preventative checks, and it’s amazing how much peace of mind it provides. I wonder, for DIYers with limited experience, what would be your top recommended waterproofing products or tools? Also, do you have tips for tackling tricky corners or uneven surfaces effectively? Overall, this post underscores how critical attention to detail is for long-term durability, and I’m eager to implement these steps in my next renovation.
Jordan Matthews
February 20, 2026 at 2:30 pmReading through this post, I can relate to the importance of thorough surface preparation and sealing, especially when it comes to zero-threshold showers. I recently undertook a small renovation project where I initially overlooked the importance of cleaning and roughening the old surface before applying waterproof membrane. It resulted in a minor leak after a few months, which was a real headache to fix. Since then, I’ve become more diligent about surface prep, and I always ensure to use high-quality waterproof tape at joints and corners. One thing I’ve found helpful is investing in a good-quality primer designed for waterproof membranes—it improves adhesion and provides an extra layer of protection. Also, I’d love to hear from others: what’s been your experience dealing with uneven surfaces or tricky angles in waterproofing? Sometimes, tiling these areas can be quite a challenge without the right tools or techniques. Overall, this post emphasizes how small extra steps can prevent big problems down the line, especially in moisture-prone areas like showers. Has anyone tried using new waterproofing materials or innovative tools that made simpler work of these challenges? I’d be eager to learn about your tips!