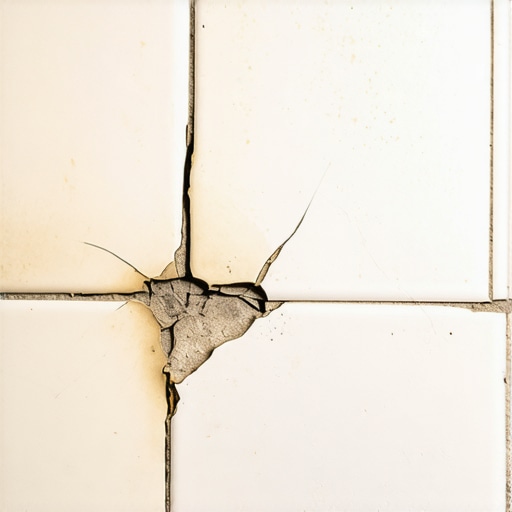
It was a cold morning when I stepped into my bathroom, only to be greeted by a stubborn puddle that refused to dry. The shower floor, which I had only recently installed, was already showing signs of failure—cracks, water pooling, and a sense of dread creeping in. That lightbulb moment hit me hard: I realized I had overlooked some key details during my initial install, and now I was paying the price.
Why Ignoring Shower Floor Issues Can Cost You Big Time
As a DIY enthusiast, I thought I could handle this project on my own. But the truth is, a failing shower floor isn’t just an aesthetic problem; it’s a safety hazard and a potential nightmare for your home’s structure. Water that seeps beneath tiles can lead to mold, rot, and costly repairs—problems that only get worse with time.
Early mistakes can seem minor but snowball into major headaches. For example, improperly sealing the drain flange or neglecting waterproofing steps can turn your dream bathroom into a source of stress. Did I mention that according to home renovation studies, water damage caused by flawed showers accounts for over 30% of repair costs in bathrooms? That’s a number worth paying attention to.
So, today, I promise to guide you through the three critical fixes I wish I knew earlier. These are proven strategies that can extend the life of your shower, keep water where it belongs, and give you peace of mind.
Is Waterproofing Still Worth the Hype?
I admit, I was skeptical at first—thinking simple sealants would do the trick. But I learned the hard way that comprehensive waterproofing is non-negotiable. My initial mistake was relying solely on basic sealant around the drain; it looked neat but failed to prevent leaks.
Getting this right involves understanding multiple waterproofing layers and proper installation techniques. If you’ve faced similar doubts or fears about waterproofing, you’re not alone. Let’s dive into the essential steps that will safeguard your shower and your home from future disasters.
Start with a Solid Base: Preparing the Shower Floor
Before applying any waterproofing materials, ensure your shower floor is perfectly level and free of debris. I vividly recall a time when I attempted to skip this step, and the uneven surface caused subsequent waterproofing failures. Use a level and remove any dust or loose debris—this foundation is crucial for a long-lasting seal.
Apply a Waterproof Membrane Effectively
Choose the Right Material
Select a high-quality liquid membrane or membrane sheets specifically designed for showers. I recommend a liquid membrane for its seamless coverage, reducing the risk of leaks through tiny gaps. When I installed mine, I used a brush to apply the first layer, then roller for the second, ensuring uniform thickness—any gaps are a potential weak point.
Methodical Application
Start from the drain area and work outward, overlapping each previous layer by at least 2 inches. I recall gently pressing the membrane into corners and around bolts with a brush, making sure no air bubbles or thin spots remained. This meticulous process ensures water cannot seep through.
Seal Critical Joints and Penetrations
Where pipes, drains, or other fixtures enter the shower base, waterproofing must be extra thorough. I once used a sealant compatible with the membrane at these points, applying generously and smoothing the sealant with a finger dipped in soapy water. Don’t skimp here—these are vulnerable leak sites.
Test Your Waterproofing Before Tile Installation
Once the membrane cures, perform a water test. Fill the shower pan with water up to a manageable height and wait 24 hours. During this time, check for any signs of seepage or drops in water level. I vividly remember catching a small leak during my test, which allowed me to reapply sealing before the tiling, saving future headaches.
Ensure Proper Drain Installation
The drain is a common failure point if not sealed correctly. Use a high-quality gasket and sealant approved for shower drains. When I replaced my drain, I applied a generous bead of sealant around the flange, then tightened the bolts firmly. Confirm the drain is flush with the shower base to prevent water pooling that could bypass waterproofing layers.
Recognize the Significance of Waterproofing in Longevity
Proper waterproofing isn’t just a technical step; it’s the shield protecting your entire bathroom. Failing at this stage can lead to mold, rot, and costly repairs—issues that could have been avoided with diligent application. Remember, every inch of your shower base needs this critical defense to ensure water stays where it belongs, keeping your home safe and stylish for years.
When it comes to home upgrades like installing baseboards, flooring, carpet, or showers, many homeowners rely on popular beliefs or basic tutorials. However, professional insights reveal that some of these widely held notions are actually myths, and overlooking key nuances can lead to costly mistakes. Understanding these subtleties can make the difference between a flawless finish and a renovation nightmare.
Why Reinventing the Wheel Sometimes Backfires
A common misconception is that following the latest trends in baseboard styles or flooring materials guarantees a timeless result. While trendy designs can elevate your space, overemphasizing aesthetics at the expense of proper installation techniques is risky. For example, many assume that simply aligning baseboards with walls is enough, but in reality, walls and floors often aren’t perfectly straight or even, especially in older homes. This can result in gaps, crooked lines, or unsightly miter cuts that diminish the overall look.
Stepping Over Critical Preparations Leads to Failures
One of the most overlooked nuances involves surface prep. Many think that applying paint or installation adhesives directly onto existing surfaces is sufficient. In truth, skipping steps like cleaning, leveling, or sealing can trap moisture, cause warping, or lead to uneven seams. For flooring and carpets, inadequate underlayment or an uneven subfloor can cause ripples, gaps, or premature wear. For showers, neglecting waterproofing layers or misapplying sealants can result in leaks, mold, and structural damage.
Advanced Trick: Accounting for Material Expansion and Contraction
A sophisticated homeowner or contractor understands that materials like wood, laminate, or certain tiles, naturally expand or contract with temperature and humidity changes. Ignoring this dynamic can result in buckling, cracking, or gaps over time. For instance, installing baseboards with no allowance for expansion can cause them to crack or pull away from the wall. This is especially crucial in environments prone to temperature swings or high humidity levels—know this and plan accordingly.
According to a study published in the Journal of Building Biology, improper handling of material properties is one of the leading causes of premature home renovation failures. Making precise measurements and incorporating expansion gaps can significantly extend the lifespan of your installations.
Don’t Rely Solely on Caulk for Large Gaps
While caulk is useful for sealing small joints, many new DIYers believe it can fix larger gaps or uneven surfaces permanently. This is a trap because caulk lacks the strength and flexibility needed for big discrepancies. Instead, use carpentry techniques like scribing or filling gaps with trim pieces. For instance, a careful scribing of baseboards to fit uneven walls ensures a clean, professional look—learn more about this essential skill at our baseboard makeover guide.
Have you ever fallen into this trap? Let me know in the comments.
For comprehensive tips on achieving perfect installations that last, check out our guides on [baseboard trends for 2025](https://tilecraftsmens.com/baseboard-trends-in-2025-fresh-styles-for-every-room), [flawless carpet installation](https://tilecraftsmens.com/carpet-install-secrets-achieving-flawless-results-every-time), and [modern shower ideas](https://tilecraftsmens.com/shower-renovation-ideas-modern-designs-for-a-luxury-feel). Remember, paying attention to these hidden nuances can save you time, money, and frustrations in your home improvement journey.
Maintaining Your Installation with Precision Tools
To ensure your bathroom upgrades, such as shower installations or flooring, stand the test of time, investing in the right tools is essential. I personally rely on a high-quality digital angle finder like the
For waterproofing projects, I recommend a premium roller brush, specifically designed to apply waterproof membranes smoothly over large areas. It minimizes bubbles and uneven spots—crucial for avoiding leaks in showers or underlayment layers. Coupled with a quality moisture meter, I can verify if my walls and floors are adequately dried before proceeding, which helps prevent mold and future repairs.
Preserving Long-Term Results
Tools are only part of the story—regular maintenance preserves your investment. For showers, clean the grout and sealant annually using a specialized grout refresh spray to prevent water ingress. When it comes to baseboards or flooring, inspect for gaps or crests, especially after seasonal changes, and fill them immediately with flexible sealants designed for expansion and contraction. Applying these small but consistent touches keeps your environment safe, dry, and aesthetically appealing.
Upkeep Strategies for a Healthy Bathroom
My go-to method involves weekly wiping of tiles and baseboards with a microfiber cloth dampened with a mild cleaning solution. This prevents soap scum buildup and dust accumulation, which can deteriorate materials over time. For carpeted areas, I use a carpet protector spray to repel stains and maintain plushness—details I cover extensively in this guide. Moreover, scheduling professional inspections annually can catch issues early, saving significant costs in repairs or replacements.
How do I maintain my bathroom fixtures over time?
Routine inspections, combined with using appropriate tools such as a sealant gun for reapplication of silicone caulks or waterproofing membranes, can extend your fixtures’ lifespan. For example, periodically removing and reapplying silicone around shower doors prevents leaks; a simple task if you keep a quality silicone remover and a professional-grade caulk gun in your toolkit. These proactive steps, although small, make a big difference in avoiding costly water damage and keeping your bathroom in top shape.
Looking to upgrade or prevent issues? Try applying the advice of replacing traditional caulking with a flexible, mildew-resistant sealant in critical joints—this modest investment can dramatically improve durability. For detailed techniques, check out our guide to sealing. Consistent maintenance paired with the right tools ensures your bathroom remains both beautiful and functional for years to come, making your DIY efforts truly worthwhile.
After navigating the intricate world of bathroom and flooring upgrades, I’ve uncovered valuable insights that go beyond the typical tutorials. These lessons stem from personal mishaps and successes, offering you a clearer path to a durable and beautiful home. Embracing these revelations can transform your DIY projects into long-lasting achievements, sparing you the frustration of recurring repairs.
Master Key Lessons That Changed My Approach to Home Installations
- Embrace the Details: Overlooking small steps like meticulous surface prep or precise sealing can lead to failures months later. Every detail, from leveling subfloors to thorough waterproofing, builds a foundation for success.
- Trust Proven Techniques Over Trends: Material choices and installation methods matter more than the latest styles. My experiments with trendy designs sometimes compromised durability—stick with what’s proven to withstand time and moisture.
- Invest in Quality Tools and Resources: Using the right tools—like a pro scribing tool for uneven walls—makes precise cuts and seals possible. Reliable resources save time and ensure professional finishes, reducing costly corrections.
- Prioritize Regular Maintenance: Routine inspections and timely touch-ups preserve your installations. Simple actions like resealing grout or filling gaps prevent small issues from escalating into costly repairs.
Tools and Resources That Elevated My Projects
- Pro Scribing Tool: Essential for dealing with uneven walls, ensuring clean, tight fits without gaps. It’s a game-changer for achieving professional results with less frustration.
- Waterproof Membranes: High-quality membranes are non-negotiable for preventing leaks. They give me peace of mind knowing my showers are protected against moisture damage.
- Durable Flooring Guides: Expert advice on layering, sealing, and materials keeps my floors looking great and resisting wear over time.
- Carpet Installation Tips: Precise techniques for stretching and sealing preserve carpet integrity and appearance for years.
This Is Your Moment To Elevate Your Home
Armed with these insights and trusted resources, you’re ready to take your home upgrades to the next level. Every project is an opportunity to learn, refine, and create a space that combines beauty with durability. Remember, patience and attention to detail are your best allies in this journey. Dive into your next renovation with confidence, knowing that your efforts will stand the test of time and moisture.
What’s the biggest challenge you’ve faced in your bathroom or flooring projects? Let me know in the comments below—sharing experiences helps everyone grow stronger.