I remember the moment clearly. I had just finished a shower renovation that I was personally proud of—until, a few years later, I started noticing my tile choices looking a bit, well, tired. It felt like my bathroom design had frozen in time, and not in a good way. That lightbulb moment made me realize something crucial: choosing the right tile pattern isn’t just about style today, but about ensuring your bathroom stays fresh and modern years down the line.
Why Your Tile Choice Can Make or Break Your Bathroom’s Future
Some decisions have long-term implications, and tile selection is definitely one of them. As I learned from my own misstep, picking overly trendy patterns might seem like a good idea now, but they often look outdated in just a few short years. The key is to go for timeless patterns—those that blend classic appeal with subtle modern touches. That way, your bathroom remains stylish and relevant well beyond 2026.
Is Trendy Always Transient? My Personal Misstep
Early in my tiling journey, I made the mistake of chasing the hottest trends—bold geometric patterns, super-large formats, and wild colors. While they looked fabulous at first, those choices quickly felt stale. It’s easy to fall into the trap of following short-lived trends, but I’ve realized that opting for patterns with classic appeal ensures longevity. To help you avoid this pitfall, I’ll guide you through four tile patterns known for their timeless charm, making your bathroom a space that stays in style for years to come.
By understanding what makes a tile pattern timeless, you’ll save yourself from costly redo’s and enjoy a space that feels both modern and enduring. Ready to discover the best choices? Let’s dive into the patterns that will keep your bathroom looking fresh—no matter what year it is.
Prepare Your Surface Meticulously
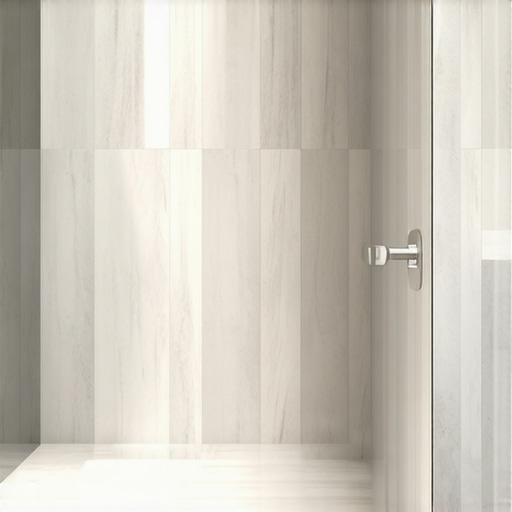
Before laying any tiles, ensure your substrate is impeccably clean, dry, and level. I once rushed this step and ended up with uneven tiles that cracked later. Use a long level and self-leveling compound if necessary, just like laying a foundation for a house—skip it at your peril.
Assess and Correct Surface Irregularities
Identify dips, bumps, or cracks on the surface. For example, during my last project, I used a straightedge to spot a slight hump in the floor. I then sanded and filled it with thin-set mortar, which prevented future tile cracks and resulted in a perfectly flat surface. Think of this step as smoothing a rough canvas before painting — essential for a professional-looking finish.
Accurate Measurement and Layout Planning
Mark your starting line using a chalk string line or laser level. When I installed my bathroom tiles, I measured and marked the center point, ensuring symmetry. Imagine it as drawing a roadmap—you want your tiles to align precisely from the start, avoiding the dreaded skewed pattern at the end.
Dry Fit Your Tiles
Lay out tiles without adhesive to visualize the pattern. During one messy session, I moved tiles multiple times before committing, which helped me adjust and avoid awkward cuts. This dry run acts as rehearsal—save yourself from unexpected surprises later.
Applying Adhesive Correctly
Choose the right thin-set mortar for your tiles and substrate. During my first installation, I used the wrong mix, resulting in poor adhesion. Use a notched trowel to spread adhesive evenly, working in small sections. Think of it as icing a cake—you want a consistent layer to prevent lumps and gaps, ensuring tiles set firmly and flat.
Work in Manageable Sections
Only apply enough adhesive for a few tiles at a time to prevent it from drying out. I learned this the hard way when I waited too long, and some tiles just wouldn’t adhere properly. Timing matters—think of it as cooking: rushing or waiting too long compromises the final result.
Perfecting Tile Placement
Set each tile firmly into the adhesive, pressing with a slight twisting motion. During my last project, I used a rubber mallet to gently tap tiles, achieving uniform height. Use spacers to maintain consistent grout lines—this is like building with Lego blocks, ensuring everything fits together seamlessly.
Address Cutting and Fitting
Measure carefully for edges and corners, and cut tiles with a wet saw. I once tried using a utility knife for a large cut and ended up chipping tiles—moral: use the right tool for precision and clean cuts. Remember, precise cutting reduces waste and enhances finish quality.
Grouting and Sealing for Longevity
Allow tiles to set for at least 24 hours before grouting. Mix grout thoroughly and apply it with a rubber float, pressing into joints at a 45-degree angle. Once I grouted my shower, I used a damp sponge to clean excess, which made a noticeable difference in appearance. Sealing grout lines afterward prevents water and stains, like a protective shield for your work.
Final Cleaning and Inspection
Wipe tiles with a soft cloth to remove haze, and inspect for any uneven joints or loose tiles. In my last project, I caught a loose tile using a flashlight and re-adhered it before grout curing. Taking that extra moment solidifies your work, saving time and money in the long run.
Executing each of these steps with care guarantees a professional, durable, and visually stunning tile installation—transforming your bathroom into a showstopper that stands the test of time.
When it comes to home renovations, many homeowners and even some professionals often overlook critical nuances that can make or break the quality of the finish. Let’s dig deeper into some widely misunderstood aspects of installing carpet, baseboards, showers, and flooring, to help elevate your project from amateur to expert level.
One of the most pervasive myths is that sealing gaps with caulk or grout alone can prevent future problems like water leaks or mold growth. While these sealants are useful, relying solely on them can be a trap, especially in sensitive areas like showers or where baseboards meet flooring. Proper waterproofing techniques, such as installing waterproof membranes under tiles or behind baseboards, are essential for long-term durability. For example, in shower waterproofing, neglecting to test waterproofing layers with pressure or moisture tests can lead to costly leaks, as emphasized by industry experts. For a comprehensive approach, consider following advanced waterproofing steps outlined in resources like this guide.
Are you accounting for movement joints effectively? An expert nuance
In flooring and tile installations, ignoring expansion joints can create stress points that crack or buckle over time. This is particularly vital in larger spaces or areas prone to temperature changes. Properly placed movement joints allow for natural expansion and contraction, preserving the integrity of your work. For a detailed explanation, see how seasoned professionals execute strategic joint placements in luxury shower projects.
Baselines for success include precise measurements, preparation, and understanding material behaviors under different conditions. Many overlook that even the best-looking baseboards can appear sloppy if not scribed properly to uneven walls or floors. Instead of mitering blindly, using techniques like coping or sanding to fit contours ensures a seamless finish. This attention to detail distinguishes a good job from an exceptional one. For trends and styles, check out upcoming baseboard trends.
Similarly, carpet installation is more than just stretching the material; it’s about managing seams, transitions, and subfloor stability. A common mistake is attempting to layer carpets over existing tiles or uneven surfaces without proper underlayment, leading to rips, wrinkles, or peaking. Advanced installers employ techniques like heat seam sealing and precise stretching algorithms—discussed thoroughly in this expert guide. Remember, high-quality carpet installation enhances comfort and aesthetic longevity. And when it comes to flooring, materials respond differently to environmental factors; understanding these subtleties can save you from costly replacements. For in-depth insights, visit this resource.
Have you ever fallen into this trap? Let me know in the comments.
Keep It Running: Essential Tools for Longevity
Maintaining your home renovation projects like flooring, baseboards, or showers requires the right tools that not only perform well but also stand the test of time. One tool I’ve personally found indispensable is a high-quality oscillating multi-tool. It’s perfect for quick, precise repairs, whether you’re re-sealing grout joints or trimming stubborn baseboard edges. Investing in a durable model like the Fein MultiMaster not only saves time but also reduces frustration, especially when working in tight corners or delicate areas.
Another essential is a digital moisture meter. Regularly checking moisture levels behind tiles or in subfloors can alert you to potential water issues early, preventing costly repairs down the line. I use the Protimeter Surveymaster because it offers accurate readings and alerts me before water damage becomes visible. This proactive approach helps extend the lifespan of your installations, especially in areas prone to humidity, like bathrooms or basements.
For ongoing maintenance, a handheld caulking gun with a comfort grip enables precise, neat sealant applications. Over time, old caulk can crack or peel, leading to leaks or mold. A professional-grade caulking gun helps me re-seal showers and baseboards efficiently, maintaining waterproof integrity. Remember, the key isn’t just applying sealant but doing so meticulously using the right tools.
Software and Digital Monitoring
Beyond physical tools, I recommend using home management apps that track maintenance schedules. Apps like Home Maintenance Schedule help set reminders for tasks such as resealing grout, inspecting caulking, or checking for drafts. These digital aids ensure you don’t forget essential upkeep that prolongs your renovation’s quality and appearance.
In addition, smart sensors for moisture detection now integrate with home automation systems, allowing remote monitoring. For instance, placing moisture sensors under bathroom floors alerts you instantly if water begins to seep, offering a chance for quick intervention. This tech-driven approach is predicted to become standard, as more homeowners embrace smart home maintenance.
How do I maintain shower waterproofing over time?
Maintaining shower waterproofing is critical for avoiding leaks and mold. Regularly inspecting grout lines for cracks or gaps and reapplying waterproof sealants is essential. Additionally, pressure testing your shower drain, as discussed in this guide, ensures the waterproof layer remains intact. Consider scheduling an annual moisture test or professional checkup to catch issues early. For a practical tip, periodically remove shower fixtures and inspect behind tiles—early detection can save thousands in repairs.
Trends suggest that integrating maintenance with smart home systems will become more prevalent. Automated alerts, remote diagnostics, and even AI-driven predictive repairs will simplify keeping your home in top shape. Now’s a great time to adopt these tools—start by trying out a moisture sensor in your bathroom to see how it transforms your maintenance routine!
Ultimately, combining quality tools with proactive habits ensures your renovation investments pay off in durability and beauty. Don’t wait for problems to appear—implement a maintenance plan today and try one of these advanced techniques to keep your home looking pristine for years to come.
What the DIY World Won’t Tell You About Home Makeovers
One of the most eye-opening lessons I learned was about patience and attention to detail. Rushing through steps like measuring or surface prep might seem harmless at first, but it often leads to costly fixes down the line. I once skipped meticulous surface leveling before tiling, and the resulting cracks reminded me that small sacrifices in time save big expenses later.
Another hidden truth is the importance of choosing quality over trend. I tried to be trendy with bold patterns and large tiles, only to realize that timeless designs age gracefully. Embracing classic styles in my bathroom meant I could enjoy my space years later without feeling outdated.
Additionally, I discovered that technology isn’t just for smart homes—it’s vital for good craftsmanship. Investing in a moisture meter and laser level transformed my installation process, making everything precise and professional-looking. These tools became my trusted allies in ensuring durability and beauty.
My Top Resources for Elevating Your Home Renovation Skills
If you’re like me, eager to do it right the first time, these are some game-changing resources I rely on. First, this guide on shower waterproofing taught me critical steps to prevent leaks, a lesson I wish I knew earlier. Second, this article about baseboard styling helped me pick designs that blend functionality with style seamlessly.
For equipment, my favorite is a quality notched trowel and a laser level, which you can find at your local hardware store or online. They make the precise work easier and elevate your results. Lastly, consulting professional tutorials, like those on expert flooring tips, saved me from common pitfalls and boosted my confidence.
Take the First Step Today and Transform Your Space
Don’t let fear of making mistakes hold you back from creating a home that reflects your personality and care. Every professional started where you are now, and with patience, the right tools, and trusted guidance, you can achieve incredible results. Remember, your home is your sanctuary, and investing time into perfecting these details ensures it remains beautiful for years to come. So, what project will you start today to bring your dream home closer to reality? Share your plans below—I’d love to hear your story and cheer you on!
And if you’re ready to dive deeper, explore some of the linked resources for expert tips and innovative ideas. Your journey to a stunning, durable home begins with that first confident step—make it today!
,