I remember the first time I tackled a flooring project in my own home. I was so eager to see my living room transformed, but halfway through, I realized I had overlooked a crucial step—preparing the subfloor properly. The result? Uneven surfaces and a finish that looked more DIY than professional. That moment was a lightbulb for me: no matter how beautiful the flooring material, if the foundation isn’t solid, the whole project can fall apart over time.
Fast forward to today, I’ve learned that the secret to achieving flawless, durable flooring isn’t just about picking the right materials—it’s about mastering the installation process. And that’s exactly what I want to share with you. Today, we’re diving into expert tips that will help you get it right the first time, ensuring your new floors stay stunning and last for decades. If you’ve ever felt overwhelmed or worried about wasting time and money on a project that doesn’t turn out as planned, stick around. I promise, these insights will change the way you approach flooring installation.
Why Proper Preparation Matters More Than You Think
Before you even lay the first plank or tile, a proper foundation is everything. I used to skip the detailed prep work, thinking it was a waste of time. Boy, was I wrong. Skipping steps like measuring moisture levels or ensuring the subfloor is level can lead to costly repairs down the line. According to industry experts, improper prep is a leading cause of flooring failure within just a few years. It’s the difference between a floor that lasts a lifetime and one that needs replacing in no time.
Have you ever installed flooring only to see it buckle, crack, or come loose sooner than expected? If so, you’re not alone. Many DIYers and even pros underestimate the importance of this initial phase. But don’t worry. I’ve been there, and I’ve learned from my mistakes. Now, I always start with a thorough assessment and preparation, which I detail in my comprehensive guide on durable flooring installation.
Getting this step right sets the tone for the entire project. It’s like building a house on a solid foundation—everything else falls into place smoothly. So, if you’re ready to move beyond the common pitfalls and make your flooring last, let’s explore the key expert tips that will empower you to do just that.
Is Cutting Corners on Prep Worth It
I used to think so, especially when I was pressed for time. But early on, I made the mistake of skipping moisture testing and uneven subfloors. The result? Cracks and shifting tiles that drove me crazy. Now, I know better. Proper prep might take a little extra time upfront, but it saves so much headache later. For detailed strategies on avoiding these pitfalls, check out expert flooring tips that focus on long-term results.
Ensure a Level and Clean Surface
Start by inspecting your subfloor for levelness. Use a long straightedge or a level to check for dips and high spots. If you find uneven areas, sand down high spots or fill dips with a suitable leveling compound. Clean the surface thoroughly to remove dust, debris, and grease, which can compromise adhesion. I once skipped this step and ended up with tiles that cracked within months. Proper cleaning and leveling are non-negotiable.
Test Moisture Levels to Prevent Future Damage
Moisture can cause flooring to swell, warp, or crack. Use a moisture meter to test the subfloor and the back of your flooring material. For concrete, readings should be under 3%; for wood, follow manufacturer guidelines. I learned this the hard way when I installed hardwood over a moist subfloor, leading to cupping. Always ensure your moisture levels are compatible to avoid costly repairs later.
Prepare the Subfloor with a Suitable Underlayment
Depending on your flooring type, use an appropriate underlayment. For laminate or engineered wood, a foam or cork underlayment provides soundproofing and moisture barriers. For tile, a cement backer board enhances stability. I once used the wrong underlayment for my laminate, which caused squeaking. Double-check compatibility and install it smoothly without wrinkles or gaps.
Plan Your Layout Carefully
Before cutting, lay out your flooring pieces to visualize the final look. Use chalk lines or spacers to maintain consistent gaps around the edges for expansion. For tiles, dry lay a few rows to see how they fit. I once miscalculated and had to redo a row, wasting time. Planning saves you from surprises and ensures a professional finish.
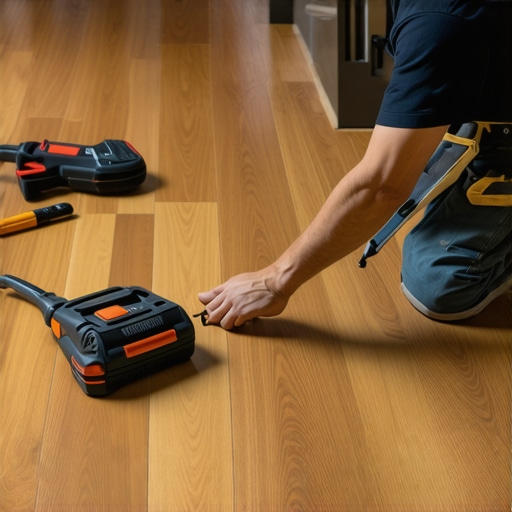
Make Precise Cuts for a Seamless Fit
Use quality saws and blades suitable for your material. Measure twice, cut once—this old saying is gold. For angles and corners, take detailed measurements and make test cuts on scrap pieces. I still remember the frustration of uneven cuts that didn’t align. Precision in cutting makes or breaks the appearance of your floor.
Apply Adhesives and Install with Care
Follow manufacturer instructions for adhesives or nails. Spread glue evenly with a notched trowel to prevent bubbles or voids. For tiles, press firmly and use spacers to maintain uniform gaps. I once hurried through this step and ended up with uneven tiles that cracked. Take your time to ensure each piece is properly seated and aligned.
Allow Proper Curing Time
After installation, avoid walking on or placing furniture until the adhesive or grout has fully cured. This can take from 24 hours to several days. I learned this the hard way when I moved furniture too soon, causing shifts and imperfections. Patience now saves headaches later.
Finish with Attention to Detail
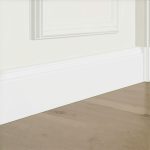
Fill gaps with matching grout, and seal edges and seams. Install baseboards or moldings to cover expansion gaps for a polished look. For a quick upgrade, visit baseboard trends in 2025. I once neglected this step and faced dust accumulation, which looked messy. Finishing touches make your project look professionally done.
Many homeowners and DIY enthusiasts fall prey to misconceptions that can sabotage their flooring projects. Let’s dig deeper into some of the most persistent myths and uncover the truths that can save you time, money, and frustration. First off, a widespread belief is that you can skip detailed subfloor preparation if the material is durable enough. In reality, no matter how tough your chosen flooring is, an uneven or moist subfloor will cause it to fail prematurely. Industry experts emphasize that proper surface assessment and prep are non-negotiable steps for longevity. To truly master this, check out this comprehensive guide.
Another myth I often hear is that adhesive or nails alone are enough to keep flooring secure. Not true. The quality of the adhesive, proper spreading, and the right amount of pressure during installation are critical factors that many overlook. Inadequate adhesion can lead to buckling and gaps over time. This is why taking your time during this stage is vital. For expert tips on applying adhesives correctly, see this resource.
What Advanced Installers Know About Moisture and Temperature
For seasoned pros, the nuanced understanding of moisture and temperature conditions during installation can make or break a project. A common mistake is assuming that climate control is only necessary in extreme conditions. However, fluctuations in humidity and temperature can cause flooring materials to expand or contract, leading to warping or gaps. Experts recommend testing moisture levels not just once, but at multiple stages. According to a study published in the Journal of Building Physics, controlling moisture migration is essential for preventing structural damage over the years. To avoid this trap, always follow manufacturer guidelines and consider environmental controls during and after installation.
Have you ever fallen into this trap? Let me know in the comments. Mastering these nuances can elevate your project from DIY to professional-grade results. Remember, the devil is in the details, and understanding these hidden nuances is what truly sets experts apart from amateurs.
Keep It Running Smoothly: Tools I Trust for Flooring Maintenance
Maintaining your flooring over time requires the right tools and a bit of know-how. One tool I swear by is a high-quality orbital sander. I use it regularly to smooth out minor scratches and wear marks on hardwood floors, preventing small issues from escalating into costly repairs. An orbital sander with variable speed settings allows me to adjust the power for different surfaces, ensuring gentle yet effective maintenance. For cleaning, a microfiber mop paired with a pH-neutral cleaner is indispensable, as it lifts dirt without damaging the finish. Regular sweeping with a soft-bristled broom prevents grit from scratching your surface, preserving its beauty over the years.
Another essential tool is a moisture meter. Monitoring moisture levels periodically is crucial, especially in areas prone to humidity fluctuations. I rely on a digital pin-type moisture meter for precise readings, helping me catch potential issues before they cause damage. Consistent maintenance also involves inspecting grout lines, especially in tiled areas. A grout cleaning brush and a professional-grade grout sealer keep tiles looking fresh and prevent water infiltration that can weaken the installation.
How do I maintain my flooring over time?
To keep your floors in top shape, establish a regular cleaning routine that includes sweeping and damp mopping. Avoid harsh chemicals; instead, opt for gentle, pH-balanced cleaners. Periodic deep cleaning with specialized equipment like a steam cleaner can also help lift stubborn dirt and sanitize the surface. For hardwood floors, applying a fresh coat of finish or sealant every few years can restore shine and add an extra layer of protection. Don’t forget to check for any signs of damage or wear, and address issues promptly to prevent them from worsening. For comprehensive guidance on maintaining your floors, I recommend consulting detailed resources like this expert guide.
Looking ahead, I predict that smart maintenance tools—like IoT-connected moisture sensors and automated cleaning devices—will become standard for homeowners aiming for long-lasting results. Investing in these technologies now can save you time and money in the future.
If you want to elevate your maintenance game, try integrating a moisture meter into your routine. Regular monitoring allows you to catch potential problems early, extending the life of your flooring and keeping it looking pristine for decades. Remember, keeping your floors working involves more than just initial installation—it’s about consistent care and using the right tools to prevent issues before they start.
The Hardest Lesson I Learned About Flooring
One of my biggest realizations came after rushing through a subfloor assessment. I thought skipping moisture testing and level checks would save time, but it led to buckling tiles and cracked hardwood within just a few years. That experience taught me that patience in the preparatory phase can save you from costly repairs later. Sometimes, the toughest lessons are the most valuable, especially when it comes to laying a durable, beautiful floor.
3 Myths About Flooring That Held Me Back
For years, I believed that using cheaper adhesives was enough to keep my floors secure. I learned the hard way that quality materials and precise application are non-negotiable. Also, I used to think that a perfectly level subfloor wasn’t critical—until uneven surfaces caused my tiles to crack. And I once underestimated the importance of environmental controls during installation, which caused hardwood to warp. Now, I know that debunking these myths is key to professional results.
What Experts Won’t Tell You About Long-Lasting Floors
Seasoned installers pay close attention to moisture migration and temperature fluctuations that can cause flooring to expand or contract over time. They also understand the importance of environmental controls in the installation space. These details, often overlooked by DIYers, are crucial for ensuring your floors stand the test of time. For a deep dive into these advanced strategies, check out this comprehensive guide.
Curated Recommendations for Flooring Success
- Moisture Meters: I rely on a digital pin-type moisture meter for quick, accurate readings. It helps me catch potential issues early, especially in basement or bathroom areas. Trust me, consistent moisture monitoring prevents future warping and mold problems.
- Leveling Compounds: A high-quality leveling compound is essential for creating a flat surface. I prefer ones that are easy to apply and dry quickly, saving me time and effort in the prep stage.
- Professional-Grade Adhesives: Not all adhesives are created equal. I always choose products recommended by manufacturers and apply them with the right notched trowel for even coverage, ensuring long-term adhesion.
- Resource for Techniques: The site this resource offers detailed tutorials and expert tips to refine your installation skills.
Your Turn to Try
Remember, the key to flooring that lasts is mastering the details—proper prep, precise measurements, and patience during curing. Don’t shy away from investing time and effort now; it pays off in decades of beautiful, durable floors. Whether you’re a DIY enthusiast or planning to hire a pro, these insights will help you get it right the first time.
What’s been your biggest challenge with flooring installation? Share your experiences below—I’d love to hear your story and help troubleshoot any issues you’re facing!