I remember the first time I tried installing baseboards and carpet in my living room. It was a disaster—gaps, crooked cuts, and a finish that looked more DIY than professional. That lightbulb moment made me realize that understanding the nuances of these seemingly simple tasks can make a world of difference. If you’ve ever faced similar frustrations, you’re not alone. But here’s the good news: with the right approach, you can achieve that perfect, polished look every time.
Why This Matters for Your Home’s Look and Value
Getting the details right when installing baseboards and carpet isn’t just about aesthetics; it’s about elevating your entire home’s vibe. Quality installations can make old rooms look brand new, and they significantly boost your home’s value. Plus, a flawless finish means fewer repairs down the line. According to a recent study, homes with professionally finished floors see a 10-15% increase in resale value, which is a pretty compelling reason to get it right from the start.
Have You Faced This Common Problem?
If uneven gaps, crooked lines, or peeling carpet sound familiar, don’t worry. I’ve been there, and I know how discouraging it can be. But with a few insider tips, you’ll be surprised how straightforward the process can become. Want to learn how to avoid those rookie mistakes and create a seamless, professional-looking finish? Keep reading, because I’m about to share everything I wish I knew when I started.
Before diving into the step-by-step process, it’s worth noting that many beginners overlook the importance of proper measurements and tools. A small mistake here can lead to big frustrations later on. For example, early in my DIY journey, I ignored the importance of a good miter saw, and it cost me hours of rework. Trust me—investing in quality tools and taking your time is key. If you’re curious about the latest trends in baseboard styles, check out this article.
Now that I’ve set the stage, let’s get into the practical tips that will help you nail your carpet and baseboard projects for a flawless finish. Whether you’re tackling a single room or remodeling your entire home, these insights will turn your DIY efforts into results you’ll be proud of.
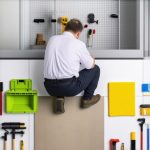
Prepare Your Tools and Workspace
Start by gathering all necessary tools: a quality miter saw, a tape measure, a carpenter’s level, a utility knife, and a staple gun or nailer. Clear the room, removing furniture and old flooring if necessary. This initial step sets the foundation for a smooth installation process.
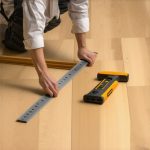
Measure and Cut Precisely
Accurate measurements are crucial. Use your tape measure to determine the length of each wall. When cutting baseboards, add a slight extra length for adjustments. I recall a time I measured once and cut twice—mistake avoided by double-checking measurements before cutting. Use a miter saw to make precise 45-degree angles at corners, ensuring seamless joints. For uneven walls, measure along the wall and cut accordingly to avoid gaps.
Install the Baseboards with Confidence
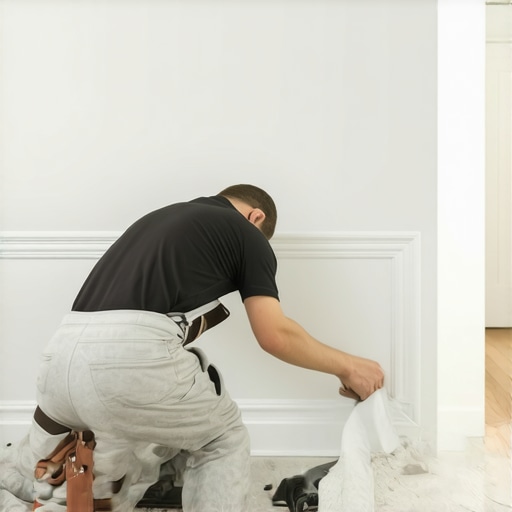
Align and Secure
Place the baseboard against the wall, ensuring it’s flush at corners. Use a level to check for straightness. Nail or staple the baseboards into the wall studs, avoiding drywall anchors that can cause unevenness. For a professional look, stagger nails and countersink them slightly. I once used painter’s putty to fill nail holes, creating a smooth finish.
Handle Corners with Care
Inside corners are best mitered at 45 degrees to create a clean joint. Outside corners may require coping—cutting along the profile of the molding to fit tightly with the adjoining piece. A coping saw is essential here. Remember, a snug fit looks best and minimizes gaps.
Lay the Carpet Properly
Prepare the Subfloor
Ensure the subfloor is clean, dry, and level. Use a level to check for high or low spots and sand down uneven areas. I once ignored this step, and it resulted in a bumpy carpet that was a nightmare to stretch out smoothly.
Cut and Fit the Carpet
Measure the room accurately, adding a few inches to each side for securing. Use a carpet knife to trim the edges for a perfect fit. Roll out the carpet, ensuring it aligns with the walls. Use a knee kicker to stretch the carpet tight, working from the center outward. Proper stretching prevents wrinkles and loose spots.
Secure the Edges
Use tack strips along the perimeter, nailing them into the subfloor, not the baseboards. Tuck the carpet into the strips with a hand stapler or carpet tucker. For a seamless look, trim excess carpet neatly along the edges. I recommend checking the tightness frequently to avoid sagging later.
Final Touches for a Perfect Finish
Fill any nail holes in the baseboards with wood filler and sand smooth. Touch up paint if needed. Vacuum thoroughly to remove debris. These small details elevate your DIY project from good to stunning.
Remember, patience and precision are your best allies. With these steps, you’ll achieve a professional-quality installation that enhances your home’s beauty and value. If you’re inspired to explore new styles, check out latest baseboard trends.
< >
>
Many DIY enthusiasts believe that installing baseboards and carpet is straightforward—measure, cut, secure, and voilà, you’re done. However, this oversimplification masks several nuances that can make or break your project’s professional appearance. Let’s dig deeper into what most people get wrong and how to avoid common pitfalls that can sabotage your efforts.
Why Relying Solely on Visual Alignment Can Betray You
While a level and a tape measure are essential, many assume that these tools alone guarantee a perfect fit. The truth is, walls are rarely perfectly straight or square. Relying solely on visual alignment or standard measurements often results in gaps or uneven joints. Advanced installers often double-check with a framing square and use a combination of measurements along the wall’s actual profile, not just the corners. This approach minimizes gaps and ensures a seamless look, especially at tricky corners. According to a study by the National Association of Home Builders, precise measurement techniques significantly reduce installation errors, saving time and materials in the long run.
Common Myth: Corner Mitering Always Works
Many believe that cut-and-join mitered corners are foolproof. In reality, wall irregularities and slight shifts in measurement can cause mitered joints to open or look uneven. A more nuanced approach involves coping inside corners, which allows the baseboard to follow the wall’s irregularities tightly. Coping requires a fine-tooth saw and a steady hand but results in far cleaner joints. This advanced method is often overlooked by beginners but is a hallmark of professional finish work.
How Carpet Installation Tricks Can Save Your Day
The common mistake here is underestimating the importance of subfloor prep. Many skip leveling or cleaning thoroughly, leading to wrinkles or loose spots in the carpet. Advanced installers use a laser level to identify high and low spots and then sand or fill these areas, creating a flat surface for stretching. Additionally, improper stretching causes wrinkles over time. Experts recommend using power stretchers and mastering the technique of working from the center outward, ensuring a taut, wrinkle-free surface. These advanced steps are crucial for durability and aesthetics, especially in high-traffic areas. For detailed tips on achieving flawless results, check out this guide.
Have You Ever Fallen Into This Trap? Let Me Know in the Comments
Understanding these nuances can be the difference between a DIY project that looks amateurish and one that rivals professional work. Patience, precise measurement, and attention to detail are your best allies. Remember, every mistake is an opportunity to learn and improve. For more advanced tips on flooring installation, visit this resource. Happy renovating!
Once you’ve completed your flooring project, the real work begins—keeping it looking pristine and functioning flawlessly over time. Proper maintenance and the right tools are crucial for extending the lifespan of your flooring and ensuring your investment continues to pay off. In this guide, I’ll share exactly what tools I recommend for ongoing care and how to maintain your floors effectively.
Investing in Quality Maintenance Tools
One of my top recommendations is a high-quality vacuum cleaner with adjustable settings specifically designed for flooring types. I personally use the Dyson V11 Torque Drive because it offers powerful suction, excellent maneuverability, and adjustable modes that are gentle enough for delicate carpet fibers yet strong enough for hardwood or tile. A good vacuum prevents dirt and debris from scratching or staining your floors and is essential for regular upkeep.
For deep cleaning, I swear by a steam mop like the Bissell Symphony. It’s chemical-free and sanitizes the surface, which is especially helpful for homes with pets or allergies. Just make sure your flooring material is compatible with steam cleaning—most hardwoods and tiles handle it well, but always check your manufacturer’s recommendations.
Tools for Routine Maintenance and Repairs
Minor repairs are inevitable, but having the right tools can make fixes quick and seamless. I keep a wood filler kit handy for baseboard nail holes and minor scratches. For stubborn stains on carpets, I use a spot cleaning extractor like the Rug Doctor portable, which I find incredibly effective at restoring look and feel. Regularly inspecting your floors with a handheld flashlight helps spot issues early, such as loose tiles or scratches that need attention.
Preserving Your Floors for the Future
Looking ahead, I predict that smart cleaning devices equipped with AI technology will become more prevalent. These gadgets can automatically detect dirt levels and adjust their cleaning routines accordingly, saving time and effort. Investing in such tools now can set you up for a maintenance routine that’s both efficient and effective.
Remember, the key to long-lasting flooring is consistency. Schedule regular vacuuming and cleaning sessions, and don’t wait until dirt becomes noticeable. For more advanced strategies, check out this resource to stay ahead of the curve.
How do I maintain my floors over time?
The best way to keep your floors in top shape over the years is to implement a routine of gentle cleaning, prompt repairs, and protective measures. Use mats at entry points to trap dirt, avoid dragging heavy furniture, and periodically apply protective coatings if recommended for your flooring type. Regular inspections allow you to catch issues early, preventing costly repairs later.
Don’t forget that professional consultations can also provide tailored advice based on your specific flooring materials. Consider scheduling annual checkups with a flooring expert to keep your home looking its best for decades to come.
Start implementing these maintenance tips today, and your floors will thank you with years of beauty and durability.
The Hardest Lesson I Learned About Flooring Perfection
One of my biggest realizations was that no matter how simple a task seems—like installing baseboards or laying carpet—the devil is in the details. I once rushed through measurements and ended up with crooked joints and unsightly gaps that took hours to fix. Patience and double-checking measurements early on saved me from future headaches and costly rework. This taught me that investing time in preparation and precision is the key to professional-looking results, even as a DIYer.
Tools and Resources That Changed My Approach
Over time, I discovered that having the right tools transforms a frustrating project into a satisfying accomplishment. My go-to toolkit includes a high-quality miter saw, a laser level, and a staple gun designed for flooring. I also rely on trusted resources like latest baseboard styles to stay inspired and informed about current trends. These tools and ideas have made my installation process smoother and more enjoyable.
Believe in Your Ability to Transform Your Space
The journey to perfect flooring may seem daunting, but every small improvement builds confidence. Whether it’s tidying up edges, choosing the right finishing touches, or maintaining your floors, each step adds up to a remarkable transformation. I encourage you to embrace the learning curve and celebrate your progress. With patience and attention to detail, you’ll create a home that not only looks stunning but also feels uniquely yours. Ready to start? Remember, your floors will thank you for the care and effort you put in today. Have you ever struggled with a specific step in flooring installation? Let me know below.
2 thoughts on “Ultimate Guide to Baseboards & Carpet Installation for Perfect Finish”
Jessica Robbins
December 27, 2025 at 12:00 pmReading through this comprehensive guide really resonated with me, especially because I recently undertook a small DIY project to install new baseboards in my dining room. I learned firsthand how critical precise measurements and proper tooling are to achieving that polished look. One detail I found particularly helpful was checking wall irregularities before cutting — walls are rarely perfect, and accommodating for that made a noticeable difference in the final outcome. I also appreciate the emphasis on coping for corners; it’s something I had overlooked initially, leading to gaps and uneven joints. Personally, I’ve found that investing time in leveling the subfloor makes all the difference before laying carpet, preventing those annoying wrinkles that tend to develop over time. For anyone starting out, do you think it’s better to practice on a small section first or jump right into a big project? I’d love to hear how others approach this, especially those who’ve done it multiple times.
Michael Johnson
February 28, 2026 at 1:50 pmReading this post really hit home about the importance of patience and precision in flooring projects. I remember my first attempt at installing baseboards and carpeting, and it was definitely a learning experience. The tip about double-checking measurements and using a quality miter saw is so true; I underestimated the impact of small errors early on and paid for it with crooked cuts. One thing I found especially helpful was coping inside corners rather than mitering — it creates a much cleaner look and accounts for wall irregularities. I also learned that leveling the subfloor is crucial because even minor unevenness can show up later in the finish. Have others found that practicing on a small section first helps build confidence before tackling larger projects? For me, starting small definitely eased the learning curve and made me more comfortable with the process.