I’ll never forget the morning I stepped onto my living room carpet, only to realize it wrinkled and shifted beneath my feet. Frustration bubbled up—was I even doing this right? Turns out, many homeowners face similar surprises when tackling carpet installations, thinking they can wing it without proper guidance. That lightbulb moment led me down a path of learning the essential steps and avoiding common pitfalls. If you’ve ever felt overwhelmed by the prospect of a perfect home floor, you’re not alone—and the good news is, there’s a way to make it easier.
Why Getting Your Carpet Installation Right Matters More Than Ever
In 2024, the trend towards creating cozy, elegant living spaces is hotter than ever. A well-installed carpet can transform a room’s ambiance, add warmth, and even boost your home’s value. But according to industry experts, improper installation can lead to issues like uneven surfaces, quicker wear, and even mold growth in damp environments. (Source: Tile Craftsmens)
Honestly, I used to believe that laying carpet was a straightforward job anyone could handle. Yet, my first attempt was riddled with wrinkles and seams that just wouldn’t line up. My mistake? Skipping the detailed preparation and not understanding the importance of the right tools and techniques. That early blunder taught me that achieving flawless results isn’t about luck but about following expert-installed steps, which I now share with friends and clients.
Have you faced the challenge of an uneven or wrinkled carpet after installation?
If yes, don’t worry. Over the years, I’ve gathered practical tips that can help you sidestep these common mistakes. Whether you’re DIY-ing or planning to hire pros, understanding the basics will save you time, money, and stress. Ready to discover how to install your carpet like a true professional? Let’s start by focusing on the essentials that make all the difference.
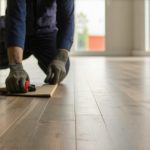
Prepare the Subfloor Carefully to Ensure Smooth Results
Start by removing old flooring and cleaning the subfloor thoroughly. Think of it like preparing a canvas before painting—any dirt or unevenness will show in your finished work. Use a level to check for dips or high spots, and address them with a self-leveling compound if needed. I learned this the hard way when I skipped this step and ended up with wrinkles. Once the surface is flat and clean, moisture testing helps prevent future mold issues and guarantees longevity. For my project, a quick moisture test revealed high humidity, prompting me to wait a few days for the area to dry completely—saving headaches later.
Measure and Cut Your Carpet Precisely
Accurate measurement is vital—measure the room’s length and width, then add a few extra inches on each side for overhang. Use a straightedge and a sharp utility knife to cut the carpet, avoiding jagged edges. I once underestimated the extra margin and had difficulty fitting the carpet—wasted material and time. Remember, a miscut can cause seams to misalign or bunch up. When cutting, work on a clean, flat surface, and use a straightedge guide for perfect cuts. This precision ensures seamless installation and reduces waste, making the job easier and cleaner.
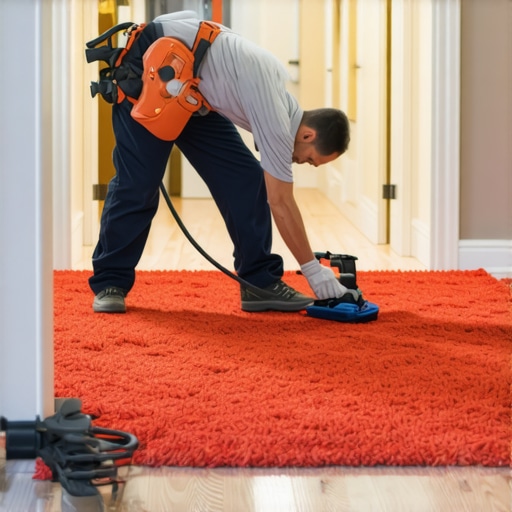
Lay Down the Carpet with Tension and Care
Unroll the carpet from the longest wall, allowing it to relax for a few minutes. Span the carpet across the room, and if you’re working alone, use a knee kicker to stretch the material toward the walls: think of it like tightening a guitar string to remove slack. Secure the edges with double-sided tape or tack strips, pressing the carpet firmly onto the adhesive or hooks. During my first try, I didn’t stretch enough, leading to wrinkles. Understanding how to apply consistent tension is key for a flat, professional appearance. Be methodical—start from the center and work outward—ensuring each section is smooth before moving on.
Seal and Secure Edges for a Long-lasting Finish
Finish by trimming excess carpet at edges, doorways, and around obstacles with a contour tool. Use a joining seam if necessary, aligning edges carefully and sealing with carpet seam adhesive or tape. For example, I once had a seam that kept fraying, but proper adhesion and using a seam roller sealed the deal. Finish by installing baseboards or molding to cover edges—this keeps the carpet in place and lends a polished look. Visit this guide for ideas on finishing touches. Proper sealing prevents fraying, lifting, and extends the life of your investment.
Why Many Homeowners Misjudge Baseboards and Their Impact
One of the prevailing misconceptions is that baseboards are merely decorative afterthoughts. In reality, they play a crucial role in framing your room and protecting walls from scuffs and impacts. Many underestimate the importance of precise measurement and proper installation techniques; a small mistake here can lead to gaps or uneven lines, disrupting the overall aesthetic. According to industry experts, paying attention to these details elevates the finished look and prevents future issues. Proper baseboard installation is an art that combines skill, measurement, and understanding of material behavior.
The Hidden Pitfalls in Shower Renovations That Many Overlook
A common trap is choosing the wrong waterproofing method or neglecting proper sealing. The misconception that a quick sealant application suffices can lead to leaks, mold, and mildew problems down the line. Advanced renovations emphasize meticulous waterproofing layers, especially around shower niches and corners. An expert tip is to use uncoupling membranes, which help distribute stresses and prevent cracking—details often missed by DIY enthusiasts. For innovative ideas on modern shower designs, see shower renovation ideas that combine durability with style.
Flooring Installation: The Nuances That Make a Big Difference
Everyone says to lay flooring from left to right or corner to corner, but the real expert move involves understanding the substrate and acclimating materials before installation. For instance, wood and vinyl expand and contract with temperature and humidity changes—skipping acclimation can cause buckling or gaps later. Also, using the right adhesive and seam treatments tailored to the material type prevents peeling or water intrusion. An advanced mistake many make is overlooking the importance of expansion joints, which accommodate natural movement. For detailed professional strategies, explore expert flooring tips that ensure longevity and a flawless finish.
Is it True That All Carpet Padding Is Equal?
Many believe that any padding will suffice, but in reality, the choice of padding significantly affects comfort, insulation, and durability. High-density foam or rubber padding can prevent dents and prolong the life of your carpet, especially in high-traffic areas. A mistake often made is selecting inexpensive padding to cut costs, which leads to faster wear and unevenness. Advanced installers recommend specific padding types based on the room’s use—think beyond just thickness. For insights on selecting the right carpet, check out guides to perfect carpet choices. Remember, small details like padding can make or break your investing in quality results.
To ensure your renovations are nothing short of professional, consider consulting with experienced specialists. For tailored advice or to discuss your project, visit our contact page. Have you ever fallen into this trap? Let me know in the comments.
Once you’ve successfully installed your new flooring, baseboards, or shower features, the next step is maintaining their pristine condition over time. Investing in the right tools and adopting effective maintenance routines can significantly extend the lifespan of your home upgrades. For flooring, I personally swear by a high-quality microfiber mop and a vacuum with adjustable suction, which allow me to remove dust and debris without risking scratches or damage. Using a vacuum specifically designed for delicate surfaces ensures that grit doesn’t cause premature wear, a tip I learned from industry expert Tile Craftsmens.
Keep Your Showers Sparkling with Advanced Sealants
Modern shower maintenance often involves more than just regular cleaning. Applying an impregnating sealer, like those recommended by bathroom renovation specialists, blocks water penetration and discourages mold growth. I recommend using a penetrating sealer every 1-2 years—it’s a simple step that makes a substantial difference in preventing stains and damage. Additionally, tools like a grout pen can help touch up and preserve the appearance of tile lines, saving you the cost of re-grouting down the line. Stay proactive by scheduling these maintenance tasks, especially after deep cleaning, to keep moisture and grime at bay.
Long-Term Results Demand Regular Inspection and Tool Upgrades
Monitoring your installations ensures early detection of issues like loose baseboards or grout cracks. I often perform quarterly inspections, armed with a small pry bar for baseboards and a level for checking the flatness of floors—simple yet effective tools that help catch problems early. Upgrading your tools periodically, such as investing in a better seam roller or a professional-grade vacuum, can streamline maintenance and improve results. As home improvement trends lean toward smarter automation, consider integrating smart sensors in showers or floors that alert you to moisture or temperature fluctuations—an exciting direction for future-proofing your space.
How do I maintain the appearance and function of my floors and showers over time?
The key is consistency. Regular cleaning with appropriate products tailored to your flooring or shower materials preserves their integrity. For example, avoiding harsh chemicals and opting for pH-balanced cleaners prevents surface degradation. Sealants and protective coatings should be reapplied as recommended by manufacturers, usually annually or biennially. Moreover, addressing minor damages early—like filling small grout chips or re-securing loose baseboards—prevents costly repairs later. Adopting an organized maintenance schedule makes this process manageable and ensures your home looks polished for years to come. When in doubt, consulting with professionals who specialize in flooring or shower upgrades can offer personalized advice; feel free to reach out to us for tailored guidance.
The Hardest Lesson I Learned About Baseboards, Showers, Flooring Installation, and Carpet Install
One significant insight I gained was that patience and thorough preparation trump speed and shortcuts. Rushing through measuring or skipping moisture tests, for example, often resulted in misaligned edges or warped surfaces—costly mistakes that could have been avoided with attention to detail. Embracing the learning curve meant dedicating extra time to understanding materials’ behaviors and practicing proper techniques, which ultimately led to more satisfying results.
3 Myths About Floor Renovations That Held Me Back
- Myth: Using the cheapest tools will save money.
Reality: Investing in quality tools like a sharp seam roller or professional-grade adhesives makes a huge difference—saving frustration and ensuring longevity. - Myth: Proper installation isn’t vital if the surface looks good.
Reality: Flawless appearance often hides underlying issues; careful attention to subfloor preparation and sealing protects your investment. - Myth: Once installed, flooring and baseboards don’t need maintenance.
Reality: Regular inspections and timely repairs can dramatically extend their lifespan and keep everything looking sharp.
What Experts Won’t Tell You About Achieving Perfect Results
One secret is understanding the importance of acclimating materials to your home’s environment before installation—something I overlooked initially. Allowing hardwood or vinyl to adjust reduces expansion and contraction issues down the line. Also, selecting the right sealants and seam treatments tailored to the specific material can prevent future problems like cracking or lifting. For detailed strategies, exploring professional resources like expert flooring tips provides invaluable guidance.
Focused Recommendations for Long-Lasting Home Upgrades
- The Right Tools: A high-quality seam roller, a straightedge, and a moisture meter have become my go-to essentials—trust me, they make installations smoother and more reliable.
- Educational Guides: Books like “The Ultimate Guide to Flooring and Baseboards” by seasoned renovators deepen your understanding and inspire confidence. I personally find their detailed step-by-step approaches invaluable.
- Reliable Suppliers: Working with reputable vendors ensures quality materials and support. Their products tend to have better warranties and specifications, giving peace of mind during and after installation.
- Online Communities: Forums and social media groups dedicated to DIY home renovation are treasure troves for troubleshooting and inspiration. Sharing experiences and tips makes the process less daunting.
Your Next Step in Elevating Home Comfort
Embarking on your flooring or shower upgrade is more than just a task—it’s an opportunity to create a space that truly reflects your style and needs. Remember, attention to detail and a willingness to learn set the foundation for success. Ready to transform your home with confidence? Visit our contact page for expert advice tailored to your project. Have you ever faced a DIY setback that turned into a valuable lesson? Share your story below, and let’s learn together!