Ever had that sinking feeling after finishing a flooring project, only to notice uneven edges, gaps, or loose tiles? I remember the first time I tried to lay down my own hardwood. I was eager, confident even, but by the end of the day, I was frustrated. The gaps, the uneven lines — it felt like a disaster. That lightbulb moment taught me the hard way how crucial expert tips are for lasting results. And trust me, it’s not just about zooming through the job. It’s about doing it right, the first time, so your floors stay stunning for years to come.
Why Proper Flooring Installation Matters for Your Home’s Future
Choosing the right flooring is just half the battle. The real magic happens during the installation. Poor techniques can turn a beautiful upgrade into a nightmare that requires costly repairs or replacement down the line. From hardwood to tile, every type of flooring demands specific skills and knowledge. When I started paying attention to expert advice, I realized how small details—like proper subfloor prep or correct adhesive use—make a huge difference. According to the National Wood Flooring Association, improper installation can reduce a floor’s lifespan by up to 50%. That’s a staggering number, and it underscores why investing in proper techniques is essential.
Have You Faced This Problem?
If you’ve ever felt unsure about how to start or worried your DIY efforts won’t last, you’re not alone. I’ve been there. But here’s the good news: with a few expert tips, you can avoid common pitfalls and achieve results that stand the test of time. Today, I’ll share those tips—things I wish I knew when I first started—so you can avoid my mistakes and enjoy a flawless finish that truly lasts.
What’s Coming Up Next?
In the sections ahead, we’ll dive into practical steps that cover everything from surface prep to finishing touches. Whether you’re tackling hardwood, tile, or carpet, these insights will help you get it right the first time. Ready to transform your space and make your flooring last? Let’s get started with the essentials that will set you up for success.
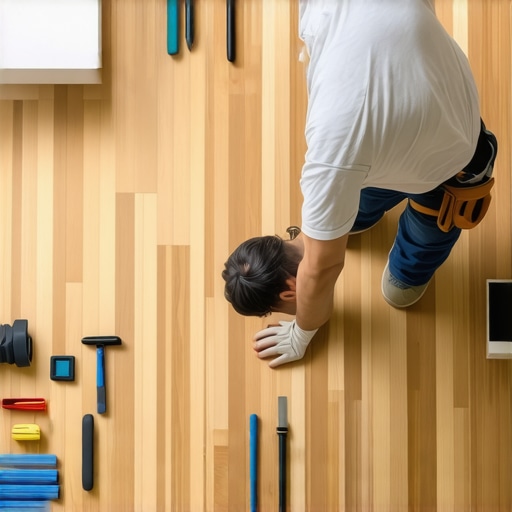
Prepare Your Surface with Precision
Start by clearing the area and inspecting the subfloor. Remove any debris, nails, or uneven spots. Use a level to check for dips or humps; these must be fixed to prevent future problems. For example, I once ignored a small dip in my subfloor, which caused my hardwood to squeak and develop gaps over time. Fix these imperfections by sanding high spots and filling low areas with a suitable leveling compound. Proper surface prep is the foundation for durable flooring, ensuring that your investment lasts for years.
Measure and Plan Thoroughly
Accurate measurements prevent waste and ensure a professional fit. Measure the room’s length and width, then add 10% for waste and cuts. Sketch your layout to minimize awkward cuts and seams. When I installed my tile, I laid out tiles without adhesive first to visualize the pattern, which saved me from costly mistakes. Planning ahead helps you work efficiently and achieve a seamless finish that looks professional.
Choose the Right Materials and Tools
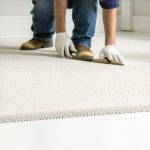
Select flooring suited to your lifestyle and space. Hardwood, tile, carpet—each has specific installation needs. Gather all necessary tools like saws, spacers, trowels, and spacers. I once tried a DIY carpet without renting a proper knee kicker, which left the edges loose. Investing in quality tools makes the installation smoother and improves the final look. For expert tips on choosing the right carpet, visit this guide.
Follow Step-by-Step Installation Procedures
Hardwood flooring often requires acclimation—leave the planks in the room for 48 hours to adjust to humidity. When installing, leave a 1/4-inch gap around the perimeter for expansion. Use spacers to maintain this gap during installation. I once forgot this step, and my hardwood buckled as humidity changed. Use a tapping block to snug planks together without damaging edges. For detailed hardwood installation tips, check this resource.
Secure the Flooring Properly
Adhesives, nails, or staples depend on your flooring type. For hardwood, use a nailer and ensure nails are countersunk. For tiles, apply the adhesive evenly with a notched trowel, working in small sections. When I laid my tiles, I spread adhesive with a margin trowel, then pressed tiles firmly into place. Use a rubber mallet to tap tiles for a level surface. Proper securing prevents shifts or gaps, extending the life of your floor.
Finish with Finishing Touches
Install baseboards and trim to cover expansion gaps, but don’t nail them too tight—leave room for expansion. When installing baseboards, I like to paint or stain them beforehand, which saves time and ensures a clean look. Seal your flooring as needed—apply a finish or sealant to protect against wear and moisture. For trendy and durable baseboard styles, visit this page. Lastly, clean the entire area thoroughly to remove dust and debris, revealing your beautiful, expertly installed floor.
Many homeowners and even some DIY enthusiasts believe that flooring installation is a straightforward task, but this perception overlooks several nuanced details that can make or break your project’s durability and aesthetic appeal. Let’s dig deeper into what most people get wrong and how understanding these subtleties can save you from costly mistakes.
Why Cutting Corners Can Lead to Long-Term Problems
One of the most pervasive myths is that surface-level preparations or rushing through the process won’t impact the final outcome. For example, skipping proper subfloor leveling can cause uneven wear, squeaks, or gaps over time. It’s tempting to focus solely on laying down the material, but expert installers know that a flawless finish begins with meticulous surface prep. According to a study from the National Wood Flooring Association, improper subfloor preparation accounts for up to 70% of flooring failures, emphasizing the importance of this often-overlooked step.
The Trap of Overconfidence in DIY Carpet and Baseboards
Many homeowners assume that installing baseboards or carpet is a simple matter of cutting and nailing. However, this can lead to issues like uneven seams, gaps, or loose edges that detract from the overall look and longevity. For instance, using subpar tools or neglecting expansion gaps for flooring can cause warping and cracking. I’ve seen DIY projects where poorly installed baseboards cracked or curled within months. To avoid this, consider consulting detailed guides or professional tips—like those found here—which reveal the importance of precise measurements and proper fastening techniques.
Advanced Insight: How Moisture and Climate Fluctuations Impact Installation
For seasoned DIYers or pros, one of the most overlooked aspects is moisture control, especially for hardwood and tile. Fluctuations in humidity can cause materials to expand or contract, leading to gaps, buckling, or cracking. For example, hardwood needs acclimation—an often neglected step that involves letting the material adjust to room conditions for at least 48 hours. Ignoring this step can compromise the floor’s stability years down the line. Experts recommend using moisture barriers and proper climate control systems during installation. According to industry standards, these precautions are essential for ensuring long-lasting results, particularly in variable climates.
Have you ever fallen into this trap? Let me know in the comments. Remember, paying attention to these hidden nuances and avoiding common myths can elevate your project from average to professional-quality, resulting in floors that truly stand the test of time.
Maintaining your flooring, showers, and baseboards is crucial for prolonging their beauty and functionality. One tool I rely on heavily is the cordless oscillating multi-tool. Its versatility allows me to trim, sand, and remove grout or old sealant in tight corners, saving me hours and ensuring precision. I personally prefer models like the Dremel Multi-Max because of their ergonomic design and variable speed settings, which give me control over delicate tasks without damaging surrounding materials.
For ongoing maintenance, a high-quality vacuum with a soft brush attachment is indispensable. It helps keep dirt and debris from settling into the grout lines or under baseboards, preventing long-term damage. Regular cleaning with a microfiber mop and gentle cleaning solutions preserves the finish and prevents moisture buildup, especially in showers and bathrooms. I often recommend the best practices outlined here for maintaining durability.
How do I maintain my floors and showers over time?
Consistent inspection is key. Check for signs of wear, water damage, or loose grout every few months. Address small issues immediately—replacing worn sealant or tightening loose baseboards can save you from costly repairs later. For showers, I suggest applying a high-quality waterproof sealant annually to prevent leaks and mold growth. Using a steam cleaner periodically can also remove deep-seated grime in tiles and grout, keeping your bathroom looking fresh and hygienic.
As technology advances, I predict smart maintenance tools will become more common. For example, moisture sensors integrated into flooring could alert homeowners to leaks before they cause significant damage. Additionally, automated cleaning devices like robotic vacuums and steam mops are evolving to handle more complex surfaces, reducing manual effort and extending the lifespan of your installation.
Don’t forget, well-maintained baseboards and trim also contribute to the overall look. A good refresh with paint or stain can make a big difference, and using the right tools for this, such as a finish sprayer or detail brushes, ensures a professional appearance. Regular upkeep not only preserves your investment but also keeps your home feeling new and inviting.
If you’re ready to take your maintenance routine to the next level, try using a high-quality, flexible sealant for your grout lines or baseboards. This small upgrade can significantly extend their lifespan and appearance. For expert advice on optimal maintenance strategies, don’t hesitate to reach out for professional tips tailored to your specific space.
The Hardest Lesson I Learned About flooring installation,carpet install,showers,baseboards
One of the most valuable lessons I discovered was never to underestimate the importance of meticulous surface preparation. Skipping even small steps like leveling the subfloor or removing debris can lead to squeaks, gaps, or buckling down the line. It’s a reminder that the foundation truly makes or breaks your project’s durability. I once rushed through leveling, only to regret it when my hardwood developed gaps after humidity changes. Taking the time to do it right initially saves headaches later.
3 Myths About flooring installation,carpet install,showers,baseboards That Held Me Back
Early on, I believed that installing baseboards or carpeting was straightforward—just cut and nail. Reality check: precise measurements, expansion gaps, and quality tools matter immensely. Overconfidence in DIY methods often led to issues like uneven seams or loose edges. Learning from experts and trusting the right resources, like this guide, helped me realize that patience and attention to detail are key for a professional finish.
What Experts Won’t Tell You About flooring installation,carpet install,showers,baseboards
Many overlook the impact of climate and moisture on their flooring’s longevity. For hardwood, letting the material acclimate for 48 hours and using moisture barriers are game-changers. Ignoring this can cause warping or gaps within a few years. I learned that investing in proper climate control during installation makes all the difference, as recommended by industry standards. This insight helped me avoid costly repairs and ensured my floors stayed beautiful despite weather fluctuations.
Curated Recommendations for Flooring Success
For tackling these challenges, I rely on tools like the Dremel Multi-Max cordless oscillating tool for precision trimming and grout removal—it’s versatile and saves time. My go-to resource for expert advice is this comprehensive guide which covers everything from surface prep to finishing touches. Additionally, updating baseboards with modern styles can elevate your space effortlessly. Lastly, a high-quality vacuum with a soft brush attachment ensures ongoing maintenance, preventing debris buildup that can damage your investment.
Embrace the Challenge and Transform Your Space
Taking on flooring installation, carpet, showers, or baseboards can seem daunting, but with the right mindset and expert tips, you’re capable of stunning results. Every mistake is a lesson in disguise, guiding you toward mastery. Your home’s transformation is within reach—trust the process, learn from seasoned pros, and don’t shy away from experimenting. Remember, the key is starting with a solid plan and paying attention to details that matter most. Are you ready to elevate your home with durable, beautiful flooring? Share your thoughts or questions below—I’d love to hear about your project journey!

One thought on “Expert Flooring Installation Tips for Lasting Home Results”
Emily Johnson
March 1, 2026 at 11:50 pmI really appreciate this thorough and practical guide on flooring installation. Having gone through a DIY hardwood project myself, I can totally relate to the importance of proper surface prep; I underestimated how much small imperfections could cause squeaks or gaps later on. The tip about acclimating the planks for 48 hours is something I missed initially, which led to buckling after a few months. Has anyone here tried using moisture barriers in high-humidity areas? I’ve read they can significantly extend a floor’s lifespan, especially in basements or coastal regions. It’s clear that taking the extra steps up front saves a lot of headaches later. Also, I love the idea of using tools like oscillating multi-tools for finishing touches—makes a huge difference. Does anyone have favorite brands or models they swear by? Would love to hear your recommendations for tools that make the process smoother and more precise.