I remember the moment clearly—the frustration of stepping onto a newly installed hardwood floor only to feel an uneven surface creak beneath my feet. It was my lightbulb moment: I realized that without expert tips and proper techniques, even the most beautiful flooring can fall short of its potential. If you’ve ever faced similar disappointment, you’re not alone. Many homeowners and DIY enthusiasts struggle to achieve flooring that looks pristine and lasts for years. Today, I want to share how I transformed my approach, and more importantly, how you can avoid common pitfalls and ensure your flooring installation stands the test of time.
Why Proper Flooring Installation Matters More Than You Think
Installing flooring isn’t just about laying down tiles or planks. It’s an investment in your home’s comfort, style, and value. A poorly executed job can lead to uneven surfaces, gaps, or worse—future costly repairs. According to industry experts, incorrect installation accounts for nearly 70% of flooring failures within the first five years (source: Tile Craftsmens). That statistic hit me hard. It defined my early mistakes and motivated me to dig deeper into the best practices.
One mistake I made early on was rushing the process. I thought that matching the pattern and fitting the pieces snugly was enough. But I ignored the importance of moisture barriers and subfloor preparation, which are critical to lasting results. These overlooked details turned minor issues into major headaches down the line.
Now, I always emphasize the importance of meticulous planning and expert advice. If you’re wondering whether tackling flooring yourself is worth the effort—or if calling in professionals makes more sense—think about your long-term happiness with your home. Would you rather fix problems later or invest upfront to get it right the first time? For insights on selecting durable flooring, visit this detailed guide.
So, what’s next? Let’s dive into the crucial steps that will help you master the art of flooring installation and enjoy its beautiful, lasting results.
Prepare Your Subfloor with Precision
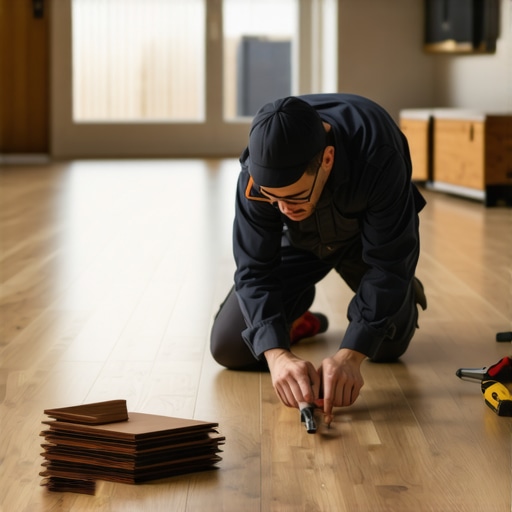
Before laying down your new flooring, ensure the subfloor is clean, dry, and level. I once ignored this step and ended up with a warped floor that creaked with every step. I recommend using a leveling compound and a long straightedge to identify and fix dips or humps. Think of your subfloor as the foundation of a house—if it’s unstable, everything else will suffer. Always check moisture levels with a hygrometer; excessive moisture can cause future buckling or mold issues. Correcting these issues upfront saves time and money later.
Measure and Acclimate Materials Carefully
Accurate measurements are the backbone of a seamless installation. I once bought more flooring material than needed because I didn’t measure room dimensions properly. Use a tape measure to determine the total area, accounting for doorways and irregular angles. Acclimate your flooring materials in the room for at least 48 hours—this prevents expansion or contraction after installation. This step is crucial for materials like hardwood or laminate that are sensitive to temperature and humidity changes.
Plan Your Pattern and Layout
Deciding on the layout before starting saves time and prevents awkward cuts. For example, I laid out planks in a random pattern to create a natural look, but I kept testing the fit on scrap pieces to avoid awkward end joints. Use chalk lines or spacers to keep consistent gaps for expansion—about 1/4 inch for hardwood. Think of laying flooring like solving a puzzle: plan the edges and main run first, then work towards the center, adjusting as needed for balance and aesthetics. Refer to this guide for detailed layout strategies.
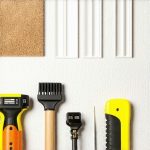
Execute with Proper Tools and Techniques
Invest in quality tools like a tapping block, pull bar, and spacers. I once tried to cut planks with a dull utility knife—an experience that resulted in uneven edges and frustration. Use a handsaw or power saw for clean cuts, and always cut away from your body for safety. When installing, lay the planks from left to right, tapping each into place with a rubber mallet to ensure tight joints—this mimics the method professionals use to create a snug fit. Remember, patience is key; rushing can lead to gaps or misaligned rows.
Seal and Finish Edges for Lasting Beauty
Once the floor is installed, sealing the edges prevents moisture seepage and damage. I added a bead of sealant along the perimeter to protect against spills and humidity. For baseboards, I recommend using modern styles that complement your flooring. Install baseboards after flooring to cover expansion gaps, ensuring a clean, professional look. Use a nail gun or finishing nails, and caulk any gaps for a seamless appearance. For showers and bathroom areas, high-quality sealant and careful tile work create a luxurious, spa-like finish—see this guide for details.
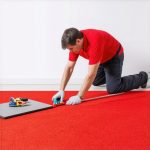
< >Many assume that installing a carpet, flooring, or finishing touches like shower tiles and baseboards is straightforward, but in reality, there are subtle pitfalls that even seasoned DIYers often overlook. One common myth is that a flawless surface depends solely on the choice of materials. In truth, expert craftsmanship, precise measurements, and understanding the intricacies of each component make all the difference. For example, a frequent mistake with carpet installation is neglecting proper pad cushioning, which can lead to premature wear and unevenness over time. According to industry studies, overlooked cushioning details can reduce carpet lifespan by up to 30% (source: Expert Carpets & Baseboards).Maintaining your flooring, showers, and baseboards over time requires the right tools and consistent attention. I swear by using a high-quality oscillating multi-tool—it’s my go-to for precise grout removal and touch-up work because of its versatility and control, especially when dealing with intricate baseboard joints or shower tile edges. For measuring and alignment, a laser level isn’t just a luxury—it’s essential. It ensures your baseboards and flooring lines stay perfectly straight, saving hours of painstaking manual leveling. I personally rely on the Bosch GLL 3-80 Laser Level for its durability and pinpoint accuracy, which helps me keep everything aligned during large projects.
The Hardest Lesson I Learned About Flooring and Baseboards
One of my most valuable insights was realizing that not all installation mistakes are obvious at first glance. Small oversights, like neglecting expansion gaps, can lead to major issues down the line. Learning to anticipate problems before they happen has saved me countless hours and money, and I want to pass that wisdom on to you.
What Industry Secrets Can Elevate Your Home’s Look
I discovered that even choosing high-quality materials isn’t enough; the way you handle them is crucial. For instance, proper acclimation of flooring and precise measurements can make the difference between a professional finish and a DIY disaster. These details, often overlooked, are what truly set a perfect project apart.
How I Transformed My Approach to Baseboard Installations
Initially, I underestimated the importance of clean cuts and seamless transitions. Now, I always use a laser level and high-quality tools to ensure baseboards align perfectly, creating a polished look. This attention to detail has dramatically improved my results and boosted my confidence in tackling complex projects.
Curated Tools and Resources to Elevate Your Skills
My go-to tool for precise measurements is the laser level from Bosch. For surface prep, I rely on a good drill with a dust extraction attachment, which keeps my workspace clean and makes the job smoother. Reading the guide on durable flooring installation has broadened my understanding of how different materials behave, helping me plan better for future projects. Finally, investing in high-quality tools like a taping block and a quality saw has been game-changing—these might seem like small upgrades but pay huge dividends in finish quality.
Your Next Step Starts Now
With these lessons and tools, you’re well on your way to creating a beautifully installed floor and flawless baseboards that elevate your home’s style. Remember, every project is an opportunity to learn and improve. Don’t wait for perfection—start today and enjoy the transformation process. If you’re ready to take the next step, reach out through this contact page—I’m here to help make your renovation dreams a reality!
One thought on “Expert Flooring Installation Tips for Lasting Results in 09:15”
Rachel Morgan
January 29, 2026 at 1:40 pmThis post really resonated with me because I remember my initial flooring project where I overlooked the importance of moisture testing and subfloor prep. The uneven surface that resulted was a quick lesson in patience and proper planning! I appreciate the detailed steps like acclimating materials and using quality tools; they truly make a difference. One thing I’ve found helpful is investing in a good laser level and a rubber mallet, especially when aligning planks. It makes the process much smoother and gives a professional finish. I’m curious, has anyone else discovered particular tools that significantly improved their installation experience? Also, I’d love to hear tips on how to efficiently handle those tricky corners and doorways without sacrificing precision.