It was around 7 a.m. on a Saturday when I stood in my bathroom, coffee in hand, realizing that the new shower tile I meticulously picked out looked dull next to the cracked, outdated baseboards. That moment, I felt a sudden mix of frustration and a spark of inspiration. Why had I overlooked these small details? Turns out, those overlooked accents—like baseboards and shower fixtures—can *make or break* the entire vibe of a bathroom.
Why Small Details Can Make a Big Impact in Your Bathroom
In my experience, upgrading your bathroom’s look isn’t just about choosing the right tiles or fixtures. It’s about weaving a cohesive design that shows you care. Sometimes, the tiniest change—adding sleek new baseboards or modern shower accents—can transform the space from drab to fab overnight.
Is Investing in Style Worth It When the Budget Is Tight?
Early in my renovations, I made a costly mistake: I splurged on high-end tiles but skimped on the finishing touches, like baseboards and trim. Later, I realized that those details either elevated the look or left everything feeling incomplete. Trust me, ignoring small accents might save money upfront, but the long-term impact makes the investment in top-notch design ideas totally worth it. To see how simple updates can make a difference, check out the comprehensive baseboards makeover guide.
Thinking about your own bathroom upgrade? Have you ever faced the dilemma of balancing style, function, and budget? If yes, you’re not alone. Many homeowners struggle with identifying which details will deliver the most wow factor without emptying their wallets.
Prep Your Space Methodically
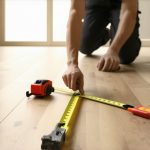
Begin by clearing the area and protecting surrounding surfaces with painter’s tape and drop cloths. Measure precisely, using a tape measure or laser level, to mark where each element will go. For instance, when installing new baseboards, measure doorways and wall lengths to cut pieces accurately. I once underestimated the length of a baseboard segment and had to redo the cut, wasting time; a quick double-check prevented that.
Install the Flooring with Precision
Choose the right subfloor preparation—clean, level, and dry. Lay out your flooring material in the room first, arranging the planks or tiles to optimize visual flow. When laying a hardwood floor, stagger seams in a brick-like pattern for strength and visual appeal, akin to laying bricks, which I learned the hard way when a long unbroken seam caused an uneven surface. Use spacers to maintain expansion gaps along walls, ensuring long-term durability.
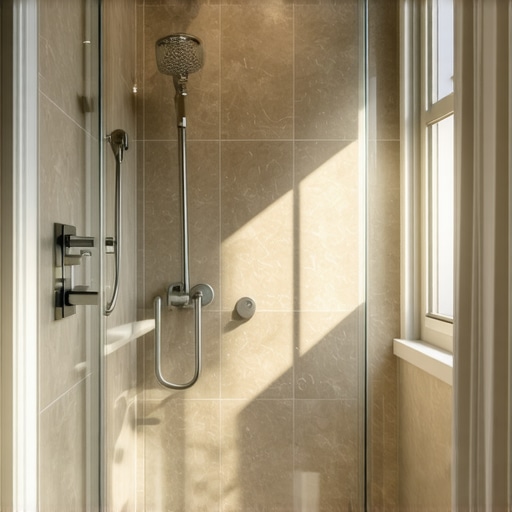
Lay Shower Tiles Flawlessly
Start tiling from the center of the shower wall to ensure an even pattern. Use a level to keep each row straight—think of it as building a brick wall, where each new course depends on the previous ones being perfectly level. Apply a thin layer of mortar with a notched trowel, working in small sections. Frequently check your work with a grout float and sponge, as uneven tiles result in a jarring look, which I discovered after rushing past this step.
Install Baseboards for a Clean Finish
Cut baseboard pieces at 45-degree angles for corners, fitting them snugly against each other. Use a nail gun or hammer and finishing nails for secure attachment, hitting the wall studs for stability. During my own project, I clumsily missed a stud and the baseboard sagged; drilling first to locate studs saved major headaches. Finish with caulk along edges for a seamless look, then paint or stain as desired. For trending styles, check out baseboard trends in 2025.
Seal the Final Details
Apply caulk around edges, fixtures, and seams for a professional touch. Use painter’s tape to keep lines sharp. Once finished, step back and inspect for gaps or uneven surfaces. Taking your time here ensures longevity and style—rushing this step leads to chips and mold issues down the line. Remember, patience at each step, from measuring to sealing, results in a sleek, durable upgrade that elevates your entire bathroom ambiance. For more on the latest trends and techniques, visit professional flooring and finishing tips.Many homeowners believe that installing flooring, showers, or baseboards is a straightforward task that can be tackled with basic tools and tips. However, in my experience as a seasoned renovation expert, there are nuanced pitfalls that often go unnoticed, leading to costly mistakes or subpar results. One widespread myth is that perfect alignment and sealing occur naturally if you just follow the standard steps. In reality, small irregularities in measurements or surface prep can cause long-term issues, such as loose tiles or uneven baseboards, which are difficult to fix later.
A common trap I see is oversimplifying the importance of proper subfloor preparation. It’s tempting to think that as long as the surface looks level, it’s good to go. But even minor height discrepancies can cause tiles to crack or laminate flooring to buckle over time. Experts emphasize that diligent surface leveling — using a laser level or self-leveling compound — is crucial for durability. According to industry analyses, overlooking this step can reduce the lifespan of your installation by up to 30%. You can find detailed strategies on ensuring long-lasting results in our guide on flooring installation.
When it comes to showers, many assume that waterproofing is only about applying a membrane beneath tiles. However, the nuances of sealing and slope are often neglected. An improper slope can lead to standing water, promoting mold and damage. Additionally, many DIYers skip the critical step of thoroughly sealing grout lines, which can result in water leaks behind the tiles, causing structural issues. I recommend consulting professional renovation checklists, such as the ones found at shower renovation tips, to avoid these pitfalls.
Baseboards may seem simple to install, but they involve precise measurements and corner cuts to achieve a seamless look. A frequent mistake is cutting corners on corner joints or using inferior adhesives, which leads to gaps or sagging over time. Advanced installers often use miter joints and secure the boards directly into wall studs for added stability. To elevate your finishing skills, explore trends and expert advice at baseboard trends.
Finally, when installing carpets, many underestimate the importance of proper padding and stretching techniques. Failing to stretch the carpet correctly can cause wrinkles or edges to lift, which diminishes both appearance and safety. The key nuance is using a power stretcher—simply tacking down the edges isn’t enough. Expert installation techniques, similar to those detailed on carpet installation guides, ensure longevity and a sleek finish.
To summarize, the hidden nuances often involve meticulous surface prep, precise measurements, and understanding material behaviors over time. Skipping these steps might save time initially but can turn your renovation into a long-term headache. Remember, consulting professional resources and expert advice can make all the difference. Have you ever fallen into this trap? Let me know in the comments, and if you need tailored guidance, don’t hesitate to reach out.
Stay Ahead with the Right Equipment for Longevity
Investing in quality tools is the cornerstone of maintaining durable flooring, showers, baseboards, and carpet installations. Personally, I rely on a professional-grade cordless oscillating multi-tool for precise cuts and detail work. Its versatility allows me to trim baseboards at perfect angles, sand small surface imperfections, or even remove old grout from tiled showers without damaging surrounding surfaces. This single gadget reduces tool clutter and speeds up projects, ultimately extending the lifespan of my installations.
Prioritize Regular Inspection and Preventive Maintenance
Setting a schedule to inspect your flooring and fixtures can prevent minor issues from morphing into costly repairs. For instance, I check grout lines quarterly, applying sealant where needed to prevent water penetration. Likewise, looking for signs of wear on baseboards or carpet edges helps address issues early. Using a moisture meter can also be valuable in detecting unseen water damage behind tiles or under flooring, especially in bathrooms—a step I highly recommend based on my experience with long-lasting results.
Tools I Recommend for Long-Term Results
Reliable siliconized caulk guns, such as the FG502 DAP Gun, make it easier to apply sealing compounds cleanly and evenly, which is critical for waterproofing showers and sealing baseboard edges. For flooring maintenance, a diamond-tipped drill bit is invaluable when re-anchoring loose tiles or replacing damaged sections without dismantling entire areas. Additionally, a high-quality vacuum with a HEPA filter ensures your space stays dust-free during routine cleaning, preventing debris from settling into grout or carpet fibers.
Where Do Trends Head Next?
Emerging smart-home sensors that monitor humidity, temperature, and structural integrity will soon offer real-time alerts for issues like moisture buildup or rising floors. Integrating these with your existing maintenance routine could revolutionize the way homeowners keep their investments in top shape.
How do I maintain my flooring, shower, or carpets over time without turning into a full-time renovation expert?
Simple periodic checks and using the right tools can dramatically extend the life of your installations. For example, regularly reapplying grout sealant with a quality caulk gun prevents leaks, while vacuuming carpets with high-end equipment keeps fibers healthy longer. Practicing proactive maintenance—like inspecting for loose baseboards or tile cracks—stops small problems from escalating. If you’re interested in elevating your DIY game, consider trying a diamond-tipped drill bit for minor repairs or expert flooring tips for lasting results. Remember, staying ahead with these straightforward practices saves time and money in the long run.
What I Wish I Had Known Before Starting
One of the toughest lessons I learned was recognizing how crucial surface prep is; rushing through it led to uneven tiles and future cracks. Taking the extra time to level my subfloor paid off in durability and visual consistency. I also underestimated the importance of precise measurements—cutting a few millimeters off in the wrong spot turned into hours of rework. Now, I double-check every measurement with a laser level, saving myself headaches later.
Another lightbulb moment involved the sealing process. Applying grout without sealing initially resulted in water leaks and mold. I now see that sealing grout and edges with high-quality caulk is not optional but essential for a long-lasting finish. Finally, I underestimated how small details like corner cuts on baseboards can elevate the entire look; miter joints and proper attachment make a noticeable difference.
My Go-To Resources for Bathroom Makeovers
For top-tier tools, I rely on the professional-grade laser level. It ensures every tile is perfectly straight. The comprehensive flooring guide has been invaluable for understanding long-term durability strategies. When I want inspiration, the latest trendy baseboard styles help me stay ahead of design curves. Lastly, the shower renovation tips provided expert insights I couldn’t find elsewhere, ensuring my shower stood the test of time and style.
Moving Forward With Confidence
Embarking on a bathroom upgrade can feel daunting, but by focusing on detailed planning, quality tools, and continuous learning, you set yourself up for success. Remember, each project is a chance to refine your skills and deepen your understanding of what makes a space truly exceptional. Don’t be afraid to experiment with trends or try new techniques—your home, after all, is a reflection of your personal journey. If you’re ready to take the next step, I encourage you to reach out for expert guidance through our contact page. What’s the one detail in your bathroom renovation you’re most excited to improve? Share your story below!
![Stop Squeaky Floors: 5 Flooring Fixes for 2026 [Checklist]](https://tilecraftsmens.com/wp-content/uploads/2026/01/Stop-Squeaky-Floors-5-Flooring-Fixes-for-2026-Checklist-150x150.jpeg)
3 thoughts on “Baseboards & Showers: Top Design Ideas to Elevate Your Bathroom”
Emily Johnson
February 9, 2026 at 10:00 amI really relate to the idea that small details like baseboards and grout sealing can drastically change the overall look of a bathroom. I once overlooked sealing my grout properly, and within a year, I had water damage and mold issues—definitely a learning moment! Since then, I always make sure to double-check these finishing touches. I find that using quality tools like a high-grade caulk gun and a moisture meter has made maintenance much easier and effective in prolonging the life of renovations. Have others found particular tools or techniques that help them catch those small but impactful details early on? It’s crazy how such minor steps can prevent major headaches down the line.
Jessica Miller
March 2, 2026 at 5:10 amReading this post really hit home for me. I’ve learned firsthand how small details like well-installed baseboards and precision sealing can elevate a bathroom’s look and durability. When I renovated my bathroom last year, I initially focused on the big stuff—new tiles and fixtures—but overlooked the finishing touches. Almost immediately, I noticed gaps and uneven edges that not only looked bad but also caused water to seep behind the fixtures, leading to mold. Since then, I’ve adopted a more meticulous approach, investing in quality tools like a miter saw for perfect angles and a high-quality caulk gun for clean application. It’s fascinating how these small tweaks can make such a difference long-term. I also wonder, for those who have done extensive bathroom updates, what are your favorite tools or techniques to ensure those details don’t get overlooked again? Also, have you found certain brands or products that really stand out for DIY bathroom finishing? I would love to hear your tips on maintaining this level of quality with regular upkeep, especially in high-use areas like showers and baseboards.
Michael Carter
March 10, 2026 at 10:10 amThis post really resonates with me, especially the focus on small details that often get overlooked in bathroom remodels. I’ve found that investing in quality tools, like a good miter saw and a reliable caulk gun, truly makes a difference in achieving those clean, precise finishes that elevate the entire space. One thing I personally swear by is using painter’s tape to create sharp lines when sealing edges or painting trim. This simple trick minimizes mess and ensures a crisp, professional look. From your experience, which tools or techniques have you found most helpful for ensuring those small details come out perfect the first time? Have you tried any particular brands of caulk or sealants that hold up well over time? I’d love to hear your favorites or any tips on maintaining that flawless finish after the renovation is complete.