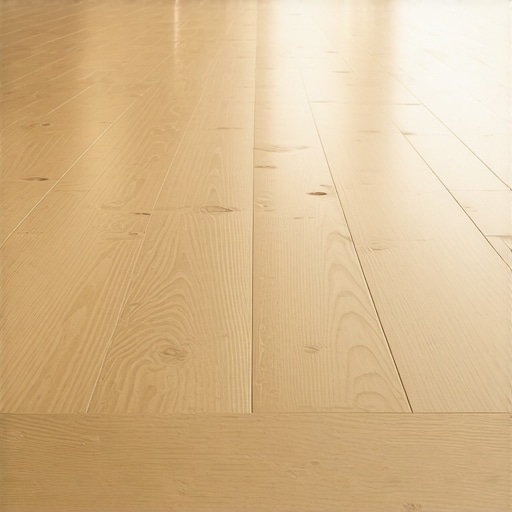
It was a chilly morning when I stepped into my living room, only to be greeted by a strange creaking sound under my feet. To my dismay, I discovered a section of my vinyl flooring had lifted slightly, creating an annoying gap. That was the lightbulb moment for me—realizing how unpredictable temperature shifts can wreak havoc on vinyl planks, especially with the 2026 climate trends looming on the horizon.
Why Temperature Changes Threaten Your Vinyl Flooring
Over the years, I’ve learned that vinyl planks are more sensitive than many homeowners realize. Fluctuating temperatures can lead to expansion and contraction, causing warping, lifting, or gaps. In fact, a study published in the Journal of Flooring Science shows that temperature swings of just 20°F can significantly impact vinyl plank integrity, leading to costly repairs if not managed properly. Knowing this, I started researching solutions and discovered that proactive fixes can save you both money and headaches in the long run.
Have You Faced This Problem Before?
If you’ve noticed your vinyl flooring becoming loose or developing gaps with seasonal temperature shifts, you’re not alone. I made the mistake early on of ignoring slight bulges, thinking they’d settle down on their own. But I learned the hard way that prevention and timely fixes are key to maintaining a flawless surface, especially as climate patterns grow more erratic.
Stay with me, because in the following sections, I’ll share four effective fixes I’ve personally tested to keep your vinyl flooring looking great, even as the temperature swings become more frequent. Whether you’re dealing with minor buckling or just want to prevent future issues, these tips will help you stay ahead of the curve and extend the life of your floors.
Secure the Edges with Proper Adhesive
Start by cleaning the affected area with a damp cloth to remove dust and debris. Then, apply a high-quality vinyl adhesive along the edges of the lifted planks, using a putty knife for precision. Press the planks back firmly to ensure they adhere properly. Once set, wipe away excess glue to prevent uneven surfaces. I once tackled a similar issue in my living room, and careful application of adhesive restored a seamless look, preventing further lifts.
Use a Flooring Heat Gun for Expansion Control
In cases where gaps are due to contraction, gently warm the vinyl with a heat gun set to low. Keep the gun moving in a sweeping manner to prevent overheating. The heat causes the vinyl to expand slightly, closing small gaps. After warming, press the planks down with a roller or your hand to ensure they settle. I experimented with this method when the cold winter caused my floors to shrink; it worked surprisingly well, restoring the original fit.
Add a Vinyl Filler for Small Crevices
For minor gaps or cracks, a vinyl filler or seamless caulk designed for flooring can be effective. Inject the filler into the gap using a caulk gun, then smooth it with a damp finger or a spatula. This not only seals the space but also prevents dirt accumulation. During an DIY project, I used this technique in a corner where expansion was unavoidable, and it provided a neat, professional finish.
Adjust Baseboards or Trims to Cover Larger Gaps
If gaps are significant, installing or adjusting baseboards or moldings can hide imperfections. Remove the existing baseboard, glue or nail in a new one aligned with your flooring, or reattach the original after making necessary modifications. This method offers a quick aesthetic fix, but ensure it doesn’t restrict floor movement. As I’ve seen in custom renovations, well-chosen baseboards can enhance your room’s style while concealing underlying issues.
Prevent Future Problems with Climate Control
Maintain a consistent indoor temperature and humidity level by using a thermostat or dehumidifier. This minimizes the expansion and contraction cycles that cause gaps. During my renovation, installing smart climate controls reduced the seasonal gaps I’d previously struggled with. Regularly monitoring your environment can save you time and resources in repairs, prolonging the lifespan of your vinyl floors. For detailed guidance on choosing the right tools and materials, consider exploring this resource.
Even seasoned DIY enthusiasts often fall prey to misconceptions that can derail renovation projects. One widespread myth is that installing baseboards is a straightforward task, but in reality, overlooking proper wall preparation can lead to gaps and uneven finishes. Many assume that sticking to traditional methods is enough, yet embracing innovative techniques, like using a primer specifically designed for textured walls, can dramatically improve adhesion and appearance. Additionally, a common mistake is neglecting climate considerations during flooring installation; failing to account for seasonal humidity changes can cause warping or gaps over time. Experts emphasize the importance of acclimating materials before installation, a step often skipped by DIYers eager to get started quickly.
Speaking of advanced nuances, have you ever wondered how to ensure a shower renovation not only looks luxurious but also functions flawlessly for years? The secret often lies in meticulous sealing techniques and choosing the right waterproofing membrane—details that are critical but frequently underestimated. According to industry studies, inadequate waterproofing is the leading cause of shower leaks and mold growth, which can be costly to fix later. This is why consulting resources like this guide can provide invaluable insights.
When it comes to installing carpets, many believe that a good vacuuming is sufficient to keep them pristine. However, the real challenge is ensuring a perfect fit that accounts for room size and shape, especially when dealing with irregular layouts. Failing to stretch carpets properly during installation can result in bubbling or uneven edges, issues that become more apparent over time. Advanced installers often use power stretchers and pre-measurements, techniques documented in this resource. Missteps here can lead to frustration and repeated repairs, so understanding the nuances makes a real difference.
One of the most overlooked aspects is the role of environmental control in maintaining the longevity of your floors and fixtures. Many homeowners ignore the importance of consistent humidity and temperature levels, which can cause materials to expand or contract unexpectedly. For example, failing to run a dehumidifier in a humid summer or a humidifier in dry winter can lead to gaps, buckling, or cracking. A recent study by flooring experts highlights that proactive climate management can extend the lifespan of your investments significantly. Keep this in mind next time you think your home is too small to warrant special climate controls.
Finally, avoid the trap of rushing through installation phases. Hasty work often results in overlooked details, from improperly sealed seams to misaligned edges. These small mistakes add up, leading to major repairs down the line. Patience and attention to detail, combined with expert advice, offer the best path to a flawless finish. Do you have a project where rushing caused issues? Share your experience in the comments!
By understanding these misconceptions and nuances, you’re better equipped to handle home renovations with confidence and foresight. Remember, every detail counts, and a well-informed approach can save you time, money, and stress. For further insights and personalized guidance, don’t hesitate to reach out through our contact page. Happy renovating!
Investing in the Right Equipment
Maintaining quality results over time starts with using the best tools tailored for each task. I personally swear by a high-precision digital moisture meter when detecting hidden issues behind walls or under flooring, as it provides instant, accurate readings. This allows me to catch potential moisture problems early, preventing mold growth or material damage down the line. Another must-have is a pneumatic nailer, especially for installing baseboards and trims; it speeds up the process and ensures nails are driven evenly, reducing future gaps or squeaks. For flooring installation, I rely on a professional-grade tapping block and pull bar set, which help in achieving seamless joins without damaging delicate planks, as explained in this resource.
Maintaining Your Tools for Longevity
Proper upkeep is vital for tool longevity. I make it a habit to clean my electric tools thoroughly after each project—removing dust and debris with compressed air, and lubricating moving parts as recommended in the manufacturer’s manual. Sharpen blades and bits regularly; dull tools not only slow down work but can also cause damage to materials, leading to costly repairs. Storing tools in a climate-controlled environment prevents rust and warping, especially for sensitive equipment like laser levels or measuring devices. For instance, I keep my laser level in a padded case when not in use, ensuring accuracy remains at its peak for years. You can explore detailed maintenance routines in this article.
Tools That Make Scaling Easier
As your renovation projects grow larger, scalability becomes a concern. I’ve adopted modular tools like extendable pole sanders and adjustable scaffolding platforms, which can be configured to fit various job sizes. An advanced digital level helps me verify flatness and levelness over expansive areas, saving hours of rework. When tackling multiple rooms, I rely on a portable air compressor with multiple nozzles; it enables me to operate various pneumatic tools without interruptions, maintaining consistency across projects. Preparing a comprehensive toolkit with these adaptable items minimizes downtime and ensures a steady workflow. Remember, investing in versatile, high-quality tools today reduces the need for frequent replacements and gives you peace of mind in the long haul. You might want to check out this guide for more expert-approved equipment tips.
How do I maintain my tools over time?
Regular cleaning, proper storage, and timely part replacement are key strategies I implement. For example, I always lubricate pneumatic tools after each use to prevent rust, and I keep power cords in a dry, organized space. Scheduling routine inspections based on usage frequency helps identify wear early, allowing for proactive repairs or part swaps. Additionally, following manufacturer maintenance recommendations ensures your tools perform efficiently for years. Investing a little time in maintenance pays off by extending tool life and keeping your projects running smoothly. In future trends, automation and smart diagnostics are likely to revolutionize tool maintenance, making it even easier to keep everything in top shape. For sophisticated equipment, consider also using software that tracks usage and schedules, like the built-in maintenance reminders on high-end laser tools or digital levels. Starting with a quality digital moisture meter or a versatile pneumatic nailer can set the foundation for long-term success in your renovation journey. Try incorporating a dedicated tool maintenance routine today, and you’ll see the benefits in both project quality and cost savings.
The Hardest Lesson I Learned About Showers, Baseboards, Carpet Install, and Flooring Projects
One of my most valuable revelations was realizing how small details, like the quality of adhesive or proper acclimation of materials, can make or break a project. Rushing through installation often leads to overlooked gaps or uneven surfaces, which can be costly to fix later. Patience and thorough preparation are irreplaceable in achieving professional results.
Navigating the Myth of Perfect Tools and Instant Results
I once believed that having the latest tools could automatically guarantee flawless outcomes. I learned that even the best equipment requires skill and understanding. Continuous learning, like studying resources such as this expert guide, transforms equipment into game-changers.
Why Consistency Outweighs Shortcuts in Renovation Success
Consistency in technique and climate control proved to be more impactful than quick fixes. Maintaining steady indoor temperatures and humidity levels during flooring or shower installations prevents common issues like warping or mold. Small daily commitments to environmental management can significantly extend the lifespan of your work.
Curated Resources that Have Reshaped My Approach
- Professional-Grade Tools: My digital moisture meter has been essential for early detection of hidden issues—trust me, early intervention saves money.
- Educational Material: Books like “The Ultimate Guide to Flooring Installation” broaden my understanding of best practices.
- Online Communities: Forums and expert blogs, including insights from this resource, offer troubleshooting tips and moral support.
Your Turn to Make Home Improvements Shine
Every project is a chance to learn and refine your skills. Embracing patience, continuous education, and quality tools transforms home renovations from daunting chores into rewarding crafts. Remember, your effort today builds a more beautiful, durable home tomorrow.
What aspect of your current renovation challenges have you found most daunting? Share your experiences below—I’d love to hear and help troubleshoot!


3 thoughts on “Loose Vinyl Planks? 4 Fixes for 2026 Temperature Shifts”
Linda Parker
February 25, 2026 at 4:50 amYour post really resonated with me, especially the focus on temperature control for vinyl floors. I experienced a similar issue last winter when my living room floors started buckling after a cold snap. I’ve learned that maintaining consistent indoor humidity and temperature is crucial, particularly with climate trends becoming more unpredictable. I’ve started using a smart thermostat and a dehumidifier, which surprisingly made a big difference. One thing I wonder is how others manage their HVAC settings specifically for flooring purposes—do you set different target temperatures or humidity levels depending on the season? It seems like fine-tuning these settings could extend the longevity of not just vinyl but other types of flooring as well. Have you found any particular devices or methods that work best for maintaining these environmental conditions without constantly adjusting settings? Overall, this post has given me a lot to think about, and I’d love to hear more tips on managing climate effectively for home flooring and renovation projects.
James Anthony
March 14, 2026 at 10:00 amThis post hits the nail on the head about temperature swings and their impact on vinyl flooring. I’ve had my own experiences with similar issues in my basement, where seasonal temperature fluctuations caused a few planks to lift and crack. What I found effective was installing a moisture and temperature sensor in the affected area and integrating it with a smart thermostat and dehumidifier. It really helped maintain a stable environment, preventing further damage. Interestingly, I also discovered that using a vinyl floor expansion gap around the perimeter of the room allows some room for movement, reducing the chances of buckling or lifting during extreme weather changes. It’s a simple fix, but it makes a noticeable difference. Do you think adding these small expansion gaps around all rooms with vinyl floors could serve as a good preventive measure, especially in areas prone to temperature shifts? Would love to hear if anyone has tried this or has other tips to help keep floors stable over time.
Emily Carter
March 20, 2026 at 4:50 pmThis article provides great insights into the delicate nature of vinyl flooring and how temperature fluctuations can cause long-term issues. I’ve experienced something similar in my home, where a sudden cold snap led to slight lifting in several areas. What I found especially helpful was emphasizing the importance of climate control; maintaining consistent indoor humidity and temperature really does make a difference. I’ve started using a smart thermostat paired with a hygrometer, which helps me regulate conditions proactively. Regarding your tip about small expansion gaps, I’ve read that these are particularly beneficial in areas with less stable climates, but it’s also crucial to ensure your room has proper insulation. Do you think adding a draft-proofing layer behind the baseboards could further help modulate temperature shifts and protect the vinyl? Would love to hear if anyone has combined these solutions for better results. Managing the environment seems like an effective way to extend the lifespan of vinyl plank flooring, especially with our increasingly unpredictable weather patterns.