Have you ever stepped into a room with freshly installed carpet and immediately noticed that oddly crooked line or that unsightly bubble that seems to ruin the entire look? I remember the first time I tackled a DIY carpet project, and despite my enthusiasm, I overlooked some key details. The result? Wrinkles and gaps that persisted long after the installation, making me wish I had paid closer attention to the common pitfalls newbies often face. That lightbulb moment—realizing that small mistakes can drastically impact the {highlight}appearance and durability{end-highlight}—is what prompted me to dive deeper into the world of flawless carpet installation.
Why Getting It Right Matters Especially in 2026
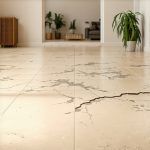
As we step into 2026, the importance of a perfect carpet installation becomes even more critical. Not only does quality affect the aesthetic appeal of your home, but it also impacts its longevity and comfort. Poorly installed carpets can lead to early wear, unsightly bumps, and the dreaded ripple effect, which can be frustrating and costly to fix. Interestingly, studies show that a majority of homebuyers notice uneven carpets during viewings, directly influencing their perception of the property’s quality. This means that a flawless setup isn’t just about looks; it positively influences your home’s value.
If you’re like me, you’ve probably faced some form of misstep—maybe rushing through the transition between rooms or ignoring the manufacturer’s recommendations. I made the mistake early on of not properly stretching the carpet, which led to ripples that stubbornly refused to smooth out. Trust me, I’ve learned the hard way that some errors are just not worth the cost or effort to fix later on.
So, what are the most common mistakes to avoid? How do you ensure your carpet remains looking pristine and perfect for years to come? Stick around. We’re about to explore practical, proven strategies to help you install your carpet like a true professional—no more bumps, gaps, or uneven edges!
Is Flawless Carpet Installation Really Possible Without a Pro?
Given my early struggles, I wondered whether achieving a perfect finish was just a pipe dream or if regular homeowners could actually get it right. The truth is, with the right guide and attention to detail, you can greatly improve your results. A mistake I made early on was not properly preparing the subfloor, which caused movement over time. Learning from that, I now swear by thorough subfloor cleaning and leveling, as emphasized in expert carpet installation guides. Whether you’re a DIY enthusiast or just want to understand what professional installers do, this article will give you actionable tips to avoid common pitfalls and ensure your carpet remains flawless for years.
Prepare the Subfloor Carefully
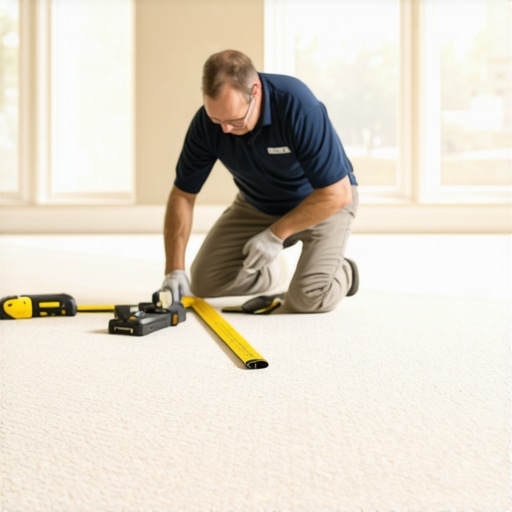
The first crucial step I learned was thoroughly preparing the subfloor. Before laying the carpet, I removed any debris, nails, or uneven patches. Imagine laying a rug over a wrinkled mattress—that’s what uneven surfaces do to your carpet. To avoid this, I rented a leveling compound and used a long leveling tool, much like a flooring pro would, ensuring a smooth, solid foundation. This step prevents ripple formation and prolongs your carpet’s lifespan. For more detailed subfloor prep, check out expert flooring tips.While most homeowners focus on the basics of flooring, carpets, showers, and baseboards, many overlook the subtle yet critical aspects that distinguish a professional finish from amateur results. One prevalent myth is that simply following the manufacturer’s instructions guarantees a flawless outcome. In my experience, understanding the micro-details—like proper adhesion techniques, climate considerations, and material compatibility—can make or break your project. For example, many people underestimate the importance of acclimating materials before installation; ignoring this step can lead to warping, bubbling, or gaps over time. An advanced mistake I often see involves not accounting for seasonal moisture variations, which affect adhesives and expansion joints, especially in shower enclosures or wood flooring. According to expert sources like industry professionals, these nuances are essential for durability and aesthetic integrity. Furthermore, overconfidence in quick fixes—such as cheap sealants or skipping proper surface prep—can cause long-term failures. For instance, improper sealing around shower bases often leads to leaks, mold growth, and costly renovations. By the same token, many underestimate how baseboard installation impacts overall look; poorly scribed cuts or inconsistent gaps can ruin an otherwise perfect space. Paying attention to these small but vital details ensures a long-lasting, high-quality result. Are you aware of these hidden pitfalls? Share your experiences or questions below. For deeper insights into advanced installation techniques, check out professional tips that will elevate your project to pro standards. Remember, mastering these nuances not only saves money but also elevates your home’s value and appearance—so don’t overlook the finer points!
Keeping your flooring, carpets, showers, and baseboards in prime condition requires the right tools and consistent maintenance routines. Over the years, I’ve honed a set of specialized equipment that helps me achieve professional results and extend the lifespan of my installations. One essential tool I swear by is the electric carpet stretcher, which ensures a tight, wrinkle-free finish. Unlike manual stretchers, this powered device allows for precise tension, saving time and reducing fatigue during large-scale projects. For routine maintenance, I rely on microfiber mops and pH-neutral cleaners; these keep surfaces pristine without damaging delicate finishes or causing buildup. Additionally, for shower maintenance, I recommend a high-pressure steamer—I use the Wagner Compact Steam Cleaner—to effortlessly remove soap scum and prevent mold growth, a task that’s invaluable for maintaining a show-room-worthy look. Hardware like diamond blade oscillating tools are also invaluable for trimming baseboards or repairing minor damage without causing splintering or cracks. As technology advances, we’re seeing smart sensors that monitor humidity and moisture levels, alerting you when conditions threaten your flooring’s integrity—these are becoming more affordable and can provide long-term peace of mind.
Looking ahead, I predict that automation will play an even bigger role in flooring and shower upkeep. Devices that combine sensors with AI to detect wear and suggest proactive repairs are on the horizon. Embracing these innovations now can save significant costs and extend the durability of your investments.
How do I maintain my flooring and showers over time?
Consistent cleaning, timely repairs, and proper sealing are fundamental. Regularly inspect for gaps or cracks, and address them before they escalate. For floors, scheduling professional deep cleaning every 1-2 years can restore luster and prevent buildup. Applying sealants around shower bases every few years prevents leaks and mold ingress—expert sources like industry professionals emphasize the importance of choosing the right sealant based on your climate and material type. When it comes to baseboards, using scribing tools like the one described in this guide helps achieve perfect fits, especially on uneven walls. Don’t forget to use protective pads under heavy furniture or appliances to prevent scratches or indentations over time. Remember, small, consistent efforts like these can keep your surfaces looking new and functioning optimally for years.
For the ambitious DIYer, I suggest trying out my favorite advanced technique: the use of a laser-guided tensioning system for carpet stretching, which dramatically improves accuracy and reduces installation errors. This method is gaining popularity among professionals and is worth experimenting with if you’re eager to elevate your results. Want to learn more? You can find detailed instructions and reviews from experts in the industry—such as this comprehensive guide—that can guide you through adopting these cutting-edge practices.
The Slip-Ups that Changed My Approach to Home Upgrades
One of the toughest lessons I learned was how a small detail, like neglecting proper acclimation of materials, could lead to costly mistakes down the line. Discovering that a tiny oversight could cause warping or gaps taught me to respect every step of the installation process. Another realization was that DIY projects demand patience and precision—rushing often results in uneven finishes that are hard to correct later. Lastly, I found that understanding industry nuances, like seasonal humidity effects, can make the difference between a durable finish and early wear. Embracing these lessons has transformed my approach, making me more attentive and appreciative of the craftsmanship behind flawless home improvements.”,