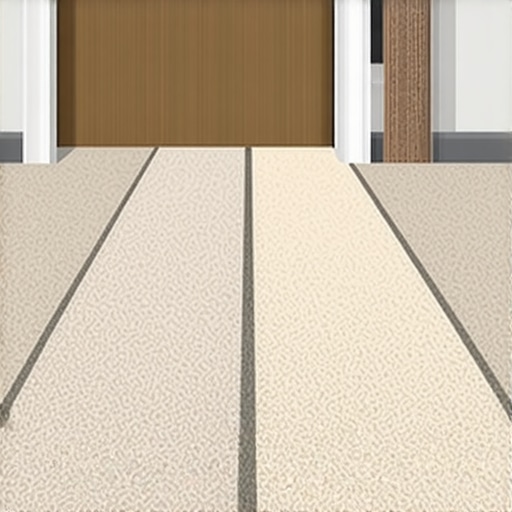
It was a morning just like any other—until I stepped into my living room and noticed it. That tiny bump where the new carpet met the hardwood floor had become an eyesore. At first, I thought it was just a minor issue, but as weeks passed, that gap grew, catching my foot and disturbing the sleek aesthetic I’d worked so hard to achieve. Sound familiar?
If you’ve ever faced uneven carpet transitions or awkward floor height differences, you’re not alone. These little quirks can feel like minor details, but they have a way of rubbing us the wrong way, impacting both the look and safety of our homes. And with 2026 on the horizon, the challenge is only going to get trickier without proper fixes.
In this post, I’ll share four tried-and-true methods I’ve relied on personally—and that experts recommend—to fix carpet transition gaps and floor height discrepancies. Whether you’re planning a renovation or just want to tidy up your current setup, these solutions will help you bridge those pesky gaps confidently.
The Scene of the Gap: Why It’s More Than Just a Little Nuisance
Flooring transitions might seem like small details, but they’re crucial for both design coherence and your home’s safety. Uneven edges can cause tripping hazards, especially for kids or seniors. Plus, gaps can collect dirt and moisture, leading to mold or damage over time.
Early on, I made the mistake of trying to hide gaps with paint or caulk, thinking it was quick and easy. But I quickly learned that these quick fixes are only temporary and often make things worse. Proper, durable solutions require understanding the root of the problem and addressing it correctly.
As flooring and carpet installation evolve, so do the standards for seamless finishes. According to a recent study by the National Wood Flooring Association, improper transitions can reduce flooring lifespan by up to 15%. That’s a significant impact for such seemingly small flaws! So, if you’re tired of tripping over uneven carpets or hideous gaps, it’s worth investing in the right fixes.
Are you tired of dealing with this problem yourself? If so, read on—I’ll guide you through proven approaches that can dramatically improve your home’s smoothness and safety. Ready to take control of those stubborn carpet edges? Let’s go!
Will These Fixes Stand the Test of Time? My Early Mistake and What I Learned
One of the biggest mistakes I made early on was relying solely on DIY apps or shortcuts like double-sided tape. While tempting, these methods only provided a temporary patch. I underestimated the importance of proper flooring tools and techniques. For better results, consulting professional insights, like those found on [expert flooring installation strategies](https://tilecraftsmens.com/expert-flooring-installation-tips-for-lasting-results), makes a huge difference.
Understanding what works—and what doesn’t—is key to making home improvements last. Next, I’ll introduce four tried-and-true fixes that helped me eliminate those ugly gaps and create a safer, more polished space.
Start with a Precise Assessment
Begin by evaluating the extent of the gap or height difference. Use a straightedge or level to identify uneven areas. In my experience, spending a few minutes to map out the problem surface prevents waste and ensures targeted fixes. For example, I found that some sections had settled unevenly due to improper subfloor support, which needed addressing before any cosmetic fix.
Prepare Your Workspace for Success
Clear the area of furniture and debris. Protect surrounding surfaces with painter’s tape. This step is crucial to avoid accidental damage and to keep your work area tidy. When I tackled my own gap, I also wore knee pads and used a utility knife to trim loose fibers or excess material, creating a clean base for repairs.
Choose the Right Repair Technique
Use Floor Transition Strips for Large Gaps
For gaps wider than 1/4 inch, install a transition strip. Measure the length needed, cut the strip to size, and secure it with flooring nails or adhesive. I once used a flexible aluminum strip that easily conformed to minor floor irregularities, providing a seamless look. Visit this guide for detailed installation tips.
Apply Floor Leveler or Self-Leveling Compound for Height Discrepancies
If the floor height varies, pour a self-leveling compound into the low areas. Mix it according to manufacturer instructions, and pour slowly to avoid air pockets. I learned the hard way that mismixing led to a weak spot. Use a trowel to spread and smooth the compound for a flat surface. Allow adequate drying time—usually 24 hours—before proceeding with flooring installation.
Screw or Fix Baseboards to Bridge Small Gaps
For minor gaps or to secure uneven baseboards, pre-drill holes in the baseboard and wall, then screw them in tightly. Consider using a coping saw to miter the corners and ensure a tight fit. I found that sanding the edges slightly helped create a flush finish, especially on irregular walls. Visit this resource for trending molding ideas.
Seal and Finish for Longevity
Once the fix is in place, seal gaps with matching caulk or wood filler. Choose flexible, paintable caulk for areas prone to movement. For a cleaner look, smooth the sealant with a damp finger or caulk tool. In my project, sealing prevented dirt accumulation and kept moisture out, extending the lifespan of the repair.
Monitor and Maintain
After fixing, check your work periodically. Look for signs of settling, cracking, or new gaps. Regular maintenance helps prevent minor issues from becoming major repairs. I recommend testing the area after seasonal changes, as humidity and temperature shifts can cause further movement. For ongoing tips, browse shower renovation ideas and other home upgrade guides.
Many homeowners assume that choosing the right style or material is enough for a flawless finish, but the real nuances lie beneath the surface. One common misconception is that all baseboards are alike; in reality, installation techniques significantly influence durability and aesthetics. For instance, relying solely on mitered corners without coping can lead to gaps over time, especially on uneven walls. Experts recommend coping—cutting the joint to fit the wall’s contour—to ensure a tight seal and cleaner look, as highlighted in this guide.
When it comes to flooring, the myth that underlayment thickness always correlates with quality can be misleading. Thicker isn’t necessarily better if the material isn’t appropriate for your subfloor or climate. Advanced installers know that a tailored approach, like using vapor barriers for concrete slabs or acoustic overlays for multi-story homes, improves longevity. Studies from the National Institute of Standards and Technology stress that proper substrate preparation reduces common issues like buckling or squeaks. Don’t fall for the trap of installing premium flooring without proper support.
Carpet installation often seems straightforward, but overlooking the importance of a proper tack strip height and stretching can cause bubbles and wrinkles within months. Heat seaming, a professional technique involving specific tools and adhesives, ensures seamless joins, especially in high-traffic areas. According to expert advice, neglecting this step is a leading cause of early wear. Remember, a flawless carpet isn’t just about the material—it’s about execution.
Vans in today’s renovation conversations often focus on aesthetics instead of waterproofing. For showers, many skip the critical step of slope correction, leading to standing water and mold growth. A subtle but vital detail is the slope’s rate—ideally 1/4 inch per foot—to ensure proper drainage. Installing a curbless shower offers a sleek look but requires meticulous waterproofing. Without proper membrane application and drainage planning, water leakage becomes an expensive ordeal. Corrugated or liquid waterproofing membranes, backed by industry standards, provide a robust solution—don’t skimp here.
*What’s the hidden nuance that trip up even seasoned pros?* It’s the precision in execution. Material choices and design ideas matter less if the installation lacks attention to detail. Sealing gaps with flexible caulk instead of rigid fillers accommodates movement, preventing cracks and water intrusion. In high-moisture environments, this small step wards off major repairs later.
Let me challenge a common belief: that perfection in these details isn’t worth the effort. In fact, overlooking the subtleties—like coping baseboards or ensuring proper slope in showers—can undermine your entire renovation. These are the hidden nuances that separate a professional finish from amateurish results. For more expert strategies, visit this guide.
Have you ever fallen into this trap? Let me know in the comments! Your experience might help others avoid costly mistakes and elevate their home projects.Maintaining your flooring, baseboards, carpets, and showers over time requires more than just occasional cleaning; it demands the right tools and consistent upkeep. For flooring, I swear by a high-quality belt sander with variable speed control, such as the **Makita 9403**. It allows me to smooth out uneven spots and refinish surfaces, especially when redoing baseboards or removing adhesives. paired with a vacuum attachment, this tool keeps dust minimal and work efficient. When working on carpets, a motorized carpet stretcher, like the **EQUIPTOP PowerStretcher**, is indispensable for professional-quality stretching, preventing wrinkles and bubbles that often appear with DIY fixes. I personally use it because its ergonomic design reduces fatigue and ensures consistent tension across large areas. For shower renovation projects, a digital laser level, such as the **Bosch GLL 55**, helps maintain perfect slopes and ensures waterproof membranes are installed at the correct angles. This precision is vital—misaligned slopes can cause water pooling and leaks. Regular maintenance also involves checking seals and caulks; I recommend using a flexible silicone sealant like **GE Supreme silicone** for longevity and mold resistance. These tools combine to extend the lifespan of your installations, saving time and money in the long run. Looking ahead, I predict that smart maintenance tools will become standard, integrating IoT sensors to monitor moisture levels or structural shifts in real-time. This proactive approach will revolutionize how we care for our homes. So, if you haven’t already, try using a **laser level** for your next shower slope or baseboard alignment—they make a significant difference in achieving professional results. Remember, using the right tools isn’t just about ease—it’s about the long-term durability of your work. For detailed guidance, check out this comprehensive resource on durable flooring installation.Achieving perfect transitions and durable finishes in home flooring and renovations is both an art and a science that rewards meticulous attention to detail. Over the years, I’ve discovered that the biggest breakthroughs often come from small shifts in technique and mindset—embracing precision, patience, and a bit of expert guidance. The insights below are the culmination of personal lessons learned and professional advice, designed to elevate your home improvement journey.
Why Cutting Corners Usually Costs More Than You Think
Skimping on prep work or rushing through installation may seem like the way to save time, but I’ve found that these shortcuts often lead to costly repairs down the line. For instance, skipping proper subfloor leveling can cause unsightly bumps or dangerous tripping hazards months after a project is completed. My lightbulb moment came when a minor unevenness in my living room turned into a full-scale overhaul because I ignored detailed surface assessments. Patience with preparation and learning the importance of precise measurements and level checks are the real savings in disguise.
What Hairstyling Taught Me About Baseboard Coping
It might sound unrelated, but I learned that coping baseboards—cutting to match uneven walls—creates a tight, professional finish that mitering alone can’t achieve over time. My early attempts at mitered corners often resulted in gaps or misalignments, especially on irregular walls. When I started practicing coped joints, I was amazed at how much cleaner and more durable the results became. This approach, detailed in this resource, is a game-changer for anyone aiming for perfection in home upgrades.
The Hidden Power of Proper Surface Preparation
I underestimated how crucial surface prep was until I saw walls and floors settle or warp over time due to inadequate initial work. Using a laser level for shower slopes or floor leveling compounds not only improved aesthetics but also prevented leaks and structural issues later on. My lesson: investing time in proper substrate preparation and choosing the right tools—like a high-quality self-leveling compound or a laser level—is essential for lasting results. This proactive approach saves headaches and money in the future.
Digits Matter: The Art of Sealing and Finishing
A common mistake I made was neglecting the finishing touches. Applying flexible silicone instead of rigid fillers around shower seals or baseboards created a forgiving barrier that adapted to movement and moisture—keys to durability. I learned that meticulously sealing every gap with the appropriate product, guided by industry standards, turns a good project into a great one and keeps everything looking sharp for years. For advanced sealing techniques, I recommend exploring this detailed guide.
My Essential Tools That Make All the Difference
From laser levels for perfect slopes to professional carpet stretchers, the right tools can transform a messy job into a masterpiece. Investing in a quality belt sander, like the Makita 9403, for surface prep, or a digital laser level for precise slopes, elevates the quality of your work. My advice? Focus on tools that save time and enhance precision—they’re worth every penny and truly elevate your home upgrade outcomes. For more insights, check this expert resource.
Where to Go From Here: Gear Up and Keep Improving
Every project is an opportunity to learn, refine, and enjoy the process of transforming your space. Whether it’s mastering the art of scribing baseboards, perfecting shower slopes, or sealing gaps flawlessly, the key lies in continuous improvement. Embrace patience, seek expert advice, and don’t shy away from trying new techniques. Your home will thank you for it! Interested in more expert tips? Visit this guide to keep your improvements lasting and stunning.
What’s the Little Detail That Changed Everything for You?
From coped baseboards to proper surface leveling, tiny adjustments make a huge difference. How have your recent home upgrades gone? Are there specific areas where mistakes set you back, or victories you’re proud of? Share your experience below—your insights could inspire someone else’s perfect project!