It was a morning like any other, but as I stepped into my bathroom, I was hit with a flood of frustration. The grout lines around my old shower tiles constantly trapped dirt and mold, turning what should have been a relaxing spa-like space into a constant cleaning nightmare. That moment of irritation sparked a deeper realization: traditional shower designs are evolving fast, and sticking with grout-heavy walls might be holding me—and you—back from a sleek, low-maintenance upgrade.
Why Now Is the Perfect Time to Rethink Your Shower Walls
Every few years, home renovation trends shift, and 2026 is turning out to be a game-changer for shower wall design. Modern homeowners are seeking styles that are not only stunning but also practical—something that reduces upkeep while elevating bathroom aesthetics. I’ve been down the rabbit hole of tile cleaning, resealing, and dealing with grout cracks that seem to crop up right when I thought I’d finished the job. The good news? There are innovative solutions that are gaining popularity fast, and I promise you, they’re worth considering for your next renovation.
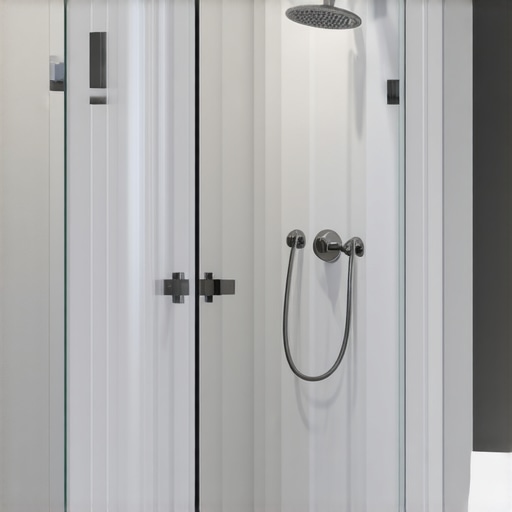
Right now, slab-wall showers, with their clean lines and durable surfaces, are dominating the scene. These designs eliminate grout lines altogether, which means fewer leaks, less mold, and a whole lot less scrubbing. It’s a trend supported by experts in bathroom remodeling, citing increased durability and a modern look that appeals to homeowners seeking both function and style.
Now, I know what you might be thinking: “Are these slab walls truly better? Wouldn’t they be more expensive or complicated to install?” Trust me, I’ve been there, and I’ve made my fair share of mistakes early on—like overlooking the importance of professional installation, which can make or break the final look. Early errors included misjudging material choices and underestimating the importance of waterproofing, both pitfalls that many DIYers stumble into. That’s one reason I am so passionate about sharing these trends now, so you can avoid the costly missteps I did.
So, if you’re tired of fighting grout lines and want a sleek, lasting solution that elevates your bathroom’s style while cutting down on cleaning time, you’re in the right place. Over the next sections, I’ll walk you through the hottest shower wall trends for 2026, focusing on how to incorporate them into your space with confidence. Ready to explore the future of bathroom design? Let’s dive into what’s making waves this year.
Preparing for the Installation
Begin by removing old shower fixtures and tiles, ensuring the area is clean and dry. Measure your shower space precisely, accounting for wall height,width, and any niches or curves. Use a level to mark the walls, confirming they are straight—this step is crucial to avoid uneven surfaces later. A mistake I made early on was rushing this phase, which led to misaligned panels and extra headaches. For a smooth fit, double-check measurements and use painter’s tape to outline where panels will go.
Choosing Your Materials and Tools
Select a high-quality, waterproof panel system designed for showers—materials like acrylic, solid surface, or composite slabs are popular. These eliminate grout lines and significantly reduce maintenance. Gather tools such as a circular saw with a fine blade, a drill, measuring tape, a jigsaw, level, and adhesive suited for wet environments. I once tried cutting panels with a dull blade, resulting in jagged edges; upgrading my saw blade made the cuts cleaner and faster. For detailed guidance, see modern shower renovation ideas.
Measuring and Cutting the Panels Accurately
Transfer your measurements onto the panels using a pencil or marker. Use a straight edge or a carpenter’s square to draw cut lines. When cutting, support the panel fully to prevent cracking—think of cutting like slicing bread evenly. I once underestimated the importance of support, leading to a cracked panel; now I clamp a straight edge alongside my cut line for stability. Remember to wear safety goggles and mask as fine dust particles are generated during cutting. For complex cuts around fixtures, mark the panel with painter’s tape, cut slightly outside the line, then sand down to perfect dimensions.
Applying Waterproof Adhesive and Setting the Panels
Spread waterproof adhesive evenly on the back of the panel using a notched trowel. Press the panel firmly into place, starting from the bottom and working upward, to minimize air pockets. Use a level to ensure the panel is plumb—adjust with shims if necessary. Clamp or weight the panel temporarily if needed, but avoid excessive pressure that could damage the material. Once held, secure panels with corrosion-resistant fasteners if the system requires. Don’t forget to seal edges with a high-quality silicone; I learned the hard way that poorly sealed edges lead to water infiltration, causing damage over time.
Sealing and Finishing the Installation
Wait for the adhesive to cure fully, typically 24-48 hours. Then, apply silicone sealant along all edges, joints, and around fixtures for a watertight barrier. Use a silicone smoothing tool or your finger dipped in soapy water for a clean finish. Avoid gaps or gaps that might trap moisture, which can lead to mold, as I experienced when I skipped sealing properly. For extra protection, consider adding a protective coating if your panels are designed for it. With proper sealing, your shower will be virtually maintenance-free, bringing that sleek, modern look without the grout mess.
When it comes to home renovation, many believe that following standard procedures guarantees a flawless finish. However, even seasoned contractors often fall prey to subtle pitfalls that can compromise the entire project. One common misconception is that a perfect installation simply hinges on the right tools and materials. In reality, understanding the nuanced behaviors of different substrates, materials, and environmental factors is essential for lasting results.
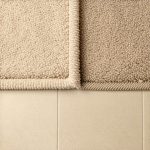
Take carpet installation, for example. Many assume that stretching the carpet taut is enough to prevent wrinkles, but ignoring the underlying subfloor’s condition and the adhesive’s compatibility can lead to buckling over time. Using a subpar tack strip or neglecting proper seam seaming can cause peaking or fraying, which might not be immediately apparent. For advanced tips on achieving seamless and durable carpet finishes, visit the expert guides at carpet installation secrets.
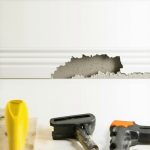
Similarly, baseboard installation isn’t just about mitering corners perfectly. A common mistake is to ignore wall irregularities, leading to gaps that are only hidden with overzealous caulking. However, this often results in unsightly finishes and gaps that trap dirt or moisture—especially problematic in humid environments. A better approach is to use scribing tools to adapt baseboards meticulously to uneven surfaces, which is a subtle skill that elevates interior aesthetics. Learn more about this in gap-filling techniques for baseboards.
Flooring installation, particularly with hardwood or vinyl planks, has its hidden traps. Many installers overlook the importance of acclimating materials to the environment beforehand, leading to expansion or contraction after installation. This can cause buckling or gaps, which are expensive to repair. Experts emphasize the significance of climate control and proper subfloor preparation, which are often underappreciated. For comprehensive strategies, check out flooring installation tips.
Showers might be the most technically complex aspect of bathroom renovation. A prevalent myth is that waterproofing is a one-time task, but overlooking dynamic water pressures and movement can cause leaks over time. The subtlety of designing waterproof niches, linear drains, and curbless entries requires a detailed understanding of waterproof membranes and slope placement. Missteps here can result in significant water damage, compromising structural integrity. For an in-depth look, see shower slope fixes.
**What’s the real secret to flawless installations?** The answer lies in attention to detail—knowing that each step, no matter how minor it appears, influences the longevity and beauty of your project. Overlooking environmental conditions, substrate stability, or material specifics often leads to avoidable failures. That’s why taking time to educate yourself on hidden nuances pays off tremendously. It’s not just about aesthetics but about creating a sustainable, durable result.
Make sure to avoid these common pitfalls and instead focus on the finer points of installation. Your home will thank you with beauty and resilience for years to come. Do you have a renovation story where overlooked details caused issues? Share your experience in the comments!
Choose Precision Tools for Seamless Installations
Investing in high-quality, specialized tools can dramatically improve the quality and durability of your home upgrades. For example, I swear by a high-grade, fine-tooth circular saw when cutting panels for shower surrounds, as it provides clean, precise cuts that minimize material waste and reduce rework. Similarly, a scribing tool is invaluable for adaptively fitting baseboards around uneven walls, ensuring a tight, professional look without gaps—a common issue that DIYers often overlook. Using these tools correctly isn’t just about making the job easier; it’s about ensuring long-term performance and aesthetic appeal.
Consistent Maintenance Extends Your Renovation’s Lifespan
Long-term results depend on regular upkeep. For shower systems, this could mean periodically inspecting silicone seals for signs of mold or deterioration—replacing or reapplying as needed. For flooring, setting a schedule for deep cleaning and checking for loose or damaged planks helps preserve the integrity and appearance. I recommend adopting a simple routine: once every six months, examine your installations for early signs of trouble, and address issues proactively to prevent costly repairs down the line. Proper maintenance is the cornerstone of your project’s enduring success.
Optimize Long-Term Performance with Smart Investment
When selecting materials, prioritize products with proven durability, such as waterproof panels for showers, which can last decades with minimal upkeep. Additionally, choosing professional-grade adhesives and sealants—like epoxy grout for high-moisture areas—is crucial. I personally use a manufacturer-recommended waterproof adhesive system because, according to the latest industry guides, it significantly reduces the risk of leaks and mold. Investing a little more upfront in quality supplies can save you from a headache later.
Plan for Future Scaling or Upgrades
Thinking ahead about scaling or further improvements can streamline future projects. For instance, if you’re considering upgrading your bathroom with additional features like heated flooring or smart lighting, choose compatible, easily integrable systems now. Use modular panels and flexible wiring solutions that facilitate easy adjustments later. This strategic foresight saves time and money, making future enhancements smoother and less disruptive. Pick tools and methods designed with adaptability in mind, ensuring your home remains a beautiful and functional space for years to come.
How do I maintain my flooring and fixtures over time?
Regular cleaning with manufacturer-approved products is vital. For floors, avoid harsh chemicals that can damage protective coatings—stick to pH-neutral cleaners recommended by the manufacturer. For fixtures like baseboards and shower doors, gently wipe down surfaces to prevent mold buildup and paint deterioration. Periodic inspections to identify small issues—like loose baseboard screws or minor grout cracks—allow for timely repairs, preventing greater damage. Resources such as this detailed guide provide excellent maintenance routines tailored for lasting beauty and function.
Ready to elevate your maintenance game? I recommend trying out a professional-grade scribing tool if you haven’t already—it’s a game-changer for achieving perfect fits around uneven surfaces, especially in older homes. Mastering this trick will save you hours of frustration and produce that flawless finish we all seek. Remember, maintaining your renovations isn’t just about fixing problems; it’s about preserving the beauty and durability of your investment for decades to come.
Embracing modern shower wall design isn’t just about aesthetics; it’s a strategic move towards a maintenance-free, durable bathroom. The shift towards slab-wall showers and seamless surfaces offers a glimpse into the future, but the real magic lies in understanding what truly works for your space. By choosing the right materials and installation techniques, you ensure your bathroom remains stunning and functional for years to come. Don’t forget to explore latest shower renovation ideas for inspiration. Taking the leap now means enjoying a more relaxing, cleaner, and beautiful space tomorrow.
Lessons the Hard Way: What I Wish I Knew About Shower Upgrades
- The importance of precise measurements: Rushing this step led me to multiple re-cuts, delaying the project. Every millimeter counts when fitting slab panels, and even minor errors can compound into costly fixes.
- Environment matters: I overlooked acclimating panels to room humidity, which caused warping over time. Allowing materials to adjust minimizes future issues.
- Invest in quality tools: Using a dull blade resulted in jagged cuts. High-quality, fine-tooth blades give you cleaner finishes and prevent material waste.
- Waterproofing is non-negotiable: Skimping on sealant and membrane layers led to leaks and mold problems. Proper waterproofing is the backbone of a lasting shower upgrade.
Precision Tools and Resources I Rely On
- Pro-level circular saws and blades: Essential for clean cuts—I’ve tried cheap tools, but professional-grade equipment makes all the difference. Check out this guide for recommended tools.
- Scribing tools for uneven walls: They save hours of frustration and ensure perfect fits, especially important with older homes. Scribing is a small investment that pays off big.
- High-quality sealants and membranes: Using trusted brands prevents future leaks. I prefer products with proven durability for peace of mind.
- Regular maintenance routines: Scheduling routine inspections and re-sealing keeps your shower looking new. Proper upkeep extends the lifespan of your renovation.
Your Next Move Toward a Stunning Bathroom
Bold choices in shower wall design empower you to craft a space that truly reflects your lifestyle—sleek, easy to maintain, and built to last. Don’t wait for problems to surface; act now to incorporate innovative solutions that simplify life and elevate your home’s beauty. Take the time to plan meticulously, invest in quality, and embrace ongoing maintenance. Your future self will thank you for a bathroom that remains a sanctuary for years to come. Ready to start your next renovation? Remember, careful preparation and informed decisions are the keys to success. How will you enhance your bathroom with the latest trends in 2026? Let me know below.