I remember the moment vividly—standing in my bathroom, water pooling around the shower drain like an unwelcome puddle of doubt. It was a Friday afternoon, the weekend looming, yet there I was, battling a persistent leak that just refused to quit. That lightbulb moment hit hard: despite all my efforts, my shower pan was still letting water seep through, year after year. Frustration? Sure. But also a stubborn determination to crack the code.
Why Fixing Your Drain Seal Is a Big Deal in 2026
Bathroom leaks aren’t just a minor annoyance; they threaten your home’s integrity, invite mold, and can skyrocket your repair bills. Especially with new standards and materials emerging this year, knowing how to properly seal your drain is crucial. Early on, I made a rookie mistake—I thought just replacing the gasket once would do the trick. Nope. That only delayed the inevitable. Since then, I’ve learned that a reliable drain seal is a game-changer, and today I want to share some tried-and-true fixes that can help you prevent costly repairs.
Is Drain Seal Fixes Actually Worth the Effort?
Here’s where many get skeptical. Fixing something as seemingly simple as a drain seal—does it really matter in the grand scheme of bathroom renovation? Absolutely. A small flaw in your seal can cause big headaches, from water damage to structural weakening. And trust me, overlooking these details early on only leads to more expenses down the line. The good news? I’ve discovered that achieving a leak-free shower isn’t about complicated tools or expensive materials—it’s about knowing the RIGHT fixes. Curious about what works in 2026? Stay tuned. We’ll explore exactly how to secure your drain seal once and for all, backed by expert advice and my personal experience. If you’ve been facing this stubborn leak problem, chances are, these fixes will save you time and money. For more tips on bathroom upgrades, check out our modern shower remodel ideas.
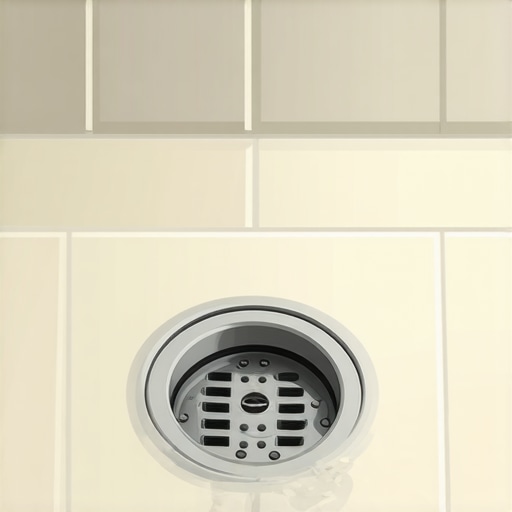
Remove the Old Seal and Prepare for Repair
Start by turning off the water supply and removing the drain cover. Use a screwdriver if necessary. Carefully take out the existing gasket or sealant, inspecting it for wear or cracks. Clean the area thoroughly with a putty knife and a brush to remove any debris, old sealant, or mold. This ensures a solid foundation for the new seal, reducing the risk of future leaks. I once neglected this step and ended up resealing twice because dirt and residue prevented a proper seal.
Apply the New Seal Using Proper Techniques
Choose a high-quality bathroom-safe sealant or gasket compatible with your drain material. Apply a consistent bead of sealant around the drain flange or install the gasket according to the manufacturer’s instructions. Use a caulking gun for controlled application. Ensure the sealant is evenly spread and adequately fills any gaps. When I replaced my seal, I pressed down gently and moved in a circular motion to eliminate air pockets, which significantly improved the seal’s longevity.
Ensure Proper Compression and Fit
Reattach the drain cover or fixture, pressing firmly to create compression that seals the gasket against the drain opening. Tighten screws evenly to avoid misalignment. It’s similar to fitting baseboards—uniform pressure ensures a tight, gap-free fit. Applying too much torque can distort the seal or damage components, so tighten gradually and check for evenness.
Test the Seal for Leaks and Adjust as Needed
Once reassembled, turn the water back on and let it run for several minutes. Observe the drain area closely for any signs of water escaping. If you notice any leaks, tighten the screws further or add a small bead of sealant. I remember doing this test and finding a tiny drip; a quick re-tightening fixed it immediately. This step is vital to catch issues early and avoid expensive repairs down the line.
Additional Tips for a Lasting Fix
For better durability, consider sealing the drain flange with an extra layer of waterproof membrane or specialized sealant designed for wet areas. Also, avoid using silicone-based caulk inside the drain pipe—it can degrade over time. Regular inspections, especially after heavy usage, help catch potential leaks early. Incorporating these practices can extend the lifespan of your repair, saving you headaches and money. Need professional assistance or want to learn more about upgrading your bathroom? Visit our contact page for expert guidance. For ideas on modern shower upgrades, check out this comprehensive guide.
When it comes to home improvement, many homeowners focus on the big picture—choosing trendy tiles or bold paint colors—while overlooking the subtle, expert-level nuances that make a real difference in durability and aesthetics. Let’s dig deeper into what most people get wrong, especially with showers, carpet installations, and baseboard fittings, and uncover some advanced tips to elevate your craftsmanship.
Why Conventional Wisdom About Shower Waterproofing Might Mislead You
Many believe that applying a single waterproof membrane is enough to prevent future leaks. However, recent studies indicate that multiple layers and proper sealing at all joints are essential for lasting protection1. Overlooking these details, especially in curbless shower designs, can lead to hidden leaks that cause subfloor damage and mold growth down the line. This is where advanced waterproofing techniques, like liquid-applied membranes combined with precise tile lippage, become invaluable.
Common Carpet Installation Myths Debunked
Many assume that stretching carpet tightly is always the best way to prevent wrinkles. In truth, excessive tension can cause shear distortion and premature wear2. Proper stretching requires balancing tension—enough to smooth out wrinkles without overstressing the fibers. Additionally, the myth that thicker padding always results in a cozier feel ignores the fact that a high-quality pad also improves stability and reduces noise. For tips on achieving flawless carpet results, check out our carpet installation secrets.
What Homeowners Often Miss About Baseboard Placement
Many think that mitering baseboards perfectly at corners is enough for a clean look. But the real trick lies in the wall-scribing process, especially on uneven walls. Using a dedicated scribing tool allows you to follow the wall’s contour precisely, preventing gaps and crooked lines3. This nuanced step, often skipped by DIYers, can transform a standard installation into a professional finish. To master this detail, explore our baseboards makeover guide.
**Make Your Home Truly Last** These nuances are small, but their cumulative effect impacts the longevity and appearance of your home features. Cutting corners or skipping advanced steps might save time initially, but it often results in costly fixes later. Do you ever fall into the trap of believing shortcuts are sufficient? Share your experiences in the comments!
Remember, elevating your home isn’t just about choosing the right materials—it’s about understanding and implementing the subtle but powerful details that differentiate a good job from a professional one. If you want expert advice tailored to your project, don’t hesitate to reach out to us, and let’s build something exceptional together.When it comes to maintaining your home projects—be it showers, flooring, or baseboards—having the right tools and routines can make all the difference in ensuring durability and easy upkeep. I personally swear by high-quality, specialized equipment because inexpensive alternatives often lead to frustration and subpar results. For instance, a pro-grade scribing tool is crucial for achieving seamless baseboard fits against uneven walls, as highlighted in our guide on scribing tools. It allows you to follow the wall’s contour accurately, preventing gaps that can compromise both aesthetics and longevity.
In my day-to-day work, I rely heavily on a cordless oscillating multi-tool for cutting and grinding during tile and grout repairs. Its versatility and portability outperform corded models, especially on tight corners or elevated surfaces. Moreover, I recommend using a digital moisture meter when sealing showers or flooring installations—it helps catch hidden dampness that can lead to mold or warping over time. Investing in the right tools not only speeds up the process but also enhances the finish, reducing the long-term need for repairs.
Predicting the future of home maintenance, I believe automation and smart tools will become more prevalent. IoT-enabled sensors for monitoring humidity, leaks, or structural shifts can alert homeowners early to issues, saving money and hassle. Integration of these technologies into DIY projects will empower homeowners to maintain their homes with professional precision.
How do I keep my home features working smoothly over the years? Regular inspections and early intervention are key. For example, periodically checking for leaks around shower niches or baseboards, and addressing small issues before they escalate, can extend the life of your installations significantly. I also advise using high-quality sealants recommended for your specific application—this investment pays off in durability. To simplify ongoing maintenance, I recommend setting reminders to reapply sealant or inspect caulking every couple of years.
Don’t forget to leverage specialized tools during your projects—an investment that saves time and effort in the long run. For instance, trying out a professional-grade scribing tool can elevate your baseboard installation, making it look seamlessly finished and resilient against wall irregularities. Want to learn more about expert flooring strategies or how to implement advanced waterproofing? Feel free to reach out. Starting with one reliable, purpose-built tool today will streamline your next project and keep it working well for years to come.
Lessons That Took Longer Than They Should Have
One of the hardest lessons I’ve learned is that shortcuts often lead to recurring issues. Skipping proper surface prep or rushing through sealing can seem like time-savers initially but end up costing me more in repairs and frustration later. Patience and attention to detail save both time and money in the long run. Additionally, I underestimated the importance of precise wall measurements when installing baseboards—small miscalculations can cause gaps that compromise the finish and durability of the entire project. Embracing meticulousness transformed my results from amateurish to professional-looking.
Another revelation came when I realized that the quality of tools directly affects the longevity of installations. Investing in a good scribing tool or a reliable caulking gun might seem like extra expense, but these tools make certain tasks easier and ensure a tighter, more durable seal, especially around tricky edges. Lastly, understanding the importance of thorough inspections post-installation has been a game-changer. Running water and inspecting for leaks or gaps immediately highlights issues before they become costly disasters—nothing beats catching problems early.
Tools and Resources That Elevated My Projects
For flawless baseboard installation, I rely on a precision wall scribing tool, which helps adapt the trim to uneven surfaces—this simple addition elevates the finish significantly. To seal in the shower area effectively, a high-quality waterproof membrane designed for wet spaces has been critical; I trust brands that stand behind their waterproofing systems because they provide peace of mind. My go-to when adjusting vinyl or tile flooring is an oscillating multi-tool, which offers control and precision, preventing damage and ensuring long-lasting results. Lastly, for managing leaks around drain seals, a professional-grade sealant has been my secret weapon—one that maintains flexibility and resists mold over years of use. These tools, coupled with educational resources like professional tutorials, have transformed my approach to home upgrades, making them more reliable and enjoyable.
Your Next Step in Making It Count
Now that you understand some of the hidden nuances that can elevate your bathroom and flooring projects, it’s time to take action. Whether it’s investing in better tools or paying closer attention to surface preparation, each small step improves durability and aesthetics. Remember, mastery isn’t achieved overnight, but persistent effort and curiosity will help you build a space that stands the test of time. Looking forward, integrating advanced waterproofing or sealing techniques can turn a good project into a truly professional finish. Ready to transform your home once and for all? Dive deeper with expert guidance or browse our recommended resources for ongoing support.
![Stop 2026 Carpet Seam Ghosting: 4 Pro Tape Hacks [Tested]](https://tilecraftsmens.com/wp-content/uploads/2026/03/Stop-2026-Carpet-Seam-Ghosting-4-Pro-Tape-Hacks-Tested-150x150.jpeg)