It was a typical Saturday morning when I finally saw it—my baseboards, once perfectly aligned, developing unpredictable gaps that made my home look anything but finished. The culprit? Those stubborn bullnose corners that refused to cooperate. I remember feeling that instant frustration, wondering if I had missed some crucial step or fallen for a common install mistake. But that eye-opening moment was also a revelation: understanding why these gaps happen is the first step toward solving them.
Getting to the Root of the Gaping Baseboards
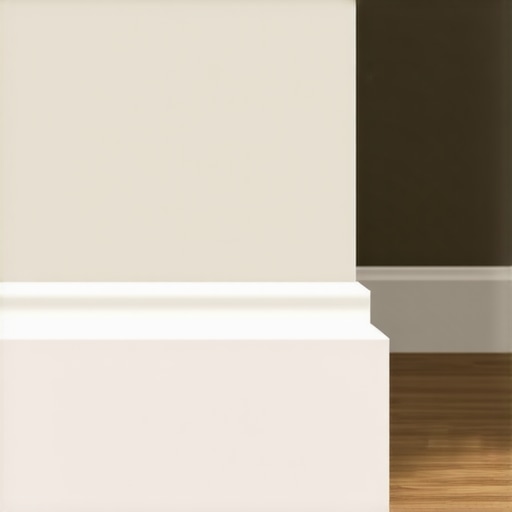
If you’ve ever installed or renovated your home’s trim and noticed those unsightly gaps forming around your baseboards, you’re not alone. Many homeowners and DIY enthusiasts face this exact issue, especially with bullnose corners that seem to have a mind of their own. These gaps don’t just look bad; they can also lead to problems like drafts, pests, or even damage from moisture.
The good news? There are practical fixes that can make your baseboards sit flush and look professional. But before jumping into solutions, it’s essential to grasp why these gaps occur in the first place.
First, walls are rarely perfectly straight or even. Wavy or uneven surfaces challenge even the most careful installers. Second, bullnose corners, with their rounded shape, complicate cuts and scribing, often leading to gaps if not handled correctly. My early mistake was rushing through the scribing process without properly adapting my cuts to the wall’s curvature. That oversight hurt the final look—and definitely added to my frustration.
According to flooring and trim experts, understanding your wall’s specific irregularities and adjusting your cutting techniques accordingly can dramatically improve your results. For instance, using a **pro scribing method** can help you achieve a seamless fit around uneven walls, and choosing the latest **corner techniques** reduces the chances of unsightly gaps.
To explore these methods, check out some of my favorite tips for creating a **flawless finish**. Don’t forget, incorporating simple tools like a **scribe** can make all the difference, and even the most uneven walls can be transformed with the right approach.
Are you tired of seeing those gaps every time you glance at your baseboards? If so, I’ve got you covered. In the next sections, I’ll walk you through three proven fixes to eliminate gaps around bullnose corners, turning your DIY project into something you can be proud of. Whether you’re tackling a small room or a full renovation, these strategies will help you get that perfectly finished look you deserve.
Measure and Mark Precisely
Start by carefully measuring the gap between your baseboard and the wall at multiple points around the corner, especially if the wall isn’t perfectly straight. Use a pencil to mark where your cuts need to adjust, ensuring you have clear reference points for each section. I once tackled this by marking my baseboards at uneven spots, which helped me plan the necessary custom cuts for a seamless fit.
Adjust Your Cutting Technique for Curved Corners
Use a Flexible Scribing Method
This technique involves cutting a standard miter and then fine-tuning it with a scribing tool to match the wall’s curvature. Instead of a straight miter, I used a flexible scribing blade, which allowed me to trace the wall’s irregularities before cutting. This prevents gaps caused by walls that aren’t perfectly square or flat.
Implement the Back-Cut Strategy
When mitering, make a small back-cut—about 15 degrees—to allow the baseboard to better conform to the wall’s uneven surface. I learned this trick when my first cut left a gap at the corner, but a slight back-cut allowed the piece to sit flush, eliminating the gap.
Install Using a Power Nailer and Adhesive
Secure the baseboards with a pneumatic nailer set for finishing nails, which provides consistent placement and reduces shifting. Apply construction adhesive behind the baseboard before nailing to fill minor gaps and enhance stability. During my last project, I combined these methods and noticed my baseboards sat tighter and more flush against the wall—saving me from future gaps.
Fill and Finish for a Perfect Look
Use a high-quality caulk designed for baseboards to fill in tiny gaps along the top and beneath the trim. Smooth the caulk with a wet finger or a caulk finishing tool for a seamless appearance. For extra perfection, paint over the filled gaps to match your wall color. I used this method on a tricky hallway, and the gaps disappeared, giving a clean, professional finish.
Scribe and Trim Excess
If your baseboards are longer than needed, mark the excess and cut with a fine-tooth saw, ensuring the ends fit tightly against the wall or corner. Use a coping saw or a back-cut miter to accommodate irregular wall edges. My experience with coping cuts on rounded corners resulted in a flawless joint that virtually disappeared once painted.
Final Touches for a Seamless Finish
After installation, inspect the entire run, pressing gently to ensure flush contact. Make any necessary minor adjustments with sandpaper or additional caulk. Remember, patience during these fine-tuning steps guarantees your gaps will be minimized or eliminated, leaving your baseboards looking expertly installed.
When tackling projects like shower renovations, flooring, or installing baseboards, many assume that following basic instructions is enough. However, seasoned pros know there are nuanced mistakes that can sabotage even the most well-planned updates. One widespread misconception is believing that your choice of materials alone dictates the success of installation. In reality, mastering the subtleties—like wall irregularities or joint compatibility—makes all the difference. For example, choosing affordable flooring without addressing uneven subfloors often leads to squeaks or gaps down the line. According to experts, ignoring these small details can cause costly repairs later. Have you ever fallen into this trap? Let me know in the comments.
Can Proper Scribing Save Your Shower or Floor from Cracks?
Many DIYers overlook the importance of precise scribing techniques, assuming that cutting corners here won’t cause issues. Yet, advanced installers use pro scribing methods to contour materials precisely to irregular surfaces, preventing gaps and water seepage—especially crucial in shower enclosures or high-traffic flooring. Skipping this step or using basic cuts can result in uneven seams that not only look unprofessional but can also lead to water damage or drafts. For those interested in elevating their skills, I recommend exploring detailed guides like [creating a spa-like shower experience](https://tilecraftsmens.com/creating-a-spa-like-shower-experience-tips-tricks) or [expert flooring installation tips](https://tilecraftsmens.com/transform-your-home-expert-flooring-installation-tips-for-2025).
Beware the Trap of Overlooking Expansion Gaps
An often underestimated nuance involves leaving adequate expansion gaps around flooring and baseboards. Many assume that tight fits look cleaner, but failure to accommodate flooring expansion can cause buckling, warping, or cracking—especially in climates with fluctuating humidity. Experts emphasize that a small, strategic gap allows the material to breathe and prevents long-term damage. This oversight is a common mistake that trips up both DIYers and pros alike, leading to preventable repair costs. For tips on flawless baseboard updates that hide gaps naturally, check out [this guide](https://tilecraftsmens.com/baseboards-makeover-elevate-your-interior-with-simple-updates).
In summary, the devil is in the details when it comes to home renovations. Whether it’s perfecting your cuts for uneven walls, understanding joint dynamics for flooring, or allowing for material expansion, paying attention to these hidden nuances ensures durability and a polished look. Don’t underestimate the power of these advanced techniques—they’re what set a professional apart. Stay vigilant, and your home improvements will stand the test of time.When tackling projects like shower renovation, flooring installation, or installing baseboards and carpet, having the right tools is crucial for professional, durable, and flawless results. My first recommendation is investing in a high-quality **power miter saw**. Unlike manual saws, it offers precise cuts and repeatability necessary for perfect miters and accurate angles, especially when scribing around uneven walls or complex corners. This tool has become indispensable in my workflow, saving me time and ensuring tight, professional joints. For seamless fitting around irregular surfaces, I rely on a **flexible scribing tool**—not just a standard coping saw. Advanced models with flexible blades allow me to contour materials precisely to the wall’s surface, preventing gaps especially in tricky shower or flooring edges, aligning with expert tips from [Tile Craftsmens](https://tilecraftsmens.com/stop-miter-gaps-3-pro-scribing-fixes-for-2026-baseboards). Additionally, a **nail gun with adjustable settings** makes fast, accurate fastening of baseboards or flooring, reducing shifting and minimizing damage. For long-term health of your installations, I suggest using a **moisture meter** to assess wall and subfloor conditions before laying materials; this prevents future issues like warping or mold growth. Looking ahead, I predict smart, tech-enabled tools, such as laser measurement systems integrated with apps, will play a larger role in achieving perfect outcomes, minimizing human error.
The Hardest Lesson I Learned About Perfecting Baseboards
One of the most enduring lessons I found was that no matter how straightforward a project seems, ignoring wall irregularities and wall-scribing techniques can lead to persistent gaps. Realizing that precision in measuring and customizing cuts improves the final look more than just rushing through the process was a game-changer. I’ve learned that patience and attention to detail in corner fitting pay off in professional results.
Tools That Made My Baseboard Installations Foolproof
Investing in a quality power miter saw transformed my approach to trim work. Paired with a flexible scribing tool, I could contour baseboards to wavy walls seamlessly. Using a pneumatic nailer and a good quality caulk enhanced the durability and appearance of my installations. These tools are worth every penny and are the backbone of achieving flawless, gap-free baseboards. For expert tips, check out this guide.
How I Overcame My Biggest Baseboard Challenges
Patience with minor adjustments and understanding the importance of leaving expansion gaps around flooring prevented future fixes and costly repairs. Being meticulous about measuring multiple points and customizing cuts for uneven walls made the biggest difference. These lessons taught me that sometimes the smallest tweaks yield the most professional-looking results, saving time and effort in the long run. For more insights, visit this resource.
Insider Wisdom About Flawless Baseboard Fitting
- Don’t rush your measurements—double-check to avoid misaligned cuts that cause gaps.
- Master scribing techniques early—allowing your baseboards to conform to irregular walls is crucial.
- Use quality tools and materials; cheap saws and caulk often lead to imperfect results.
- Be patient during installation—small adjustments can make a big difference in the final look.
Next Steps for Your Baseboard Journey
Armed with these lessons and tools, you’re well on your way to achieving professional-looking baseboards that enhance your home’s interior. Remember, perfecting your skills involves patience and practice. Whether you’re addressing gaps or exploring new trim styles, the key is attention to detail and utilizing the right techniques. Interested in elevating your entire renovation game? Consider exploring future design trends or seeking personalized advice through consultation.
![Stop Shower Floor Puddles: 3 Slope Fixes for 2026 [Tested]](https://tilecraftsmens.com/wp-content/uploads/2026/03/Stop-Shower-Floor-Puddles-3-Slope-Fixes-for-2026-Tested-150x150.jpeg)