I’ll never forget the first time I tackled a baseboard installation that seemed to go off without a hitch—until I stepped back and noticed those tiny gaps and crooked lines glaring right at me. It was one of those lightbulb moments where I realized I had overlooked the little details that make a huge difference in the finished look. If you’ve ever experienced that sinking feeling of seeing your carefully nailed baseboards misalign or pop out after painting, you’re not alone.
Why Seamless Baseboards Can Be Trickier Than They Look
Baseboards are more than just decorative trims; they frame your rooms and can elevate the entire aesthetic when installed perfectly. But achieving that seamless, flawless finish? That’s an art and a science. Early in my DIY journey, I made the mistake of relying solely on standard nail placement, which often led to stubborn gaps and uneven lines. Did you know that improper nail hiding or misaligned nails can cause baseboards to look crooked over time? According to expert carpenters, small adjustments in nail technique can dramatically improve the outcome—saving you from future touch-ups or replacements. (Learn more about creating a clean finish with [this guide](https://tilecraftsmens.com/baseboard-trends-in-2025-fresh-styles-for-every-room).)
Is All the Fuss About Hidden Nails Worth It?
Maybe you’re skeptical. I was too! I used to think a few nails here and there wouldn’t affect much, but the truth is, how you hide those nail heads matters. I used to hastily hammer in nails without sinking them properly or filling the holes effectively, which led to issues down the line. This mistake made me realize that mastering a few secret tricks can make your baseboards look professionally finished—without the expense. Ready to learn the tricks that will make your 2026 baseboard projects flawless? Let’s dive into the four hidden nail hacks that can transform your work from good to stunning.
Prepare Your Tools and Workspace Correctly
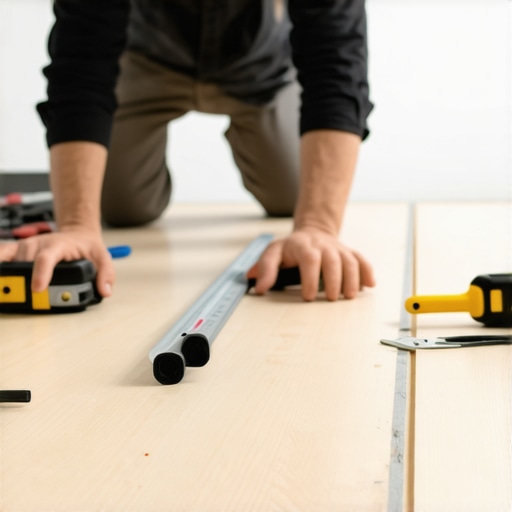
Before starting, gather all necessary tools: a quality miter saw, nail gun, filling compound, level, measuring tape, and a pencil. Clear the workspace and protect your floors with drop cloths. I remember the first time I neglected this, spilling paint and losing time—preparation saves headaches and ensures precision from the get-go.
Measure and Cut Precisely
Accurate measurements are key. Measure wall lengths twice and add a few centimeters for adjustments. Use a miter saw to make clean, accurate cuts—miter joints for corners and straight cuts for walls. I once tried to eyeball my cuts, which led to gaps. Using a level to confirm that the baseboards sit evenly can prevent crooked lines later on. Revisit your measurements before the final cut to avoid costly mistakes.
Positioning the Baseboards
Align the baseboards on the wall, checking for level and fit. Use painter’s tape to temporarily hold pieces and mark positions. This step is like fitting pieces of a puzzle; patience here ensures a seamless line. Remember, fitting baseboards around obstacles like outlets require careful scribing and marking.
Practicing Wall Scribing
Walls are rarely perfectly straight. Use a compass or a flexible corner template to trace uneven edges onto the baseboard, then cut along the line. I once spent extra time scribing a single piece to fit a curved wall perfectly, which paid off with a professional look.
Nailing Without Damage
Sinking nails slightly below the surface prevents future cracking. Use a nail set to tap the nails below the surface, then fill with high-quality wood filler. I once hammered directly and ended up with bulges that cracked months later. To avoid this, pre-drill nail holes on the back of the board for tight fits—especially important on thicker materials.
Hiding Nail Heads Seamlessly
Apply a quick-drying filler or wood putty over nail heads, then sand smooth. For a more concealed finish, consider concealed nails or using a nail gun designed for hidden nailing. If the nails are not sunk properly, gaps can form over time, ruining the look. Once the filler dries, sand lightly to match the surface texture—this step makes a noticeable difference in professionalism.
Finishing Touches for Professional Results
Caulk the gaps between wall and baseboard with painter’s caulk to create a seamless transition. After sanding and filling, wipe down the baseboards to remove dust. Applying a coat of paint or stain enhances the appearance; use painter’s tape to keep edges sharp. This final step turns a good installation into a stunning one, but rushing here causes imperfections. I learned to take my time, especially at corners, to ensure the edges meet perfectly.
Perfecting Corners with Accurate Miter Cuts
Join corners with precise miter cuts—measure twice, cut once. Use a corner clamp for tight joints and fill any minor gaps with wood filler. I once tried to connect two mitered pieces with a quick dab of glue; it misaligned slightly, creating a visible seam. Patience and proper tools make all the difference.
Inspect, Adjust, and Enjoy
Walk the entire installation, checking for level, gaps, and crooked lines. Use a level and straightedge to verify. Making small adjustments at this stage prevents future issues, such as baseboards pulling away or gaps widening. After completing these steps, your baseboards will have a polished, professional look that elevates the entire room’s aesthetic. These core techniques form the backbone of a flawless finish and are applicable whether you’re installing baseboards, molding, or even tackling complex projects like shower renovations or flooring upgrades. For techniques on other upgrades, explore our detailed guides through baseboard trends in 2025 or home flooring installation tips.
 When it comes to DIY home improvement, many enthusiasts assume that mastering the basics guarantees perfect results. However, even seasoned DIYers often overlook nuanced mistakes that can lead to long-term issues. Contrary to popular belief, rushing through the installation process or relying solely on standard techniques can introduce subtle flaws that compromise the finish and durability of your projects. For example, with flooring installation, the misconception that alignment is solely about straight lines ignores the importance of controlling moisture levels and subfloor stability, which experts like those cited in our flooring guide emphasize as critical. In showers, the myth that sealing grout is enough to prevent leaks neglects the significance of proper slope and waterproofing membrane application, a nuance I’ve seen overlooked repeatedly. This can cause costly water damage over time. When installing baseboards, many assume that perfect miter cuts alone suffice, but the real secret lies in wall scribing and understanding wall irregularities—details that separate professional results from average craftsmanship. Ignoring these intricacies can cause gaps or uneven lines, which become more noticeable as materials settle or shift. A common trap is underestimating the impact of environmental factors like humidity on materials, leading to warping or gaps in flooring and baseboards. For advanced DIYers aiming for perfection, paying attention to these lesser-known nuances makes the difference. An insightful study published by the National Association of Home Builders highlights that small attention to detail during installation can dramatically extend the lifespan of finishes and prevent costly repairs. So, how can you avoid these pitfalls? It starts with thorough preparation, knowledge of materials, and understanding a project’s underlying mechanics. For more expert tips on installing flooring, showers, or baseboards, explore our comprehensive guides, and always remember—perfection lies in the details. Have you ever fallen into this trap? Let me know in the comments.
Keeping Your Home Projects Running Smoothly with the Right Tools
To ensure your installation work stays looking professional over time, investing in high-quality, specific tools is essential. For baseboards, I recommend using a precision miter saw with a laser guide. This tool helps me make accurate cuts effortlessly, especially when dealing with intricate corner joints or scribing around uneven walls. A nail gun with adjustable power settings speeds up the process while minimizing damage, and I use a magnetic nail set to sink nails neatly below the surface, allowing for a seamless paint finish. When working on flooring, a moisture meter becomes invaluable, helping me monitor humidity levels that impact expansion or contraction. This kind of proactive maintenance tool can extend the lifespan of your flooring, preventing warping or gaps. Additionally, a good quality caulking gun with quick-release features makes finishing edges and sealing gaps more controlled and less messy. I personally prefer models with ergonomic handles and precision nozzles, ensuring accuracy and comfort during long sessions.
Adopting Software to Simplify Long-Term Upkeep
Beyond physical tools, digital solutions like home maintenance apps can help you schedule regular inspections—whether it’s checking for loose baseboard nails, assessing grout integrity in showers, or evaluating flooring stability. Using reminders for annual checks can catch small issues before they become costly repairs. For instance, consistent cleaning and inspection of shower seals using specific silicone-based cleaners can prevent leaks, as highlighted in our shower renovation guide. Keeping an organized digital log of maintenance tasks enables a proactive approach, saving time and money in the long run.
Considering Future Trends in Home Maintenance Tools
Looking ahead, smart tools that integrate sensors and IoT technology are poised to revolutionize how we maintain our homes. Imagine a smart moisture sensor installed in your bathroom’s subfloor that alerts you via smartphone if humidity levels rise unexpectedly—potentially indicating leaks or mold risks. This trend is expanding as manufacturers develop more user-friendly, affordable solutions that empower homeowners to stay vigilant without constant manual checks.
How do I keep my installations in top shape over time?
Regular maintenance is key. Incorporate routine inspections of grout in showers, baseboard seals, and flooring joints. Use tools like a multi-tool oscillating blade for precise repairs, or a digital moisture meter to monitor environmental conditions affecting your installations. These methods prevent small issues from turning into expensive repairs, ensuring your home remains beautiful and functional for years. For tailored advice, don’t hesitate to reach out to us or explore our detailed guides on flooring and shower upkeep. Remember, a little investment and regular attention go a long way—try adopting a maintenance routine with the tools mentioned, and you’ll be surprised at how effortless it becomes to keep your home projects performing their best long-term. Experts like the National Association of Home Builders underscore the importance of periodic inspections and the right equipment for longevity.
What I Wish I Knew About Baseboard Precision Early On
One of the most valuable lessons I’ve learned is that patience and attention to detail are more crucial than tools alone. Rushing through measurements or neglecting wall irregularities can turn a straightforward project into a series of frustrating corrections. The true mastery of seamless baseboards lies in embracing meticulous wall scribing and understanding the subtle quirks of your space. Remember, embracing the imperfections of your walls and adjusting accordingly can save you time and ensure a truly professional finish.
Tools and Resources That Elevate DIY Baseboard Projects
Over time, I’ve come to rely on essential tools that make a real difference. A laser level ensures your lines are perfectly straight, while a high-quality miter saw with a laser guide makes precise cuts effortless. For wall irregularities, a wall scribing tool can be a game-changer, allowing you to adapt baseboards flawlessly around uneven surfaces. Investing in these tools has transformed my DIY approach from hit-or-miss to consistently professional.
Your Dream Home Starts with Small Wins
Remember, every successful baseboard installation is a step closer to a polished, inviting space. The real magic is in the details—sanding smoothly, applying caulk precisely, and choosing the right finishes. Don’t shy away from trying these techniques; your home deserves that extra layer of care. With consistent effort and the right knowledge, you’ll find that your projects become more satisfying each time, boosting not just your skills but your confidence in tackling bigger renovations. You’re capable of transforming your space—start today, and enjoy every moment of the process!
What’s your biggest challenge with baseboard installation? Share your thoughts below, and let’s get the conversation going!