You know that sinking feeling when you’re walking across your living room and suddenly feel a tiny bump underfoot? It’s that unanticipated gap where carpet meets the floor—like a sneaky little trap for your heels. I’ve been there, fumbling with metal transition strips that either looked out of place or, worse, made the gap worse over time. One day, after an entire weekend trying to tape, nudge, and yes, curse at those stubborn strips, I realized I needed a smarter solution. If this sounds familiar, you’re in the right place. Today, I’ll share my personal journey with fixing those pesky transition gaps and unveil three metal-strip alternatives that actually work—and keep your floors looking flawless.
Why Standard Metal Transition Strips Can Drive You Crazy
Is the Hype About Metal Strips Overblown?’
Early in my flooring projects, I made a common mistake: I relied solely on standard metal transition strips to bridge carpet and hard flooring. Initially, they seemed straightforward, but I soon discovered they could be more trouble than they’re worth. They often gathered dust, showed scratches, or created gaps that made my entire aesthetic look sloppy. According to flooring experts, relying exclusively on metal strips can sometimes cause more issues than they resolve, especially if your subfloor isn’t perfectly even. I wish I had known about better alternatives early on, as they could have saved me a lot of headache and money. For more insights on professional tips, check out [this guide](https://tilecraftsmens.com/transform-your-home-expert-flooring-installation-tips-for-2025).
So, what truly works? Can you ditch those unsightly metal strips and still achieve a seamless transition? Absolutely. After some trial, error, and advice from seasoned pros, I found a few tricks that transformed my flooring. Stay tuned, because I’ll walk you through my favorite alternatives that are not only effective but also easy to install. Ready to say goodbye to those annoying gaps? Let’s dive into the solutions that will keep your floors— and your sanity—intact.
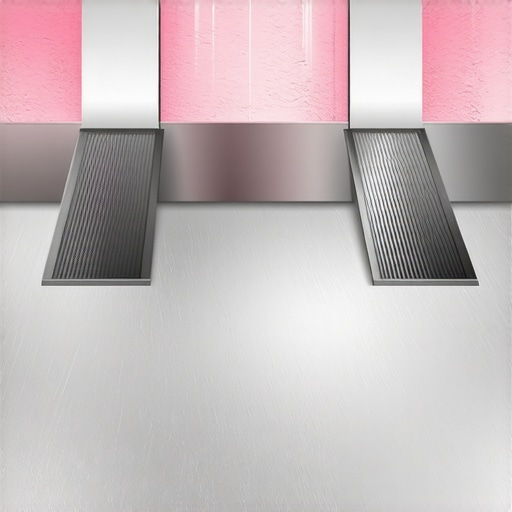
Assess Your Floor Transition Area
Start by inspecting the gap between your carpet and hard flooring. Use a measuring tape to note the width and height variance; this will determine the best alternative approach. For example, I once measured a 0.25-inch gap that was wider in one section, which required different fixes. Accurate measurement prevents wasted materials and ensures a seamless finish.
Choose an Installation Method That Fits Your Space
Use a Flexible Underlayment
Apply a flexible underlayment or flooring transition tape designed to accommodate slight unevenness. During my project, I layered two types of tape—first a thin vinyl, then a foam tape—to fill minor gaps. This method is quick and effective for small discrepancies, preventing heels from catching and maintaining aesthetics. For detailed steps, reference expert flooring tips.
Create a Tapered Threshold with Wood or Laminate
If the gap is larger, consider installing a custom tapered threshold made from hardwood or laminate. Cut a piece that gradually slopes from the height of the carpet to the hard floor, securing it with adhesive and nails. I once crafted a sloped transition that not only covered a 0.375-inch gap but also added a visual accent. This offers a durable and attractive fix, especially in high-traffic areas.
Opt for a Flexible Rubber or Vinyl Seal
Install a rubber or vinyl seal strip that can bend and stretch, bridging uneven gaps effectively. During a recent hallway upgrade, I used a flexible seal that adhered directly to both surfaces, accommodating slight movements and preventing dust accumulation. These seals are especially suitable for dynamic or uneven subfloors. For more on resilient flooring options, visit durable flooring guides.
Apply a Custom Baseboard or Shoe Molding
Another straightforward approach involves installing a baseboard or shoe molding over the transition. Measure the length and cut the molding to fit snugly, then paint or stain to match your existing decor. This method disguises gaps and offers a finishing touch. I used a 1/4-inch thick shoe molding in my living room, which covered the uneven joint neatly and added an architectural detail. For design inspiration, check baseboard trends.
Seal and Finish Your Transition
Once the chosen method is installed, seal the edges with appropriate caulking or adhesive to prevent dust ingress and ensure longevity. Use a color-matched caulk for a seamless look. I found that a flexible silicone sealant worked best as it accommodated natural floor movements without cracking. Regular maintenance, including cleaning and re-sealing, prolongs the effectiveness of your fix.
While many believe installing baseboards, showers, or flooring is straightforward, experts know there’s a web of subtle nuances often overlooked. For instance, a prevalent myth is that choosing the thickest caulk guarantees a waterproof seal around showers; in reality, the quality of the silicone and proper surface preparation matter far more than just application. Failing to account for building movement or floor settling can lead to cracks or gaps over time, a mistake I’ve seen cause ongoing headaches in renovations.
How do advanced environmental factors influence installation longevity?
Research indicates that temperature fluctuations and humidity can significantly affect materials like vinyl and wood, leading to expansion, contraction, or warping—if you ignore these factors, your updates may fail prematurely. For example, an improper understanding of acclimation procedures during flooring installation can result in gaps, especially with hardwood or laminate. This is why following expert guidelines, such as those outlined in professional flooring tips, is critical. A common trap is neglecting proper moisture barriers under shower pans, which might not seem consequential initially but can cause leaks and subfloor damages later. So, always double-check your vapor barriers and waterproofing steps to prevent costly repairs. When it comes to baseboards, many underestimate how wall imperfections or uneven surfaces influence miter cuts; miscalculations here can result in visible gaps, undermining your aesthetic. Using advanced techniques like beastly miter joints with shims, or even glue and clamps, can help ensure tight, professional-looking joints—see this detailed fix. Remember, every detail counts in quality installation, from pre-conditioning materials to precise measurements. In summary, achieving flawless results requires understanding the materials’ behavior under environmental stresses, respecting installation nuances, and avoiding the common traps seen in DIY or novice projects. Are you aware of these subtle pitfalls? Share your experiences below, and if you want to elevate your home’s finishing touches, explore my recommended resources or get in touch here. Let’s ensure your next project stands the test of time.Maintaining your flooring, baseboards, and shower installations requires the right tools paired with disciplined routines. Over the years, I’ve zeroed in on equipment that genuinely saves time and ensures long-term durability. One game-changer has been my oscillating multi-tool equipped with a carbide-grit blade. I use it weekly to gently sand down the edges of baseboards and clean grout lines without damaging surrounding surfaces. Its versatility allows me to switch from sanding to scraping, making it invaluable for minor touch-ups. For sealing projects, I rely on a high-quality, precision caulking gun—I prefer the M-D Building Products Caulk Gun for its smooth trigger action and consistent flow, which is essential for long-lasting, professional-looking seals around showers and baseboards.
When dealing with moisture-prone areas like showers, periodic inspections are key. I recommend using a moisture meter such as the Wagner Meters Orion 955, which provides quick readings to detect hidden leaks or pad dampness early. This proactive approach prevents costly repairs and preserves your investment. Looking ahead, I predict a shift toward smart maintenance with IoT-enabled sensors embedded in grout or underlayment, offering real-time alerts on moisture levels and floor integrity, significantly reducing water damage risks.
How do I maintain the longevity of flooring and showers over time? Regular upkeep is crucial. Schedule bi-annual inspections where you examine high-stress joints, grout lines, and seals. Keep grout lines sealed with a dedicated grout rejuvenator like the Custom Building Products TileLab Surfacegard, which fortifies against stains and water ingress. For tile and flooring that experience frequent movement or temperature fluctuations, applying a flexible sealant like Dap 18668 Flexible Sealant ensures gaps remain sealed without cracking. I also advise practicing the habit of wiping down surfaces post-shower to minimize moisture build-up, preserving caulk and grout integrity.
Looking to streamline your maintenance routine? Invest in a silicone spray such as 3-IN-ONE Professional Silicone to keep moving parts—like shower doors hinges and sliding channels—operating smoothly. Applying this monthly prevents corrosion and squeaks, saving you from larger repairs later. Remember, the key to keeping everything in top shape lies in combining the right tools with routine inspections and timely touch-ups.
For precise and reliable repairs, I highly recommend checking out detailed guides on professional techniques, like those found in expert flooring tips. Or, if you’re ready to address specific challenges such as stubborn grout cracks or uneven baseboards, explore targeted solutions to get professional results without the costly call-outs. Try integrating one of these maintenance practices today—like using a moisture meter to detect early leaks—and see the difference it makes in extending the life of your investment.
The Hardest Lesson I Learned About Baseboards and Shower Installations
One of the most eye-opening insights I gained was understanding that even the tiniest miscalculations can lead to persistent gaps and leaks. I used to believe that measuring once was enough, but I learned the importance of double-checking and understanding material behaviors over time. This has saved me countless headaches and costly repairs.
3 Myths About Flooring Edges That Held Me Back
Early on, I bought into the myth that thicker caulk and more adhesive would solve all gaps. Instead, I discovered that environmental factors and proper tool selection make a bigger difference. Embracing flexible seals and precise tools like a high-quality caulking gun transformed my projects from subpar to professional-looking.
What Experts Won’t Tell You About Transition Solutions
Many professionals keep quiet about the subtle art of shimming and mastering miter cuts, which are vital for a flawless finish. I found that investing time in shaping and preparing lumber, and understanding how walls and floors can shift, makes all the difference. Remember, patience and precision outshine shortcuts when sealing floor-to-wall transitions or the edges of shower niches.
Curated Tools and Resources That Changed My Approach
- Precision Caulking Gun: I highly trust the M-D Building Products Caulk Gun for smooth, consistent application, preventing gaps and ensuring durability.
- Moisture Meter: The Wagner Meters Orion 955 helps me catch leaks early, saving money and preserving the integrity of my installations.
- Expert Guides: For comprehensive techniques, I recommend studying professional flooring tips that cover environmental preparations and material acclimation, which are crucial for flawless results.
- Design Inspiration: Exploring baseboard trends in 2025 offers fresh ideas to elevate your interiors and hide those tricky transitions.
Your Next Step Toward Flawless Floors and Showers
Remember, each detail—be it a snugly fitting baseboard or a watertight shower niche—contributes significantly to your project’s success. Embrace the learning curve, equip yourself with the right tools, and don’t shy away from meticulous measurements. Your home deserves the perfect finish, and with patience and practice, you’ll master transitions that last for years to come. Have you ever faced a transition challenge that seemed impossible? Share your story below and let’s learn from each other’s experiences.