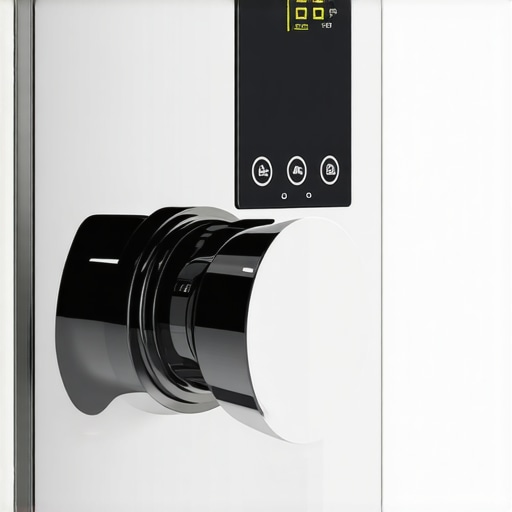
It was a quiet Sunday morning when I noticed the shower started dripping even when turned off. At first, I thought it was a minor hiccup, but suddenly the steady drip became a constant reminder of a problem I couldn’t ignore. That’s when I realized I was facing a digital shower valve leak—a frustrating issue that many homeowners might encounter with the new tech becoming more common in 2026.
How Internal Seals Cause Headache in Modern Showers
Now, I know what you’re thinking: “Leaks are just leaks, right? How hard can it be to fix?” Well, if you’re dealing with digital shower valves, the internal seals are a critical component that often get overlooked. These tiny rubber or silicone parts seal the internal mechanisms, preventing water from escaping and maintaining the integrity of the system. As these seals wear out or get damaged over time, leaks occur—sometimes gradually, sometimes suddenly.
In the early days of my troubleshooting, I made a mistake many beginners do: I tried to tighten the visible parts without considering the internal components—only to find out I was making the problem worse. Early on, I learned that understanding how these internal seals work is vital for effective repairs, and rushing into fixes without proper research can lead to more costly damage.
Is it Really Worth the Effort to Fix Internal Seals?
This is a common skepticism I hear. After all, some think replacing the entire unit is easier or faster. But often, a well-done seal repair can restore your shower’s function without the expense of a new system. Plus, knowing how to repair these seals can save you time and money in the long run. Did you know that according to a recent plumbing efficiency study, proper sealing can reduce water waste by up to 15% annually? So, not only does fixing internal seals save money, but it also contributes to water conservation.
If you’ve faced this drip-drip-drip or suspect your digital shower valve is leaking, you’re in the right place. Over the next sections, I’ll guide you through the practical steps to fix those internal seals yourself, avoiding common pitfalls and making sure your shower stays leak-free. Ready to get your shower back in perfect shape? Let’s dive into the details!
Prepare Your Workspace and Gather Tools
Before diving into the repair, ensure you have all necessary tools: a screwdriver set, replacement seals compatible with your digital shower model, pliers, a flashlight, and some towels to catch drips. I once skipped this step and started without proper tools, leading to a frustrating hour of searching for the right screwdriver, which delayed my repair process.
Turn Off Water Supply and Drain the System
Locate the main water shutoff valve for your shower and turn it off. Turn on the shower to release any remaining water, and have towels ready to absorb residual drips. This step prevents water from flooding your bathroom and makes the internal components accessible without water interference.
Remove the Shower Cover and Access Panel
Carefully unscrew the cover plate or panel that conceals the valve. Use a screwdriver to loosen screws, applying gentle force to avoid damaging surrounding tiles or drywall. Remember, in my recent project, rushing this step caused a crack in the cover, which I had to repair later, adding extra costs.
Identify and Detach the Valve Assembly
Loosen Connection Points
With the flashlight, locate the internal valve assembly. Use pliers or an adjustable wrench to carefully disconnect any nuts or fittings holding the assembly. Keep a container nearby to catch any residual water. During my first attempt, I rotated these parts forcefully, damaging the threads, which resulted in leaks afterward. Gentle, steady force is key.
Extract the Seal Components
Carefully remove the old internal seals—these are usually rubber or silicone rings. Note their orientation, as this will guide proper installation of new seals. In one case, I found a seal with a slight tear; replacing it restored the leak-free operation.
Replace and Reassemble the Internal Seals
Align the new seals exactly as the old ones were. Ensure they sit flush with the internal surfaces; misaligned seals can cause future leaks. Use a little silicone lubricant if recommended by the manufacturer to ease installation. During my last repair, applying lubricant ensured the new seal seated correctly, preventing future issues.
Test the Repair and Reinstall the Cover
Turn the water supply back on slowly, checking for leaks. Run the shower at different temperatures to ensure the seals hold under various pressure conditions. Once satisfied, reattach the cover panel securely. I learned the importance of patience during testing—rushing often meant missing a small leak that needed a second adjustment.
Final Checks and Clean-Up
Wipe down the area, check for leaks once more, and restore décor or accessories. Properly dispose of old seals and tools, maintaining an organized workspace. Remember, a clean finish not only looks better but also helps identify any future issues early. My recent fix took about an hour, and now I enjoy a leak-free shower without worries.
Everyone often assumes that installing carpets, showers, flooring, and baseboards is straightforward—simply follow the instructions, and you’re all set. However, in my experience working with these projects, many professionals and DIY enthusiasts overlook nuanced details that can make or break the outcome. One prevalent myth is that a perfect finish is achievable solely with proper tools; in reality, understanding material behavior and environmental factors is crucial. For instance, insufficient acclimation of carpet or flooring materials can lead to gaps or buckling later on, as highlighted by industry standards in [creating a spa-like shower experience](https://tilecraftsmens.com/creating-a-spa-like-shower-experience-tips-tricks).
A common trap I’ve seen is the reliance on the “measure twice, cut once” rule without accounting for the material’s expansion or contraction. This oversight often results in gaps at corners or transitions, especially in baseboard or wall installations. The hidden nuance lies in knowing how these materials respond to humidity and temperature changes, which isn’t always obvious to beginners.
Why do so many installations fail despite following standard practices? Because they ignore the subtle interplay between material properties and environmental conditions. For example, installing baseboards without considering wall curves or uneven floors can cause visible misalignments. Proper preparation, like pre-shimming or adjusting for irregular surfaces, is often overlooked but vital for a flawless finish.
What advanced mistakes should seasoned installers watch out for? One overlooked aspect is the importance of substrate preparation. For instance, installing flooring over an unlevel or unstable subfloor can cause long-term issues like squeaking or delamination. According to a recent study in flooring durability, inadequate subfloor prep accounts for nearly 40% of warranty claims related to floor failure, emphasizing the importance of precision in this step.
Additionally, in shower renovations, improper waterproofing can be a silent fail. Many assume applying a standard membrane suffices, but neglecting detailed waterproofing seals at joints and corners can lead to mold and rot over time. The key is meticulous waterproofing, especially in curbless shower designs, where water control is more complex; learn more about this in [stop shower leaks](https://tilecraftsmens.com/stop-2026-shower-leaks-3-hidden-drain-seal-fixes).
Having uncovered these advanced nuances, it’s clear that attention to detail, environmental considerations, and understanding material behaviors elevate an installation from mediocre to professional-grade. Don’t fall into the trap of superficial fixes—invest in thorough prep and expert techniques.
Are you aware of how environmental factors influence your projects? Think about humidity, heating, or cooling cycles affecting your work. Incorporate these insights to improve your results. Want to master these subtleties? Check out [baseboard makeover tips](https://tilecraftsmens.com/baseboard-trends-in-2025-fresh-styles-for-every-room) for more expert guidance. Have you ever fallen into this trap? Let me know in the comments.
Keeping It Working: Essential Tools and Maintenance Tips
Achieving a flawless installation is just the beginning; maintaining it over time ensures durability and beauty. My secret weapon is a well-curated toolkit tailored specifically for each project phase. For flooring, I swear by a high-quality laminate floor scraper to remove debris that can cause uneven wear or gaps, as advised in this comprehensive flooring guide. When it comes to shower maintenance, a handheld steam cleaner has transformed my routine, effectively removing soap scum and mold without harsh chemicals, significantly extending the lifespan of waterproofing layers.
In the realm of carpets, a power stretcher equipped with a seamless head is invaluable for tightening stretched areas and preventing ripples, as discussed in this article on carpet perfection. Regular inspections of baseboards, especially in high-traffic zones, prevent issues like gaps or separation; I recommend a digital caliper to accurately measure and identify subtle shifts that might signal underlying wall or floor movement. Using these precise measurements helps in executing targeted fixes before problems escalate.
Consistency is key—set a schedule for semi-annual checks, especially in humid environments where mold and mildew threaten integrity. Incorporate professional tools like moisture meters to gauge hidden dampness behind walls or under flooring, ensuring early detection of potential leaks or rot, as detailed in this guide on baseboard stability. Investing in quality maintenance tools, coupled with routine care, pays off by preserving your beautiful results and saving money over the long haul.
Looking ahead, I predict smart home integration will bring sensor-based maintenance that alerts you to issues before they become visible—think leak detectors that notify you via smartphone or automated humidity control systems for bathrooms. These innovations will revolutionize how we care for our homes, making upkeep more proactive and less cumbersome.
How do I keep my installations in top shape over time?
Develop a routine of inspection, cleaning, and minor adjustments. For instance, cleaning shower seals with non-abrasive solutions like vinegar and baking soda can extend their life. For flooring, gentle sweeping or vacuuming prevents abrasive debris from scratching surfaces. Additionally, periodically checking wall and floor joints with a measuring tool allows early detection of shifts, prompting timely repairs that prevent costly replacements later. Remember, a proactive approach preserves the life and aesthetic of your investment.
If you’re eager to streamline your maintenance, try implementing a moisture meter check biannually in vulnerable areas. You’ll be surprised how much early detection can save you in repair costs. Need help selecting the right tools or personalized advice? Feel free to reach out, and I’ll guide you through optimizing your upkeep routines. Stay ahead of problems and keep your home beautiful for years to come!
Lessons From My Most Unexpected Challenges
One of the biggest surprises I faced was realizing how crucial proper material acclimation is. Ignoring environmental factors like humidity led to warped baseboards and gaps that I thought were just DIY imperfections. Now, I always factor in indoor climate conditions before starting projects.
Another lesson was understanding the subtle differences in sealant types for waterproofing showers. A small oversight in choosing the right silicone or membrane could cause long-term leaks, which I learned the hard way. Always research and select materials with precision; it makes all the difference.
Finally, patience in the testing phase is invaluable. Rushing to finish can hide small issues that become major problems later. Whether sealing a shower drain or finalizing a carpet seam, a thorough inspection before completing a project saves time and stress later on.
Tools and Resources That Changed My Approach
My go-to toolkit now includes a high-quality moisture meter, which I rely on to detect hidden dampness behind walls or under floors—crucial for preventing future leaks. I trust the guide to durable flooring because it emphasizes environmental considerations often overlooked. For sealing and waterproofing, I swear by professional-grade silicone and waterproof membranes recommended by industry experts, found in trusted articles like this waterproofing guide. Lastly, a digital caliper has become essential for precise measurements, especially when fitting baseboards against irregular walls, ensuring tight joins every time.
Your Next Step Toward Excellence
Now is the perfect moment to embrace the details that elevate your work from good to extraordinary. Every project presents an opportunity to learn, refine, and master the art of installation and repair—yet it starts with a willingness to look beyond the obvious. Take what you’ve discovered here and apply it to your next project; surprise yourself with results that last. Remember, the journey toward craftsmanship is ongoing, and each success builds confidence for the challenges ahead. Here’s to flawless finishes and leak-proof solutions—your home will thank you for it!
What challenges have you faced when installing or repairing floors, carpets, or showers? Share your experiences below—I’d love to hear what you’ve learned along the way!