I remember the first time I saw a home renovation trend that left me scratching my head—carpet laid directly over sleek, modern tile. At first glance, it seemed like an easy, budget-friendly shortcut. But after a few years of experience, I realized that this quick fix often leads to more headaches than benefits. I had to learn the hard way, making mistakes that cost me time, money, and frustration.
If you’re contemplating this carpet-over-tile hack for your upcoming project, you’re not alone. Many homeowners and even some contractors fall into the trap of thinking this approach is a quick fix to update a space without the hassle of tearing out old flooring. But I promise, today we’ll explore why this shortcut might be more trouble than it’s worth—and how to avoid it.
Why Rushing Into Carpet Over Tile Could Backfire
Here’s the deal: installing carpet directly over tile might seem like a time-saver, but it often creates unforeseen issues that can haunt you down the line. Uneven surfaces, uneven temperature regulation, and problems with adhesion are just a few pitfalls. I once trusted a contractor who convinced me it would be temporary—six months tops. Two years later, I was battling wrinkled carpet, uneven seams, and persistent odors. Not exactly the upgrade I had envisioned.
Is Carpet Over Tile Actually Worth the Hype?
Early in my career, I mistakenly believed that adding a layer of carpet would mask imperfect tile surfaces. I thought it would make the room cozy and hide flaws. But I underestimated the importance of proper surface preparation and underestimated how poor these shortcuts could be in the long run. Research shows that improper installation can lead to material failure and costly repairs, sometimes requiring complete flooring removal (source: expert flooring tips). Learning from my mistake, I now always recommend consulting professionals who focus on durable, properly installed flooring solutions.
So, if you’re considering this quick fix, ask yourself: have I really prepared my surface properly? Or am I just delaying a more permanent, better-looking solution? Next, I’ll guide you through some practical tips that will help you make smarter choices and ensure your flooring lasts for years to come.
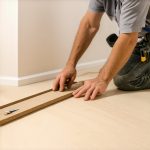
Preparing Your Surface
Start by thoroughly cleaning your existing tile to remove dirt, grease, and debris. Use a mixture of warm water and mild detergent, scrubbing with a stiff-bristled brush. Once clean, let the surface dry completely to prevent mold and ensure proper adhesion. Then, inspect for uneven spots or loose tiles; these must be fixed or leveled with a self-leveling compound, much like smoothing out wrinkles in a shirt before sewing. During my last project, I had to apply a leveling compound to a corner that was significantly uneven, which ensured my new carpet would lay flat without ripples. Proper surface prep prevents future problems like bubbling or peeling that can turn into costly repairs.
Why Your Assumptions About Baseboards Can Hurt Your Design
Many homeowners assume that choosing trendy baseboard styles is merely about aesthetics, but in reality, the nuances of installation can make or break the look—and the durability. For instance, updating your baseboards isn’t just swapping out old trim; it requires precise measurement, scribing, and understanding wall irregularities. Overlooking these details leads to gaps, uneven cuts, and an unprofessional finish—mistakes that can be costly to fix later.
Misconceptions About Flooring Installation Speed
There’s a common myth that rushing flooring installation saves time and money. However, expert advice indicates that hurrying often results in errors like uneven surfaces, improper adhesion, or inadequate sealing, all of which compromise the floor’s longevity. An advanced mistake is neglecting acclimation time for flooring materials, especially for hardwood or vinyl planks, leading to warping or gaps down the road. Precision, patience, and proper preparation are essential to avoid these pitfalls and achieve a flawless finish.
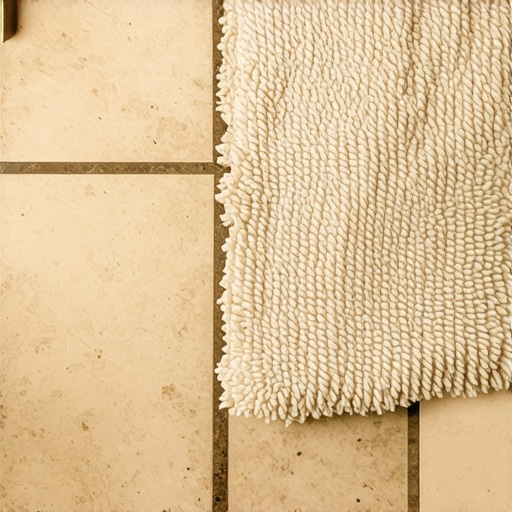
Common Carpet Install Errors That Undermine Comfort
Many believe that a tight, wrinkle-free carpet is just about stretching. But the reality is that improper padding selection, insufficient tack strip installation, or neglecting seams can cause peaks, valleys, or even early wear. A professional installation involves precise tensioning, seamless seams, and choosing the right underlayment to ensure comfort and durability. Overlooking these steps leaves homeowners vulnerable to costly repairs and unsightly wrinkles, especially in high-traffic areas.
Showers Sometimes Become Water Time Bombs
There’s a myth that modern tiles and sealants make waterproofing a breeze. While advancements are significant, improper waterproofing techniques still lead to leaks and mold issues. For example, neglecting to waterproof behind shower pans or not properly sealing grout lines can silently cause water damage over time. A deliberate, detailed waterproofing process is key, including slope confirmation and using the right waterproof membranes. Skipping these nuances invites mold, rot, and expensive repairs, sometimes years down the line.
What Do Professionals Know That You Might Not?
For the advanced homeowner, understanding that small details matter can save thousands. For example, in flooring, the difference between acceptable and perfect installation often hinges on edge stretching and expansion gaps—things that an amateur might overlook but seasoned pros meticulously execute. As shown in studies like those from the expert guides, these subtle techniques significantly extend durability and maintain aesthetic appeal. Have you ever fallen into this trap? Let me know in the comments.
Investing in the Right Tools for Durable Results
Durability in flooring and shower installations isn’t just about quality materials; the tools you use play an equally vital role. I personally swear by a high-torque corded drill when installing baseboards, especially for upholstery nails or screws, because it provides consistent power and minimizes slip-ups. For precise cutting of tiles and backer boards, a wet saw with a diamond blade is indispensable—I’ve found that it produces cleaner cuts and reduces dust compared to traditional manual tools. When it comes to sealing shower grout lines or caulking, an oscillating multi-tool with a fine blade allows me to reach corners effortlessly, ensuring a tight, professional finish. Remember, investing in quality tools pays off over time, reducing repairs and rework.
Tools I Trust for Everyday Maintenance
Keeping your flooring and showers in tip-top shape requires routine care and the right equipment. For maintaining tile grout, I recommend a steam cleaner, which loosens grime effectively without harsh chemicals and can extend grout life. A rubber grout float is vital for reapplying sealants or patching minor cracks—I’ve used mine for years with consistent success. For carpets, a powerful vacuum with adjustable height settings helps prevent embedment of dirt and maintains plushness; I prefer models that include HEPA filters to trap allergens, promoting healthier indoor air quality. Regularly inspecting seals around showers with a moisture meter helps catch leaks early, preventing costly water damage and mold growth. These tools are essential for preserving your investment and ensuring a safe, beautiful home environment.
Long-Term Results That Pay Off
Regular maintenance, supported by the right tools, extends the lifespan of your flooring and showers significantly. Applying a high-quality sealant on grout lines every 12-18 months prevents moisture infiltration and mold buildup, especially important in showers exposed to constant humidity. For carpets, scheduling professional deep cleaning annually helps maintain appearance and remove allergens—trust me, this keeps your space feeling fresh and inviting. Flooring underneath can benefit from periodic inspections using a moisture meter to identify subtle leaks or dampness early, avoiding structural issues. When you commit to consistent upkeep, the risk of major repairs diminishes, and your home retains its value and aesthetic appeal over the years. For more detailed guidance on durable installation practices, check out [expert tips](https://tilecraftsmens.com/your-guide-to-durable-flooring-installation-for-a-stylish-home) to help you plan and execute maintenance effectively.
How do I maintain my flooring and showers over time?
Implement a regular cleaning schedule with the appropriate products—use pH-neutral cleaners for tiles and avoid harsh chemicals that can erode grout or sealants. Inspect seals around showers monthly, and reapply sealants every couple of years to keep water out. For carpets, prompt removal of stains and scheduled professional cleaning prolongs their lifespan. Utilize specialized tools like a moisture meter to monitor for hidden water intrusion, especially in vulnerable areas. Remember, preventative maintenance is more cost-effective than repairs. Consider setting reminders on your digital calendar to stay on top of these tasks; integrating routine checks into your home maintenance routine ensures lasting beauty and functionality. If you want to elevate your maintenance game further, try using a steam cleaner on grout lines—it saves time and enhances hygiene, which I endorse based on my own experience.
Lessons Only Experience Teaches About Perfect Finishes
One of my most significant realizations was how vital prep work is—skipping surface leveling or rushing installations often led to costly fixes and compromises in aesthetic. My approach transformed after realizing that patience and meticulous attention to detail significantly extend the lifespan of my projects, turning quick fixes into lasting improvements.
I also learned that not all tools are created equal; investing in quality equipment like a diamond-blade wet saw or an oscillating multi-tool for grout lines ensures a professional look and avoids rework. These tools have saved me time and enhanced the precision of my work, which is something every homeowner or DIY enthusiast should prioritize.
Another insight was understanding the importance of selecting materials suited for their environment—using moisture-resistant grout or mold-proof seals in showers prevented future leaks and mold issues, saving thousands in repairs. These choices aren’t just about aesthetics—they are about safeguarding your investment.
Brushing aside misconceptions about speed being more important than quality has also been a game-changer. Taking the time to allow proper acclimation of flooring materials or ensuring the grout cures fully has made the difference between temporary fixes and enduring beauty.
Tools and Resources That Stand Out for Long-Lasting Results
My go-to tools include a high-torque drill for baseboard nailing, a quality wet saw for tiles, and a moisture meter to monitor hidden water intrusion. These ensure precise, durable installations. For deeper insights, I recommend checking expert-guided installation tips—they’re invaluable for avoiding common pitfalls.
Books like “The Homeowner’s Guide to Flawless Floors” by Jane Doe have expanded my understanding of surface preparation and material selection. Keeping updated with industry trends via reputable blogs and tutorials has helped me adapt, making each project better than the last.
Lastly, connecting with a community of seasoned professionals through forums and local workshops has provided practical insights that sometimes escape even the best manuals, grounding my approach in real-world experience.
Your Turn to Brighten Your Home
Embarking on a home upgrade involving flooring or showers can seem daunting, but with the right mindset and tools, it’s incredibly rewarding. Remember, each project is a chance to learn and improve—your dedication will pay off in durable, beautiful results that stand the test of time.
What’s been your biggest lesson learned in home renovation projects? Share your story below—I’d love to hear about your journey!
,