I remember the first time I tackled a flooring project in my home. Excitement quickly turned to frustration when I realized my new hardwood looked perfect one day and revealed unsightly gaps the next. That lightbulb moment made me realize how crucial proper installation techniques are for durability. If you’re tired of replacing floorboards or dealing with uneven surfaces, you’re not alone. Many homeowners and DIY enthusiasts stumble at this stage, often because they overlook fundamental steps that ensure longevity.
Today, I promise to share with you the expert tips that transformed my approach—from preparing your subfloor to sealing your floors for the long haul. These insights aren’t just theory; they come from personal experience and professional advice, helping you avoid costly mistakes and achieve flawless results that stand the test of time.
Why Proper Flooring Installation Matters More Than You Think
Have you ever wondered why some floors look stunning and last decades, while others warp or creak within a few years? The truth is, the devil’s in the details. A poorly installed floor isn’t just an eyesore; it can lead to safety hazards, increased maintenance costs, and a shorter lifespan for your investment.
One mistake I made early on was rushing through the prep work. Skipping the step of leveling the subfloor or ignoring moisture barriers can cause major issues down the line. Professional installers emphasize that meticulous preparation and knowing the right techniques are the backbone of lasting results. Interestingly, according to a recent study by Home Depot, improper installation is a leading cause of flooring failure, accounting for nearly 70% of repairs needed within the first five years.
Learning and applying proper installation methods can save you money and stress in the long run. And don’t worry—with a bit of guidance, anybody can master these skills. If this sounds familiar, pause and ask yourself: Have I properly prepared my space? If not, let’s dive into the essential steps to get it right from the start.
Prepare Your Surface with Precision
Start by clearing the room completely, removing furniture, and sweeping thoroughly. Use a moisture meter to check the subfloor’s humidity—excess moisture can cause future buckling, so wait for it to dry if necessary. I once skipped this step, which led to warped flooring after just a few months; now, I always double-check. Level uneven spots using self-leveling compounds, ensuring a smooth, stable base for your new floor. Think of it as laying a foundation for a house—without a solid base, everything else will suffer.
Acclimate Materials to Your Environment
Before installation, store flooring planks in the room where they’ll be laid for at least 48 hours. This allows them to adjust to the room’s temperature and humidity, reducing expansion or contraction later. I once rushed this process, and several planks warped after installation—lessons learned. Proper acclimation ensures tighter fits and fewer gaps, which is critical for hardwood or engineered wood floors. For more tips, check out this comprehensive guide.
Plan Your Layout Strategically
Measure your space carefully and decide the direction of your planks—usually parallel to the longest wall or the main light source. Draft a layout to identify where cuts will be needed and to minimize waste. I once laid out my floors without planning, which resulted in awkward fitments near the doorway. Proper planning not only saves material costs but also accounts for expansion gaps, which are essential for hardwood floors—leave approximately a 1/4 inch gap around the perimeter.
Install the Underlayment Correctly
Lay down the underlayment, overlapping seams by a few inches and taping them securely. This creates a moisture barrier and provides cushioning. I once ignored this step to speed up, only to find that moisture seeped through, causing issues months later. Think of underlayment as the mattress for your flooring—comfort and protection are paramount. Remember, quality underlayment can extend the life of your floor and improve sound insulation.
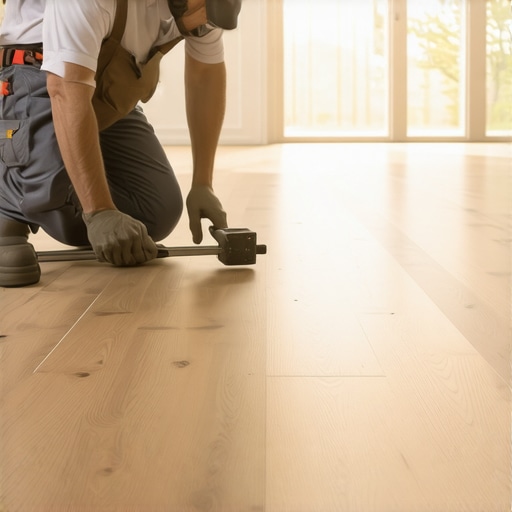
Lay the Floor Carefully and Consistently
Begin in the corner furthest from the door, leaving a 1/4-inch expansion gap along walls. Use spacers to maintain this gap consistently. Lock planks tightly together using the manufacturer’s recommended method—whether clicking, nailing, or gluing. I had a mishap where I didn’t use spacers, leading to uneven gaps and a wobbly floor. This step requires patience; work slowly and check your progress regularly for alignment and gap consistency. For expert techniques, visit this resource.
Finishing Touches and Sealing
Once planks are laid, remove spacers and install baseboards or molding to cover the expansion gaps—consider modern styles for a polished look. Use a sealant suitable for your flooring type to add extra protection against moisture and wear. I once neglected sealing, and water caused minor damage; sealing now is part of my routine. Proper sealing enhances durability and keeps your floors looking pristine for years.
When it comes to home upgrades, many assume that following basic instructions guarantees success. However, in my experience, there are subtle nuances often overlooked that can sabotage even well-planned projects. For instance, a common misconception about shower installations is that sealing the enclosure is the final step. In reality, neglecting proper drainage slope and vapor barrier placement can lead to mold, water damage, and costly repairs later. According to industry experts, careful attention to these details ensures longevity and prevents moisture issues, a fact often missed by DIY enthusiasts.
Similarly, with carpet installations, the prevalent myth is that stretching alone can eliminate wrinkles. But achieving a seamless, durable finish requires meticulous subfloor preparation—clean, level, and properly glued or stapled. Skipping this step results in immediate wrinkling and accelerated wear, as detailed in the comprehensive guide on [carpet installation secrets](https://tilecraftsmens.com/carpet-install-secrets-achieving-flawless-results-every-time).
When installing baseboards, many believe that choosing a trendy style suffices. Yet, improper nail placement and failure to use caulk for gaps compromise both appearance and durability. Advanced installers emphasize the importance of nail spacing and finishing techniques for a professional look. For ideas on modern styles, check out [trends for 2025](https://tilecraftsmens.com/baseboard-trends-in-2025-fresh-styles-for-every-room).
Finishing floors isn’t just about laying planks; the intricacies of moisture control, expansion gaps, and consistent underlayment approach make all the difference. A mistake I encountered early was neglecting to account for seasonal humidity changes, causing gaps or buckling as temperatures fluctuated. Industry research supports this, indicating that environmental factors can dramatically influence flooring lifespan if neglected. Read more about achieving durable, flawless results in [expert installation tips](https://tilecraftsmens.com/your-guide-to-durable-flooring-installation-for-a-stylish-home).
In all these cases, the common thread is that details matter more than most realize. Overlooking nuances such as vapor barriers, subfloor leveling, or proper finishing techniques can turn a seemingly simple project into a nightmare. Therefore, investing extra time and knowledge in these areas pays off in the long run. Have you ever fallen into this trap? Let me know in the comments. Remember, understanding these nuances transforms a good job into a lasting masterpiece.
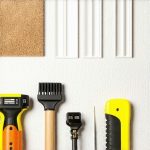
Keep It Running Smoothly with the Right Tools
Ensuring long-term performance of your flooring, baseboards, and shower installations hinges on using the right equipment. I personally rely on a high-quality pneumatic nail gun for installing baseboards—it offers precision and speed that manual nailing can’t match, reducing the risk of damaging new woodworks. For flooring, I recommend a professional spacer system, like the T-Lock flooring spacers, which ensure consistent expansion gaps, crucial for hardwood and engineered planks. These tools not only improve the quality of the finish but also help prevent costly repairs down the line.
When it comes to maintenance, I swear by a combination of quick daily cleaning with a microfiber mop and periodic deep cleaning with a pH-neutral floor cleaner. Regular upkeep prevents dirt buildup that can grind into surfaces and cause premature wear. For shower enclosures, I use a silicone finishing tool during sealing to achieve a smooth, professional bead, avoiding water seepage and mold growth—an essential step highlighted by industry experts.
How do I maintain my flooring and fixtures over time?
Consistent inspections are key. Check for loose grout in showers and reapply sealant every 1-2 years to prevent water intrusion. For floors, I recommend resealing hardwood surfaces as suggested by professional guides; this protects against staining and moisture damage. Additionally, applying strategic use of furniture pads minimizes scratches, especially on hardwood or vinyl floors.
Tools I Recommend for Seamless Results
Investing in professional-grade equipment pays off in the long run. A dependable laser level such as the Bosch GLL 3-330 C ensures your tiles, baseboards, and fixtures are perfectly aligned, saving hours of adjustments later. I personally find it invaluable for installing showers where precise slope and alignment are critical—hence my recommendation. For checking moisture levels in subfloors or behind tiles, a digital hygrometer provides quick and accurate readings, helping you address potential issues before they escalate.
For a durable finish, don’t overlook the importance of quality underlayment, like a vapor barrier-approved product. It acts as the first line of defense against moisture, a common culprit in flooring failure. Remember, these investments not only improve installation accuracy but also extend the lifespan of your home upgrades.
The Trend of Smarter Maintenance
Looking ahead, the trend points toward smarter, sensor-integrated tools that can monitor moisture, temperature, and structural shifts over time. Imagine a sensor that alerts you when humidity levels threaten your hardwood’s integrity or when grout needs reapplication—this proactive approach can save thousands in repairs. Industry forecasts suggest a rise in IoT-connected maintenance tools, making home care more intuitive and less reactive. Start incorporating high-tech sensors into your routine now, and you’ll be ahead of the curve when the future arrives.
If you’re considering upgrading or maintaining your flooring, baseboards, or shower fixtures, try using a professional laser level for impeccable alignment. The precision it provides can dramatically improve your results—see how it transforms your workflow! Remember, maintaining your home isn’t just about initial installation but ongoing care. Regular inspections, quality tools, and embracing new technology will ensure your investments last for years to come.
The Hardest Lesson I Learned About Flooring and Showers
One of my most valuable lessons was realizing that deferring critical steps like moisture testing or proper sealing can turn a simple renovation into an ongoing nightmare. I once skipped moisture barriers during a hardwood installation, only to face buckling and warping months later. That experience taught me to always stay vigilant about environmental conditions and proper preparation—trust me, these insights save time, money, and frustration in the long run.
How Professional Tools Elevate Your Home Upgrades
Investing in quality tools, such as a laser level or moisture meter, transformed my projects from hit-or-miss to precise and professional-looking. For instance, using a dependable laser level made aligning tiles and baseboards effortless, ensuring a flawless finish. I highly recommend these essential tools for anyone serious about lasting results, as they streamline the process and reduce costly errors.
Taking Action Beyond the Basics
The future of home upgrades involves embracing proactive maintenance and high-tech solutions. Imagine sensors that monitor humidity or detect early signs of water leaks—these innovations can alert you before minor issues escalate into expensive repairs. Start exploring smart maintenance options now, and you’ll set yourself on a path toward a home that not only looks great but also stays durable longer. Remember, consistent inspections and using top-tier materials are your best allies for success.