It was a morning like any other, until I stepped into my living room and noticed a terrible gap where my freshly installed carpet met the new tile floor. That frustrating little space seemed to mock me, revealing every uneven edge and making the entire room look unfinished. I had just spent hours coordinating colors, textures, and clean lines, only to be let down by something as seemingly simple as a gap.
That lightbulb moment made me realize how often these gaps happen—failures of planning, measurement mistakes, or just those unpredictable quirks of an old house. But here’s the thing: these little issues don’t have to ruin your project or your mood. Today, I want to share the four professional hacks I’ve learned to properly fix Carpet-to-Tile Gaps, so your floors are seamless, durable, and — dare I say — beautiful.
Why Fixing Carpet-to-Tile Gaps Should Be a Priority
If you’ve ever dealt with a gap between your carpet and tile, you know how quickly it can turn into a trip hazard or a place where dirt and debris gather. Plus, it affects your home’s visual harmony, especially if you’re aiming for a sleek, modern-looking space. These gaps are often caused by uneven subfloors, changing humidity, or even tiny measurement miscalculations during installation. Ignoring them doesn’t just look bad; over time, they can cause further structural issues or carpet fraying.
Research shows that properly installed flooring can improve your home’s value and lifespan significantly. The National Association of Home Builders states that high-quality, well-maintained flooring is a top factor in buyer appeal and overall home satisfaction. So, resolving these gaps isn’t just about aesthetics; it’s a smart move for your property’s future.
Do you often face this problem during flooring projects? If so, you’re not alone—and good news: I’ve found some tricks that make the process surprisingly straightforward.
Is This Fix Worth the Time and Effort?
Initially, I thought fixing these gaps would be a hassle, especially since I’d seen so many so-called quick fixes that didn’t last. I remember trying to stuff foam backer rods or caulk them in, only to see the gaps reopen within months. One mistake I made early on was underestimating the importance of proper scribing and aligning the baseboards before adding trim. Trust me when I say that rushing through those steps only led to more frustration.
Now, after experimenting with a few proven strategies, I can confidently say that fixing carpet-to-tile gaps is an investment that pays off. Whether you’re tackling a small hallway or a large open-concept living space, these hacks will help you achieve a professional finish—saving you time, money, and headaches in the long run. Want to see how these tricks work? Keep reading, and you’ll be armed with all the knowledge you need to turn those gaps into seamless transitions.
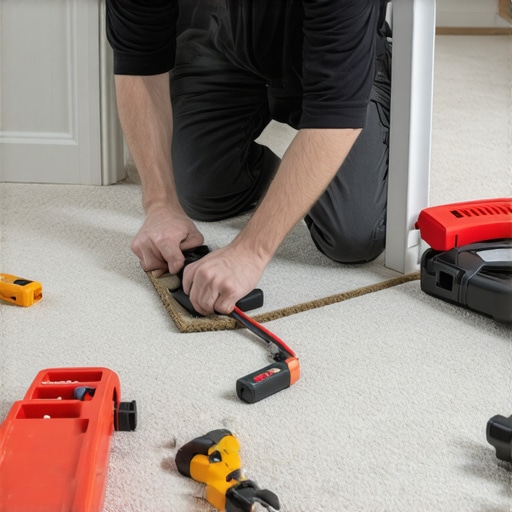
Assess the Gap and Prepare Your Tools
Begin by measuring the width and depth of the gap using a tape measure and a straightedge. Clear the area of debris and old filler, then gather essential tools: a saw or oscillating multi-tool, a chisel, construction adhesive, a putty knife, and optional molding. I once faced a stubborn ¾-inch gap in my hallway, which I initially underestimated; after precise measurement, I knew the exact materials needed for a lasting fix.
Code the Perfect Scribe Line
Use the multi-tool to cut a piece of scrap material, like thin plywood or hardboard, that matches the height of your baseboard. Place it snugly along the edge where the carpet and tile meet, then trace its outline onto the substrate with a pencil. This scribed line acts as a reference for trimming the underlayment or subfloor material. During my project, this step prevented me from over-trimming, ensuring a tight fit for the molding and eliminating unnecessary gaps.
Scribe to the Contours
Hold a flexible scribing tool or a piece of cardboard against the uneven surfaces. Transfer these contours onto your underlayment or backer rod. If your floor has irregularities or wavy walls, this custom fitting ensures the filler accords perfectly, much like fitting puzzle pieces. I used this method to match the irregularities of my old concrete slab, significantly reducing future shifting.
Fill and Secure the Gap
For larger gaps, insert a foam backer rod into the cavity, pressing it flush with the surface. Apply construction adhesive over the rod and along the edges to prevent settling. For narrower gaps, a high-quality, flexible caulk or sealant suffices. Push the filler into the space, ensuring complete contact with the surrounding surfaces. I recall applying a bead of sealant in my living room; it expanded slightly as it cured, sealing the gap effectively without mess.
Finish with Molding and Final Checks
Once the filler cured, install the appropriate baseboard or molding. Use a fine-tooth saw to cut it to length, mitering corners for a seamless look. Attach it securely with nails or a nail gun, then fill in nail holes with wood filler. Caulk the joints for a polished appearance. During my own installation, I chose a sleek modern baseboard, which I custom cut using an angle saw, dramatically improving my room’s aesthetic.
Polish and Maintain
Paint or stain the molding if needed, blending it with existing decor. Regular inspections and quick touch-ups prevent future gaps from forming. For my project, sealing the edges with paint made the transition virtually invisible, elevating the entire room’s appearance. This detailed approach ensures your flooring remains durable, safe, and visually appealing, even in challenging spaces. If you’re interested in evolving your interior details, check out the latest baseboard trends for modern inspiration.Many homeowners and even some professionals overlook the subtle complexities involved in correct installation and finishing of interior elements like baseboards, showers, carpets, and flooring. A prevalent myth is that simply following basic instructions guarantees a flawless result. However, I’ve discovered that paying attention to nuanced details can significantly impact durability and aesthetic appeal.
For instance, a common mistake is assuming that caulk alone can hide gaps around baseboards or between flooring types. While caulk is useful, relying solely on it can lead to problems over time, such as cracking or mold growth, especially in areas prone to moisture. Expert installers understand that proper scribing and using backer rods create a more resilient seal that withstands everyday wear and tear.
Another trap is underestimating the importance of subfloor preparation in flooring installation. Many think that choosing a good quality product is enough, but without an even, clean subfloor, issues like buckling, uneven heights, and squeaks will emerge. This is corroborated by a study from the National Association of Home Builders, emphasizing that meticulous subfloor leveling reduces long-term failures.
In my experience, a frequently overlooked detail in shower renovation is waterproofing. Many believe that sealing tiles with grout is sufficient, yet expert advice shows that a comprehensive waterproofing membrane beneath tiles prevents leaks that cause subfloor rot. Check out our guide on waterproofing in curbless showers for advanced insights.
Let’s consider the advanced question of how to properly scribe baseboards to uneven floors or walls, which often trips up even seasoned DIYers. This process involves transferring the contour of irregular surfaces onto the baseboard, ensuring a tight fit. A simple yet effective method is using a flexible contour gauge or a backing method to trace exact shapes—a technique many pros swear by. Proper scribing not only enhances visual harmony but also prolongs the life of your installations.
Avoiding these common pitfalls elevates your project from amateurish to professional quality. Remember, the devil is in the details, and mastering these nuances can save you considerable time and expense in the long run. Want to explore more pro tips? Check out our latest trends in baseboards or learn how to choose the right carpet for a cozy living space. If you’ve ever fallen into these traps, let me know in the comments—your experience might help someone else avoid the same mistake.Maintaining your flooring after installation is crucial to ensure its longevity and visual appeal. I rely on a combination of specialized tools and consistent methods that I personally use to keep floors looking pristine over time. For instance, a high-quality multi-tool with oscillating features allows me to make precise cuts and adjustments when re-caulking or trimming baseboards, saving me time and minimizing damage. I’ve found that a detailed magnetic level is indispensable for checking and correcting uneven surfaces—a small investment that pays off by preventing future issues like squeaks or gaps.
For cleaning, I prefer soft microfiber mops and locally sourced, environmentally friendly floor cleaners that avoid harsh chemicals, which can degrade finishes over time. Regular inspections using a visual checklist help me catch potential problems early, whether it’s loose molding, small cracks, or surface wear. Applying protective pads on furniture and using felt gliders ensures that high-traffic areas remain scratch-free.
Investing in a quality scribing tool, like a flexible contour gauge, makes adapting baseboards to uneven walls or floors straightforward. This precision tool allows me to create tight-fitting moldings that enhance aesthetic continuity and prevent dust buildup in gaps. Many professionals consider this an essential part of a long-term maintenance plan, and you can see more about this technique in our guide on [how to scribe baseboards to stone walls](https://tilecraftsmens.com/how-to-scribe-baseboards-to-stone-walls-3-2026-pro-hacks).
Predicting where flooring trends are headed, I believe smart integration of IoT-enabled sensors for moisture and wear detection will revolutionize maintenance routines in the coming years. These sensors can alert homeowners to issues before they become visible, reducing costly repairs.
How do I maintain flooring over time? I adhere to a regular schedule of inspections, utilize specialized tools like a multi-tool and contour gauges, and apply protective measures that keep my surfaces at their best. Consistency in these practices ensures durability and beauty that last into the future.
If you’re interested in elevating your home’s durability, I recommend trying out a laser level or a high-quality contour gauge to get perfect, tight-fitting moldings or baseboards. These tools can significantly improve installation quality and prevent pesky gaps down the line. Remember, paying attention to detail during maintenance saves you expense and effort later. For more advanced tips, you might want to explore how professionals keep their flooring flawless by visiting our detailed guides on [flooring installation](https://tilecraftsmens.com/your-guide-to-durable-flooring-installation-for-a-stylish-home). And for ongoing support, don’t hesitate to contact us through [our contact page](https://tilecraftsmens.com/contact-us).Throughout my journey of refining my flooring and finishing techniques, I’ve uncovered some unexpected insights that transformed my approach. One of the most profound lessons was realizing how small details can have a massive impact; for instance, meticulously scribing baseboards not only ensures a seamless look but also significantly extends the lifespan of the installation, saving future headaches. Another revelation was the importance of proper subfloor preparation—what seems like a tedious step at the start pays off in a squeak-free, level surface that stands the test of time. Additionally, I learned that patience in finishing touches, such as carefully caulking or molding, elevates the entire room’s aesthetic and feels rewarding beyond measure. These lessons have empowered me to create more polished, durable, and beautiful results, turning typical projects into true showpieces.