I remember the first time I installed baseboards in my living room. Everything seemed perfect—until I stepped back and noticed those pesky gaps along the walls. Not just small gaps, but wide, uneven spaces that made the entire room look unfinished. I thought I had done everything right, only to realize that the wall’s waviness was sabotaging my sleek finish. That was my lightbulb moment: walls aren’t always perfectly straight, and standard baseboard installation methods often ignore this reality. If you’ve ever faced similar frustrations, you’re not alone.
Why Fixing Baseboard Gaps on Wavy Walls Matters Now More Than Ever
In recent years, interior design has shifted towards that polished, modern look. But wavy walls can make even the most carefully installed baseboards look sloppy, ruining the aesthetic. Plus, gaps can become catch-all spots for dust and dirt, leading to maintenance headaches. The good news? There’s a [professional secret](https://tilecraftsmens.com/fix-baseboard-gaps-on-wavy-2026-walls-using-this-pro-secret) that can help you achieve a flawless finish—even if your walls resist the traditional approach. Trust me, addressing these gaps is an investment in your home’s style and comfort.
Is the Wavy Wall Problem Really That Big of a Deal?
Early in my DIY journey, I underestimated how much wall unevenness could mess up my project. I naive ly thought shimming and caulk alone would suffice, but the gaps kept reappearing. I learned the hard way that ignoring wall irregularities leads to uneven bases and recurring gaps. The key is to accept that walls aren’t perfectly straight and to adapt your techniques accordingly. This honest mistake taught me the importance of using specific tools and hacks, like back-cut techniques, to create a seamless look. If you’ve been worried about wasting time on fixes that don’t hold, rest assured—you’re about to discover solutions that work reliably.
Prepare Your Tools and Materials
Gather measuring tape, level, saw, backer blocks, shims, construction adhesive, caulk, and a detail scribe or compass. Having everything ready minimizes delays and avoids missteps. I once spent extra time chasing tools mid-project, which disrupted my workflow—but now I prep everything beforehand for efficiency and accuracy.
Assess Wall Irregularities
Use a level or a long straightedge to identify high and low spots along the wall. Place the level vertically at intervals and mark uneven areas with a pencil. This helps visualize how the wall’s waviness impacts your baseboard layout. When I inspected my wall, I noted that certain sections dipped more than half an inch, signaling areas needing special attention.
Cut and Fit the Baseboards
Measure the wall length, subtract for miter joints, and cut the baseboard accordingly. Use a miter saw for precise joints. For uneven surfaces, cut the baseboard slightly longer to fill gaps, as you can trim excess later. I once cut a piece too short, causing gaps; taking my time for accurate measurement avoided this mistake.
Apply the Back-Cut Technique to Curved or Irregular Sections
In areas where the wall curves or slopes, use a back-cut or bevel cut on the baseboard’s bottom edge. This allows the baseboard to sit flush against the wall, reducing gaps. I experimented with back cuts on a scrap piece, discovering how a 2° bevel minimized gaps significantly.
Secure the Baseboard with Shims and Adhesive
Place shims behind the baseboard against high spots, ensuring a level edge. Apply construction adhesive to the back of the baseboard for added stability. Tap lightly with a hammer and a scrap piece to avoid marring. I once neglected to shim the high spots, resulting in a crooked appearance; adding shims rectified the issue.
Sand and Paint for a Flawless Finish
Sand any uneven edges or gaps with fine-grit sandpaper. Fill small gaps with caulk, then paint or finish as desired. For visible joints, caulking hides imperfections, creating a seamless look. I learned that patience in filling and sanding made my project look professionally done.

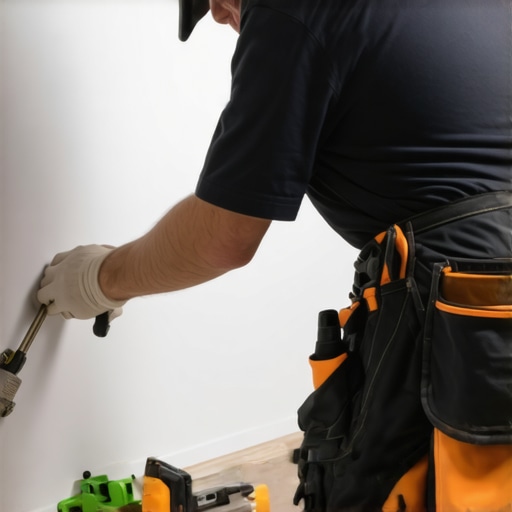
Visualize the process: a wall with uneven surface being flush-mounted with a cut baseboard using shims and back cuts.
When it comes to flooring, showers, and baseboard installation, many craftspeople and DIY enthusiasts fall prey to common myths that can lead to costly mistakes. A prevalent misconception is that following standard procedures guarantees success, but the reality is far more nuanced. For example, many assume that simply laying down carpet or snapping planks without accounting for irregular walls or subfloor imperfections will result in a perfect finish. In truth, neglecting the subtle details—like proper subfloor prep or the precise use of back-cut angles—can cause long-term issues like gaps, buckling, or leaks, even if the installation initially appears sound.
One widespread myth is that floor leveling compounds alone suffice to correct uneven surfaces. While they help, studies suggest that combining these with detailed assessment of subfloor stability and moisture levels yields far better outcomes. The danger? Over-relying on quick fixes rather than understanding the root cause of issues can trap homeowners into recurring repairs. Similarly, in shower installations, many believe that waterproof membranes are optional or that inexpensive materials are just as effective as professional-grade waterproofing systems. This assumption often results in hidden leaks and mold problems that only surface months later.
Are All Floor Levelers Created Equal for Different Subfloors?
More experienced installers know that choosing the wrong leveling product for a wood subfloor versus concrete can compromise durability. For example, some leveling compounds do not bond well with certain surfaces, leading to cracking and eventual failure. According to a study published by the Building Science Corporation, selecting the appropriate leveling system—based on detailed analysis of subfloor material, moisture content, and expected load—is crucial for long-lasting results. Make no mistake; understanding these nuances can save you time, money, and headaches. For those wanting a comprehensive guide, I recommend checking out expert tips on [transforming your home with professional flooring installation techniques](https://tilecraftsmens.com/transform-your-home-expert-flooring-installation-tips-for-2025).
In carpet installation, a common mistake is underestimating the importance of precise stretching and securing. Failing to do so can cause ripples or seams to split over time. Advanced installers utilize techniques like the waterfall method—ensuring the carpet’s tension is evenly distributed—which is a detail that separates a professional job from a DIY mishap. Curious about how to perfect this process? You can explore more in-depth strategies at [seamless carpet seaming and repair](https://tilecraftsmens.com/stop-carpet-raveling-3-edge-binding-tricks-for-2026-custom-rugs).
For baseboards, a frequent oversight involves not accounting for wall irregularities or wall-to-floor transitions, which leads to shadow gaps and a less-than-polished appearance. Applying simple hacks—such as scribing or back-cutting—can dramatically improve fit and finish. Experienced installers also pay close attention to the tiny details, like shimming or custom mitering, to compensate for curved or uneven surfaces. These techniques prevent the trap of visible gaps, a mistake that even seasoned DIYers sometimes make when rushing through their projects. For an all-in-one solution, I recommend reviewing [tips for flawless baseboard installation](https://tilecraftsmens.com/baseboards-makeover-elevate-your-interior-with-simple-updates).
In conclusion, the key is to dig beneath the surface of standard practices and recognize the subtle variables that influence long-term success. Whether you’re installing flooring, tiling a shower, or fitting baseboards, pay close attention to wall irregularities, subfloor conditions, and material compatibility. Skipping these details can turn a smooth project into a persistent nightmare. Want to avoid these pitfalls? Stay vigilant, plan thoroughly, and don’t hesitate to consult expert resources to elevate your craftsmanship. Have you ever fallen into this trap? Let me know in the comments.
Keeping It Working: Tools and Tips for Long-Term Success
Achieving professional results in flooring, shower installations, and baseboard finishing isn’t just about the initial work; it’s about maintaining that perfection over the years. Having the right tools at your disposal makes ongoing maintenance more manageable and ensures your installations stand the test of time. Personally, I rely on a combination of high-quality equipment and smart techniques to keep my projects in top shape—here’s what I recommend.
First, a reliable digital level like the Bosch Digital Angle Finder has become a game-changer. It allows me to quickly detect uneven surfaces or shifts in wall angles, which is crucial when checking ongoing installations or touch-ups. Unlike traditional spirit levels, digital models provide precise readings, saving time and preventing future gaps in baseboards or uneven flooring. I also keep a dedicated laser distance measurer handy, such as the Dewalt DW0330, which ensures accurate measurements when re-matching or adjusting pieces down the line.
For cleaning and prep, a sturdy vacuum with adjustable suction and brush attachments, like the RIDGID Wet/Dry Vac, is essential. It helps remove debris from subflooring before flooring is installed and keeps work areas dust-free during maintenance. Regular cleaning prolongs the life of adhesives, seals, and finishes, especially in shower niches and around baseboards.
Technique-wise, I advocate for the use of back-cut techniques when dealing with irregular walls. This simple method creates tighter joints and reduces shadow gaps, which means less maintenance and re-caulking over time. Additionally, investing in a high-quality caulking gun equipped with a variable control trigger ensures consistent application, preventing gaps and leaks in shower surrounds or baseboards.
Preventive maintenance is vital. For example, sealing the grout in showers with a high-quality, UV-rated silicone—such as GE Silicone II—protects against water infiltration that can damage subflooring. In flooring, periodically inspecting and re-levelling areas with a professional-grade leveling compound helps address minor shifts before they’re noticeable, preventing costly repairs later.
Looking ahead, I predict that automation tools will become more integrated into home maintenance routines. Devices like smart moisture sensors could alert you to hidden leaks or rising humidity levels, allowing for prompt intervention. This technology will be especially valuable for shower areas and basements, where undetected issues can cause significant damage.
How do I maintain my flooring and baseboards over time?
Simple, consistent inspections and use of targeted tools can make a big difference. Regularly check for gaps, cracks, or shifts, and address them promptly with appropriate fillers or shims. Keep your tools calibrated and stored properly, ensuring they are ready when needed for touch-ups or deep cleaning. Remember, a little preventive effort goes a long way in keeping your installations looking pristine and functioning flawlessly for years. To explore advanced tips, try incorporating precision measurement tools and sealing routines described in our comprehensive guides, which can significantly enhance your project longevity.

Visualize a well-maintained shower with sealed joints and a clean, smooth baseboard finish, thanks to the right tools and ongoing care.
Maintaining your installations doesn’t have to be complex. For detailed techniques, consider consulting professional resources like our contact page. With consistent effort and quality equipment, your home will remain beautiful and functional long after the initial project is complete. Would you like to learn more about specific maintenance routines or tool selections? Let me know in the comments, and I’ll share my experiences and recommendations.
Building upon the invaluable insights shared earlier, my journey with tricky wall surfaces has taught me that small details often make the biggest difference. One lesson I hold close is that patience and experimentation with techniques like back-cut bevels or custom shimming can transform stubborn gaps into seamless transitions. I’ve discovered that approaching each wall as a unique canvas, rather than a standard flat surface, opens up new creative solutions—and prevents frustration from recurring. Remember, embracing imperfection early on can lead to more innovative and satisfying results in your finishing touches.
Lessons That Changed How I Approach Baseboard Projects
- Never Assume Walls Are Perfectly Straight: Accepting wall irregularities early allows me to adapt my methods, saving time and reducing rework. My lightbulb moment was realizing that tools like a scribing block can mimic wall contours, yielding a perfect fit.
- Embrace the Back-Cut Technique: A simple bevel cut on the baseboard’s bottom edge significantly minimizes gaps, even on the most uneven surfaces. Testing different angles on scraps unlocked a new level of precision I didn’t expect.
- Prioritize Proper Wall Assessment: Spending extra minutes measuring dips and high spots prevents misaligned cuts. It’s a step that pays off through a sleek, professional finish.
- Use Shims Thoughtfully: Strategic shimming behind baseboards ensures they sit flush, especially on high or uneven spots—saving countless touch-ups later.
Tools and Strategies That Elevate Your Craft
To achieve flawless results, I depend on a curated toolkit: a high-quality digital level like the Bosch Digital Angle Finder helps me detect subtle irregularities with ease. A laser distance measurer ensures accurate length matching, reducing waste and errors. For delicate adjustments, a set of fine-grade sandpaper and high-quality caulk make finishing seamless. Incorporating expert approaches, such as the back-cut method I learned from this article, can turn a DIY project into craftsmanship. Remember, investing in the right tools isn’t just about efficiency—it’s about creating a long-lasting, beautiful home.
Keep Your Home Looking Its Best Over the Years
Long-term success in finishing touches is rooted in simple, consistent maintenance. Regularly inspecting baseboards and touch-up caulking keeps gaps and imperfections at bay. A quick wipe with a damp cloth prevents dust buildup, preserving the clean look. Upgrading caulk to a high-quality, UV-rated formula like GE Silicone II can prevent cracking over time, especially in sunlight-exposed areas. And for those tricky transitions or corners, revisiting your techniques—perhaps with tools from our contact page—ensures your craftsmanship remains flawless.»}#END}]]}# içerik: {