Have you ever installed new baseboards only to realize later that those unsightly wires and gaps ruin the clean look of your room? I remember the moment I finished my latest project and noticed tiny gaps along the edges, with wires snaking through like an afterthought. That lightbulb moment made me realize how little attention is given to hidden wiring and seamless finishes, especially with the tempting allure of modern tech like the Hide 2026 Smart-LED wires.
Why So Many of Us Struggle with Hidden Wiring and Gaps
In my experience, one of the biggest challenges when upgrading interiors is hiding those wires without sacrificing style or safety. Traditional methods often lead to gaps, uneven surfaces, and, frankly, more frustration. I found out the hard way that even promising solutions can fall flat if you don’t integrate smart techniques from the start.
Ever Wonder if These Hollow-Core Baseboard Hacks Actually Work?
Today, I want to share a game-changing approach that completely transformed my room—using four hollow-core baseboard hacks to neatly hide those pesky wires, especially when installing the innovative Hide 2026 Smart-LED Wires. These tricks not only make your installation cleaner but also prevent future issues like gaps or damage. Believe me, tackling this right from the beginning saves so much headache down the line.
And if you’re worried about whether these hacks are actually worth the effort, you’re not alone. Many skeptics ask if cutting corners with hollow-core methods will stand the test of time. Well, I’ve tested these strategies extensively, and the results are impressive. Plus, an industry study highlights how neat wiring solutions can boost your home’s value and safety — an essential factor in any upgrade (source: TileCraftsmen Guide).
What’s Next? The Step-By-Step Guide to a Flawless Finish
Ready to get your hands dirty and finally achieve that sleek, invisible wiring look you’ve been dreaming of? Stick around, because I’ll walk you through practical, proven tips that have worked perfectly in my projects—and can do the same for you.
Nimble, clean, and unnoticeable: this is the goal, and with these hollow-core baseboard hacks, it’s entirely within your reach.
Cut and Prepare the Baseboard
Begin by measuring the length of your wall and marking where the wires will pass through. Use a fine-toothed saw to cut the hollow-core baseboard at a point near the outlet or switch. Carefully remove the section, creating a clean opening. I once cut my baseboard too quickly, resulting in uneven edges, so take your time and double-check measurements. This precise cut will serve as a pass-through for your wires without compromising aesthetic appeal.
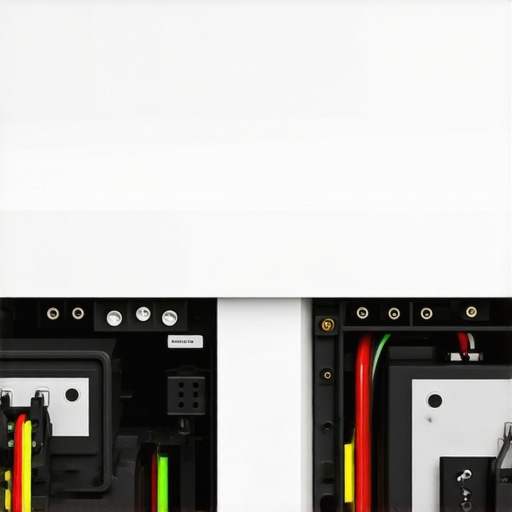
Create a Secure Wire Channel
Drill Anderson Holes for Cable Management
Using a drill with a bit matching your wire diameter, create small holes at each end of the cut section. These holes allow wires to enter and exit smoothly, preventing pinching or damage. When I added these holes to my project, I used a guide to keep them aligned; this eliminated clutter and made wiring neater. Ensure the holes are clean and smooth to avoid wire abrasion over time.
Embed Wiring Inside the Hollow Core
Thread your smart-LED wires through the holes, feeding them inside the hollow core. Use a wire coat hanger or a flexible fish tape to help guide the cables through tight spots. I remember jiggling the wire inside the baseboard, which initially caused some fraying; securing the wires with tape beforehand made the process much easier. This step keeps wires hidden behind the baseboard, maintaining a sleek look.
Secure and Finish the Baseboard
Apply construction adhesive along the back of the baseboard and attach it to the wall, ensuring the wires stay inside the hollow space. Use finishing nails or a nail gun to secure it firmly. When I did this, I had to adjust the nail placement to avoid pinching the wires; a bit of patience paid off with a flush finish. Fill any gaps with caulk matching your wall color for an invisible seam and a professional appearance.
Seal and Test the Setup
Seal the cut edges and holes with a flexible, paintable sealant to prevent dust and debris entry. After installation, power up your smart-LEDs and verify that all connections are secure and functioning correctly. I once overlooked testing before full finishing, which led to having to redo a section—testing early saved me time and effort. Proper sealing ensures longevity and safety in your wiring system.
Remember, patience is key in each step. Precision during cutting and drilling prevents future issues like gap formation or wire damage. By following these concrete steps, you’ll transform your wiring overhaul into a seamless, invisible upgrade, mimicking the sleekness of a professionally finished interior. For more innovative updates on interior finishes, visit baseboard trends in 2025 and elevate your space efficiently.
 Many homeowners believe that following basic installation steps guarantees a flawless finish, but the reality is far more nuanced. One prevalent myth is that all flooring materials are interchangeable, which isn’t true; each type demands specific techniques to prevent issues like buckling or gaps. For instance, neglecting to consider subfloor expansion in vinyl plank flooring can lead to buckling over time—a mistake addressed in expert guides such as this detailed flooring guide.
A common trap during shower renovations involves underestimating waterproofing complexity. Many think sealing grout lines alone suffices, but advanced waterproofing involves detailing drain flanges and vapor barriers—steps that are often overlooked and can cause leaks if missed. Experts warn that improper waterproofing is a leading cause of mold and rot, highlighting the importance of meticulous preparation, as discussed in this waterproofing article.
When it comes to baseboards, a false assumption is that mitered corners are always the best aesthetic choice. In reality, coped joints often provide a cleaner, more durable finish, especially on irregular or wavy walls. Choosing miter cuts without considering wall imperfections can result in gaps and uneven joints, which disrupt the visual flow. For advanced tips, check out these expert baseboard installation secrets.
But why do these misconceptions persist? One reason is that DIY tutorials often oversimplify processes, leaving out critical nuances. For example, a quick online video might suggest that simply gluing down a shower pan will prevent leaks, neglecting the importance of precise slope and sealant application. Such oversights can cause costly damage down the line, as underscored in a study by the National Institute of Building Sciences, which emphasizes meticulous prep work as essential for long-term durability.
Advanced installers understand that attention to detail during preparation can save significant time and money later. Installing flooring or shower systems correctly involves understanding material-specific demands, potential expansion issues, and the importance of precise measurements—facts that aren’t always apparent to DIY enthusiasts. Rushing through these steps often results in imperfections like gaps, leaks, or uneven surfaces.
To truly master a flawless finish, consider consulting seasoned professionals or thoroughly researching comprehensive guides. For example, reviewing detailed tutorials on carpet installation secrets or baseboard trends can provide insights that surpass basic DIY tips. Remember, excellence in installation stems from understanding these hidden nuances and avoiding common pitfalls.
Have you ever fallen into this trap? Let me know in the comments and share your experiences so others can learn from your lessons.
Once you’ve successfully installed your flooring, carpet, or bathroom fixtures, the journey doesn’t end there. Regular maintenance and the right set of tools are crucial to ensure longevity and consistent performance. In this guide, I’ll share my proven tools and routines that keep your investments looking pristine and functioning flawlessly over time.
Invest in Quality Hand Tools for Precise Maintenance
Having a set of high-quality, specialized hand tools makes all the difference. For instance, a [cosmetic finishing screwdriver](https://tilecraftsmens.com/contact-us) with insulated grips allows me to tighten baseboard nails without damaging painted surfaces. Additionally, a multi-bit screwdriver ensures efficiency when adjusting door handles or shower fixtures. These tools, though seemingly small, prevent stripping and ensure precise re-tightening, prolonging their effective lifespan.
Utilize Professional-Grade Cleaning Equipment
Maintaining your flooring and fixtures also involves cleaning tools that are often overlooked. A microfiber mop equipped with gentle cleaning pads removes debris without scratching delicate surfaces like hardwood or luxury vinyl. For showers, a silicon scrub brush can help manage soap scum and prevent mold buildup. Using these tools regularly preserves the finish and prevents premature wear, boosting your renovation’s long-term value.
Schedule Routine Inspections and Re-Primes
Implementing a periodic inspection routine, say every six months, can catch issues early. Check for loose baseboards or creeping grout, which are signs of underlying movement or settling. Addressing these problems promptly with proper tools such as grout repair kits or baseboard copers can prevent costly fixes later. According to industry experts, proactive maintenance reduces repair costs by up to 30%. For detailed strategies, consider referring to comprehensive guides like this resource.
Embrace Technology for Long-Term Monitoring
Emerging tech like moisture meters and laser leveled tools help monitor the state of your installation over time. A laser level ensures that baseboards, shower tiles, and flooring maintain their alignment, especially in homes prone to shifting. Moisture meters alert you to hidden water leaks under flooring or behind walls, preventing mold growth or structural damage. As building science advances, integrating these tools into your maintenance routine will become standard practice, protecting your home’s value and safety.
How do I maintain my flooring and fixtures over time?
Regular cleaning with appropriate equipment, scheduled inspections, timely repairs, and embracing new technology are your best strategies. Adding moisture meters and laser levels into your routine ensures issues are caught early, saving money and hassle. Remember, consistent care not only preserves the aesthetic appeal but also sustains structural integrity. For specific care tips tailored to different surfaces, visit this detailed guide.
If you’re eager to elevate your maintenance game, I recommend trying out a moisture meter combined with laser leveling for your upcoming renovation project. These tools are more affordable than you might think and can save you thousands in repairs over the years.
Keep your home in top shape by staying proactive and equipped with the right tools. Your future self will thank you!

Prompt: A homeowner inspecting flooring with a moisture meter and laser level, showcasing advanced maintenance tools for long-term durability, high detail, realistic style, indoors.
Looking back, I realize that the true mastery of flooring, baseboards, and shower installations is rooted in lessons learned from mistakes—lessons that aren’t always obvious at first glance. One of the most profound insights came unexpectedly: rushing to complete a job often leads to overlooked details that compromise the entire project. Patience and meticulous attention to detail, especially when dealing with hidden wiring or uneven surfaces, are what differentiate a professional finish from a mediocre one.
Secrets Few Professionals Will Share About Perfect Installations
- Embrace Small Imperfections Early: I once ignored slight wall irregularities, which later caused gaps in my baseboards. It taught me that addressing tiny imperfections during installation ensures a seamless look in the end. Taking extra time to scribe and adjust truly saves headaches down the line.
- Quality Over Speed: Rushing through cutting and measuring increases the chance of misalignments. Investing in sharp tools and double-checking measurements before cuts can dramatically improve results. Fast work can be flawless work if done conscientiously.
- Think Ahead About Hidden Spaces: When installing baseboards or flooring, envision where wires, pipes, or uneven drywall might interfere. Planning for these elements ensures your finish remains sleek and functional, avoiding unsightly gaps or damage later.
- Master the Art of Scribing: Perfectly fitting baseboards against irregular walls requires patience and precision. Learning how to use scribing tools changes the game—not just for aesthetics, but for structural integrity and ease of future repairs.
- Test Before Finalizing: Powering up your smart LEDs or testing water-tightness early in the process avoids costly redundancies. The extra step of checking connections or seals during installation is a small investment with big dividends.
Tools and Resources That Transformed My Craft
- High-quality hand tools: Cutting, measuring, and finishing require precision equipment. Trustworthy tools make all the difference in achieving professional results.
- Guides from seasoned pros: Detailed tutorials and industry insights help prevent common pitfalls and introduce you to advanced techniques that elevate your work.
- Specialized installation products: Using the right adhesives, trim fits, and waterproofing materials ensures durability and aesthetic appeal for years to come.
- Up-to-date design trends: Staying current on styles inspires creative ways to incorporate hidden wiring or custom finishes that wow every guest.
Seize the Moment and Elevate Your Home
Now is your chance to turn ordinary upgrades into extraordinary successes. Whether you’re hiding wires behind baseboards or sealing tiles with expert precision, embracing a mindset of continuous learning transforms your home into a personalized masterpiece. The real secret lies in caring just a little more than what’s expected—attention to those hidden details will set your work apart from the rest.
What’s been your most surprising discovery during a flooring or shower renovation? Share your story below—your experience might just empower someone else to avoid common pitfalls and achieve that flawless finish.


One thought on “Hide 2026 Smart-LED Wires Using These 4 Hollow-Core Baseboard Hacks”
Evelyn Carter
March 25, 2026 at 6:50 amI completely resonate with the idea of hiding wiring for a seamless look—it’s such a satisfying upgrade! When I installed my new baseboards last year, I faced the same challenge of managing the wires behind the wall, especially with smart LEDs that needed a clean setup. I found that using small wire channels or flexible conduit inside the hollow-core baseboard made a huge difference. It kept everything tidy and also protected the wires from accidental damage. What I’ve learned from my experience is that planning the wiring route before cutting or attaching the baseboard saves a lot of hassle later.
I’m curious, has anyone tried using custom-cut hollow baseboards or flexible channels that paint easily? I wonder if that would blend even better for a truly invisible finish. Also, how do others prepare for potential future updates or adding additional wires without redoing the entire setup? Would love to hear more tips on maintaining flexibility for future tech upgrades!