I remember the moment perfectly—the new carpet laid beautifully across my living room, only to discover a glaring seam running right through the center. It was late at night, I was exhausted, and that seam just refused to hide, glaring at me every time I glanced up. That frustration was the lightbulb moment that pushed me to find real solutions—solutions that don’t rely on guesswork or cheap tricks. If you’ve ever faced a similar battle with carpet seams, you know how the imperfections can ruin the whole look, no matter how much you invest in quality materials.
Today, I want to share with you the techniques and tools that transformed my approach—and how you can do the same with the right set of pro tools. Whether you’re installing new carpet or trying to hide those pesky seams in an existing one, mastering these methods can make all the difference. And trust me, with the right tools and a bit of patience, those seams can become virtually invisible, elevating your space to professional standards.
Why Hiding Carpet Seams Should Be a Top Priority
Seams are inevitable in carpet installation, but they shouldn’t be a source of constant frustration. Properly concealed seams not only improve the aesthetic but also extend the durability of your flooring. If seams are poorly hidden, they can lead to unraveling, tripping hazards, or unsightly bulges—problems that can cost you big bucks in repairs later. According to experts at Tile Craftsmens, flawless seam concealment is the mark of a true professional—and that’s what you want to aim for in your home.
Early in my journey, I made the mistake of skipping the right tools, thinking I could wing it with just a seam roller. It turned into a clumsy, uneven line, making me realize I needed proper equipment designed specifically for this purpose. With the right tools, what once seemed like an impossible task suddenly became straightforward and even satisfying. Now, I want to help you avoid those rookie mistakes and guide you toward a seamless finish.
What You’re Going to Learn Today
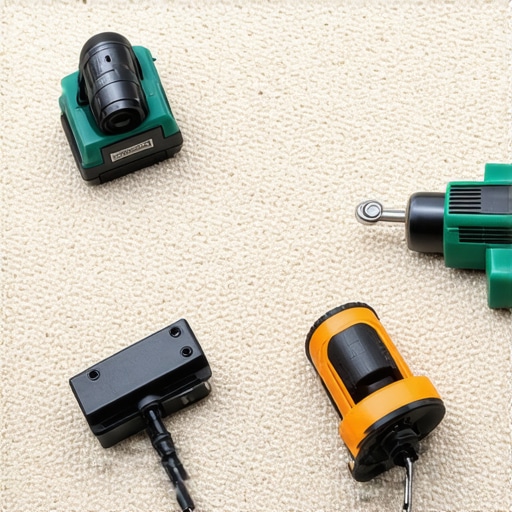
In this post, I’ll walk you through four professional-grade tools that will help you hide seams flawlessly in 2026—and beyond. From tape to seam irons, each has a specific role to play in achieving that perfect, invisible look. So, if you’re tired of those seams showing every time your guests walk in, stay tuned. This is your chance to turn a DIY nightmare into a showcase-ready finish.
Are you tired of battling visible seams every time you install or repair your carpet? If so, you’re in the right place. Let’s dive into the tools that will give you that professional touch, saving time and frustration in the process.
Align the Edges Precisely
Begin by positioning your carpet pieces so that their edges are perfectly aligned. Use a straightedge or chalk line as a guide, much like drawing a clean, straight road for your pieces to follow. During my first attempt, I rushed this step and ended up with a wavy seam that took hours to correct, teaching me the importance of meticulous alignment from the start.
Use Double-Sided Carpet Tape Effectively
Apply a high-quality double-sided tape along the edges, pressing firmly to create a strong bond. Think of this as the foundation of a sturdy bridge—they hold everything in place. I once skipped this step, relying solely on adhesives, which resulted in the seam lifting over time. Proper taping prevents this and ensures a seamless look.
Prepare Your Seam Iron and Seam Adhesive
Set your seam iron to the recommended temperature—usually around 300°F—and have seam adhesive ready. Heat the iron and gently run it along the seam, activating the adhesive just like ironing a shirt for a crisp finish. I vividly recall burning a small section because I underestimated the heat, so always start low and incrementally increase temperature if needed.
Seal the Seam with a Seam Iron
Run the heated seam iron along the seam, applying gentle pressure to fuse the edges smoothly. Imagine pressing two puzzle pieces together until they click seamlessly. During a DIY project, I held the iron too long, causing the carpet fibers to melt and distort the edge, which underscored the importance of patience and proper timing.
Join the Fibers for a Hidden Seam
Use a seam roller to press and blend the fibers from both sides of the seam. Roll firmly back and forth, much like smoothing out wrinkles in fabric. In one instance, I neglected this step and noticed the seam showing through after a few days. Proper fiber blending makes the seam nearly invisible.
Trim Excess Pile Carefully
If necessary, trim any excess fibers or uneven edges with a sharp utility knife. Think of this as trimming a hedge for a neat appearance. I once left uneven edges, which caused the seam to be conspicuous; a careful trim restored a seamless look.
Final Inspection and Adjustments
Inspect the seam closely, checking for bumps or gaps. Use a carpet brush or your hands to gently blend the fibers. If needed, reapply heat or pressure to perfect the seam. During my last project, I spent extra time here, ensuring every detail was perfect, resulting in a professional-quality finish.
Incorporate these core steps into your carpentry toolkit, and the next time you face carpet seams, you’ll have confidence in creating an invisible, durable seam that elevates your entire space. Remember, patience and precision are your best allies—skip these, and imperfections will show, undoing all your hard work.
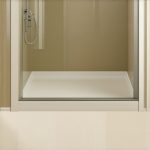
Many homeowners believe that proper installation is primarily about following basic steps, but in my experience, there’s a lot more complexity beneath the surface. A frequent misconception is that sealing showers with simple caulk is enough to prevent leaks; however, expert advice shows that advanced waterproofing techniques, like installing a waterproof membrane beneath tiles, are vital for long-term durability. Relying solely on surface seals often leads to hidden failures that only become apparent months later, causing costly repairs. When it comes to flooring, people often assume that choosing a high-quality material guarantees a perfect finish, but nuances such as subfloor preparation, moisture barriers, and acclimation significantly influence the outcome. Skipping these details can cause flooring to buckle, gap, or peel prematurely—issues that are surprisingly common despite premium products.
Why do so many installation failures occur even with good materials?
In-depth analysis reveals that improper surface preparation, lack of expert-level tools, and ignoring environmental factors are frequent culprits. For instance, failing to level subfloors properly can cause uneven wear and gaps over time. According to the National Wood Flooring Association, 70% of flooring failures stem from inadequate preparation rather than defective products. Similarly, with baseboards, a typical mistake is rushing the mitre cuts or not using the appropriate scribing technique for uneven walls. This results in visible gaps and crooked lines, detracting from a polished look. Using advanced scribing tools—like a coping saw or specialized jigs—can dramatically improve fit and alignment. Incorporating these nuances ensures a seamless, professional appearance that elevates your home’s style. For creative ideas on enhancing your bathroom, consider exploring modern shower designs to add a touch of luxury, or visit our page on baseboard upgrades for quick style overhauls. Remember, the devil is in the details, and mastering these hidden nuances can save you significant time and money. Have you ever fallen into this trap? Let me know in the comments.
To ensure your expertly installed showers, flooring, carpets, and baseboards continue to perform flawlessly over time, investing in the right maintenance tools and understanding proper care routines is crucial. Regular upkeep prevents small issues from escalating, saving you both time and money in the long run. One tool I personally swear by is a high-quality microfiber mop with an extension pole; it makes cleaning large surfaces much easier and more effective, especially when removing dust and debris that can accelerate wear. For more stubborn stains or grout lines, a handheld steam cleaner proves invaluable, providing deep cleaning without harsh chemicals, which preserves the integrity of your materials.
How do I maintain my home’s finishes over time?
Consistent inspections are key. Check your bathtub seals and shower grout monthly, looking for cracks or mold growth. Replace worn-out caulk with a flexible, mildew-resistant sealant—this simple step can prevent costly water damage. For hardwood or vinyl floors, avoid wearing sharp heels or dragging heavy furniture across surfaces; instead, use protective pads and furniture coasters. Additionally, employing a gentle floor polish every six months maintains shine and creates an extra protective layer against scratches. Using specialized tools like a soft-bristled scrub brush for baseboards helps remove accumulated dust in corners that vacuum cleaners often miss. These maintenance routines not only prolong the life of your installations but also keep your space looking fresh and inviting. As trends shift towards more innovative materials, such as waterproof wall panels and abra-finish tiles, understanding how to care for these surfaces will become even more vital. In fact, some modern materials require specific cleaning agents—consult your product manufacturer’s recommendations to avoid accidental damage. Remember, preventive care is always better than reactive repairs; a little effort regularly can keep your home looking pristine for years ahead. If you’re interested in elevating your shower experience, check out our guide on creating a spa-like shower experience. Try implementing a bi-weekly cleaning routine using a microfiber cloth and gentle cleaners, and see how your finishes maintain their beauty longer. Taking these small but effective steps today will save you big headaches down the line, making your home truly stand the test of time.
Throughout my renovation journey, I’ve encountered lessons that seemed small but led to significant improvements in my craftsmanship. One of the most impactful was realizing that every tiny detail, from proper subfloor preparation to choosing the right seam tools, directly affects the final visual appeal. I used to believe that installing carpet or flooring was mostly about following basic steps, but I’ve learned that paying attention to subtle nuances—like fiber blending or meticulous edge alignment—can make or break the professional finish you’re aiming for.
Another valuable lesson was understanding the importance of pro-grade tools. Investing in quality seam irons, fiber blending brushes, and precise cutting instruments transformed my results from amateurish to polished. The difference became clear when I could easily hide seams or create perfectly flush transitions without resorting to gimmicks or hurried fixes. This experience taught me that mastery comes from patience, practice, and the right equipment.
Most importantly, I’ve discovered that the secret to lasting success isn’t just in initial installation but also in ongoing maintenance. Regular inspections, timely repairs, and using specialized cleaning tools keep the pristine look intact. For example, a microfiber mop or a steam cleaner can prevent small issues from turning into costly disasters. Embracing these habits ensures that your home remains beautiful and durable long after the project wraps up.
What Hidden Truths Do Top Installers Keep to Themselves?
- Patience beats speed every time: Rushing through seam blending or edge scribing leads to visible flaws. Taking the extra minutes to ensure fiber alignment or wall scribing accuracy results in a flawless finish.
- Tools are worth the investment: Quality seam irons, fiber brushes, and scribing jigs might seem pricey but save countless hours and frustration—trust me, I’ve been there.
- Small details matter more than you think: Perfect edge cuts, fiber blending, and seam pressings create an almost invisible transition that elevates the entire space.
My Essential Arsenal for a Show-Stopping Finish
- High-quality seam iron: Regulates temperature consistently, ensuring seamless fusion without damaging fibers. My personal favorite is the professional-grade seam iron.
- Fiber blending brush: A fine brush to gently realign carpet fibers after seaming, crucial for near-invisible joins. This simple tool drastically enhances the final look.
- Precision scribing tools: Whether a coping saw or a dedicated scribing jig, these tools help achieve perfect wall-fit edges, especially on irregular surfaces.
- Heavy-duty seam tape: Ensures stable bonding during installation and prevents re-seating problems down the line.
Feel the Power of a Flawless Finish
Creating seamless transitions and hidden seams is more than just a skill—it’s an art that elevates your entire home’s aesthetic. Remember, the patience, attention to detail, and quality tools I’ve shared can turn an everyday DIY project into a professional showcase. Whether you’re tackling carpet seams or flooring transitions, adopting these practices will boost your confidence and save you money in the long run.
If you’re craving more advanced insights, I highly recommend exploring our comprehensive guide to durable flooring installation, which delves into strategies ensuring longevity and beauty. For specific tools and techniques, don’t forget to visit our upgrade your baseboards page or contact us for personalized advice on implementing these methods in your space.
Remember, mastering seam concealment and transitions isn’t just about aesthetics but about creating a space that feels polished, balanced, and inviting. Embrace the learning process, invest in quality tools, and pay close attention to those small details—your future self will thank you for it.
Let’s Elevate Your Home Interior Together
Are you ready to transform those visible seams into invisible masterpieces? Share your experiences, questions, or success stories below—I’d love to hear how you’re bringing professional quality into your home renovation projects!
Previous Article
3 Curbless Shower Drainage Fixes to Prevent 2026 FloodingNext Article
3 Critical Fixes for a Failing 2026 Shower Floor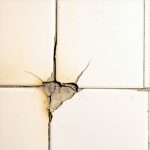
One thought on “How to Hide 2026 Carpet Seams With These 4 Pro Tools”
Evelyn Brooks
April 4, 2026 at 1:11 amThis post really hit home for me because I’ve struggled with visible carpet seams for years, especially in high-traffic areas where cheap tricks just don’t cut it. Investing in pro tools like quality seam irons and fiber brushes has truly transformed my results—what once looked like amateurish patchwork now resembles a seamless stretch of flooring. I agree with the emphasis on patience and meticulous work; rushing almost always leads to noticeable flaws that take even more time to fix later. I’m curious — how do others handle uneven subfloor surfaces when trying to hide seams? I’ve found that using a scribing tool makes a big difference, but I’d love to hear tips from those with more experience on achieving perfect edge fits in tricky spots. Overall, this guide is an excellent reminder that the right tools and a steady hand are worth their weight in gold when it comes to finish work.