Ever wrestle with installing a new carpet, only to find unsightly bunching and wrinkling the very moment you step back to admire your work? I recall a weekend project where I thought I had nailed the perfect stretch—only to discover those frustrating little creases days later. That lightbulb moment made me realize there’s more to a flawless carpet installation than just laying it down; it’s about knowing the secrets to keep it smooth and lasting for years.
Why a Perfect Carpet Install Matters More Than You Think
Let’s be honest—carpet installation can be a dreaded task, especially because the outcomes often seem unpredictable. You want your new flooring to look sleek and feel cozy, but one misstep can turn your living room into a wrinkled mess. Not only does this ruin the aesthetic, but it can also shorten the lifespan of your carpet and lead to costly replacements sooner than expected. Early on, I made the mistake of rushing through measurements and ignoring proper stretching techniques, which resulted in waves and bumps that no vacuum could fix. Trust me, you’re better than that!
Today, I want to share with you five professional tips that will help you achieve that flawless finish—tips real carpet pros swear by and that I’ve personally tested. With these insights, you can say goodbye to those pesky bunches and hello to a smooth, durable surface that lasts. Ready to transform your DIY game? Let’s dive into what truly makes a difference in carpet installation success.
Is it really worth all this fuss, or is a DIY install doomed to fail?
Honestly, I used to think that achieving a perfect carpet lay was only for seasoned pros. I believed that unless you had the right tools or years of experience, it was just a matter of luck. But after a few embarrassing missteps—like ignoring the importance of proper padding and overestimating my stretching skills—I learned that with the right techniques, anyone can get professional results. Early mistakes included neglecting to prepare the subfloor and assuming that all carpets are created equal, which isn’t true. For more tips on the best installation practices, check out this detailed guide.
In the upcoming sections, I’ll walk you through the proven strategies that helped me and countless others turn a messy job into a satisfying, even fun, project. So if you’ve ever faced the disappointment of uneven surfaces or sagging corners, don’t worry—you’re about to learn how to get it right the first time, every time.
Prepare the Surface Methodically Before Laying Down Carpet
Think of installing carpet like preparing a canvas before painting; a smooth, clean surface ensures your artwork will look pristine. I remember one project where I skipped cleaning the subfloor, resulting in bumps that caused the carpet to look uneven. To avoid this, thoroughly sweep and vacuum the area, removing dust and debris. Check for any uneven patches and rectify them with a subfloor leveler or screw down loose boards. This creates a solid foundation, much like setting a stable base for a tower, preventing future wrinkles or shifting. For detailed subfloor prep, visit this guide.
Use the Right Tools and Techniques for Stretching
Invest in a Quality Carpet Stapler or Tack Strip
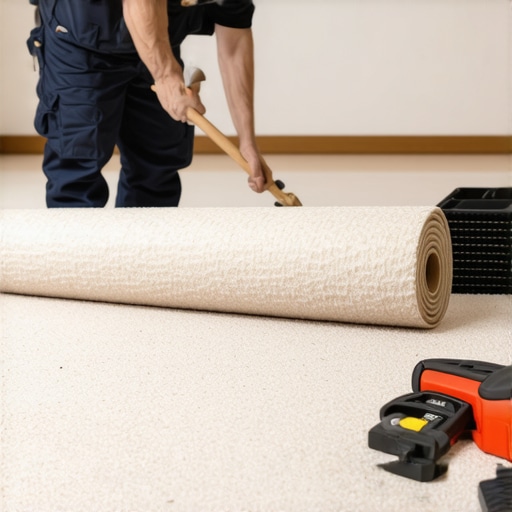
Secure the edges with tack strips or staplers designed for carpet installation. During my first try, I used a basic hammer and nails, which poorly held the carpet edges, leading to immediate wrinkles. Switching to a professional tack strip and power stretcher changed everything, providing enough tension to straighten the material tightly. Think of this process like tuning a guitar string—proper tension is key to a harmonious look. Carefully measure and align tack strips along the perimeter, leaving about half an inch from the wall to accommodate baseboards later. For optimal results, check out this installation strategy.
Master the Pull Technique with a Power Stretcher
Using a power stretcher allows you to pull the carpet evenly across the space, reducing slack and preventing bumps. I remember jamming a knee into the carpet while manually stretching—ineffective and painful. When I finally rented a power stretcher, I was amazed at how smoothly I could distribute tension. Position the tool at a taught angle, and work from the center outward, anchoring the carpet firmly every few feet. Check the tension frequently; too tight can cause ripples, too loose results in wrinkles. For step-by-step instructions, explore this detailed guide.
Trim Excess Material with Precision
Cutting the carpet properly is crucial to achieving a neat edge. I learned this the hard way when I rushed the trimming and ended up with uneven borders. Use a sharp utility knife and a straight edge or a specialized carpet trimmer for cleaner cuts. Measure and double-check the length against the wall before making cuts, leaving about a half-inch overlap for the tack strip. To minimize fraying, mark your cut line clearly and cut in one smooth motion. Proper trimming ensures a seamless transition into baseboards, enhancing the overall appearance. For alignment techniques, visit this expert guide.
Secure the Edges and Finish Neatly
After stretching and trimming, fix the edges onto the tack strips securely. Avoid loose spots, as these can cause buckling over time. I once overlooked this step and noticed my carpet starting to lift after a few months. For a clean look, use a knee kicker or notched roller to press the edges into the tack strip firmly. Check for consistent tension along the perimeter, and trim any excess if necessary. Once secured, install your baseboards or trim to cover the gaps and give a polished finish. For complementary ideas, see this makeover guide.
While it might seem straightforward to lay flooring or install baseboards, many homeowners overlook subtle nuances that can undermine their efforts. One common myth is that perfect measurement alone guarantees a flawless finish. In reality, slight shifts in subfloor moisture levels or temperature fluctuations can cause materials to expand or contract after installation, leading to misalignments over time. For example, you might find that your newly laid carpet starts to ripple because adhesive choices weren’t suited for your climate—something many overlook when rushing a project. Advanced DIYers should consider seasonal variations and material compatibility, and cross-reference expert guidelines like those found at this resource. Additionally, a common trap involves neglecting the importance of proper expansion gaps in flooring and shower installations, which can lead to buckling or cracking down the line. Such gaps aren’t just filler; they accommodate natural expansion and contraction, especially in humid environments. Failing to leave these spaces often results in costly repairs later.
The mistake of assuming that all adhesives suit every space can also spell disaster. Using a glue intended for wood on a tile shower, for instance, will compromise waterproofing and longevity, as discussed in this guide. Consider the finer points like moisture resistance, substrate compatibility, and proper curing times to avoid premature failure.
Ever wondered why some seemingly perfect DIY projects start to show cracks or gaps months after completion? It often boils down to micro-variations in installation techniques and overlooked environmental factors. Paying attention to these details—and challenging the broad assumptions many people hold—can elevate your home improvement game from amateurish to professional quality. Remember, mastering these nuances not only saves money but also ensures your projects stand the test of time. Have you ever fallen into this trap? Let me know in the comments.
Once you’ve successfully installed your flooring, carpets, or shower fixtures, the next crucial step is maintaining them to ensure longevity and sustained beauty. Proper maintenance begins with selecting the right tools and knowing how to use them effectively. Over time, investing in quality equipment pays off by reducing wear and tear and minimizing costly repairs.
Tools That Make Maintenance Easier and More Effective
For flooring, I recommend a high-quality vacuum with adjustable settings and a soft brush attachment. This allows you to remove dust and debris without damaging delicate fibers or surface finishes. For deeper cleaning, especially on hardwood and laminate, a microfiber mop with a gentle cleaning solution preserved in an easy-to-use spray bottle works wonders. These tools not only streamline the process but also help maintain a pristine look over the years.
When it comes to bathroom showers, a good squeegee is essential. I personally swear by one with a wide rubber blade, as it easily removes water after each shower, preventing soap scum and mineral buildup. For tackling stubborn grout stains or mold, a dedicated grout brush combined with a commercial-grade cleaner designed for bathroom surfaces is invaluable. Regular scrubbing with the right tools prevents more serious issues down the line, and it’s far easier than performing major renovations.
How do I maintain my flooring and showers over time?
Consistent care is key. For floors, schedule a weekly vacuuming or sweeping to prevent dirt from embedding into surfaces. Every few months, deep clean with suitable products—avoiding harsh chemicals that can strip finishes or cause damage. For showers, wipe down surfaces with a squeegee or microfiber cloth after each use to prevent water spots and mold growth. Additionally, inspecting grout and sealants periodically allows you to catch and repair small issues before they become major problems. For comprehensive guidance, I suggest visiting this guide, which offers expert advice on shower maintenance techniques.
Another important aspect is choosing the right cleaning products. For most surfaces, pH-neutral cleaners are gentle yet effective. Avoid bleach or ammonia-based products that can damage grout or sealants. Investing in a steam cleaner for floors can also be a game-changer, providing deep sanitization without chemicals—a technique increasingly popular among DIY homeowners aiming for professional results.
Predicting future trends, I see smart cleaning tools—like robotic vacuums with mapping capabilities—becoming standard in home maintenance. These devices can be programmed to clean your floors automatically, reducing ongoing effort and ensuring consistent care. Embracing technology like this can keep your home looking impeccable with minimal hassle.
Try this advanced tip for long-term maintenance
Incorporate periodic sealing of grout lines and surface seals, especially in showers and high-traffic areas. Applying a high-quality sealant every 12 to 18 months creates a moisture-resistant barrier that significantly prolongs the life of your tiles and grout. For detailed instructions on how to do this correctly, check this expert resource. Using a premium penetrating sealer will protect your surfaces from water damage, stains, and mold, ensuring your investment remains as stunning as the day it was installed.
Lessons That Changed My Approach to Flooring and Shower Installations
- Precision Over Speed: Rushing through measurements or prep work led to avoidable mistakes, reminding me that patience and attention to detail are the true keys to lasting results.
- The Power of Proper Tools: Investing in quality equipment like a professional tack strip or a power stretcher transformed my outcomes, proving that the right tools save time and heartache.
- Don’t Underestimate Subtle Environment Factors: Seasonal changes and moisture levels impact installations more than I initially believed, emphasizing the importance of adapting techniques to environmental conditions.
Tools, Books, and Resources That I Trust for Transformative Results
- My Essential Toolkit for Flooring and Shower Upgrades: A high-quality vacuum with adjustable settings and a microfiber mop have been indispensable for maintenance, helping preserve my installations over time.
- Recommended Reading for Home Improvement Enthusiasts: The comprehensive guide on flawless carpet installation (here) has expanded my understanding of tensioning and trimming techniques that matter most.
- Inspiration for Modern Bathroom Designs: Ideas from this resource elevate my shower renovation plans, blending style with durability.
Your Turn to Make a Lasting Impact in Home Upgrades
Remember, mastering seemingly small details in flooring and shower installations can make a monumental difference in how your space looks and lasts. Don’t hesitate to embrace the learning process—your home’s beauty and functionality are worth the effort. Are you ready to take the next step toward professional-quality results? Share your experiences or questions below, and let’s grow together!
Hope this deep dive sparks your confidence—happy home improving!
![Stop Squeaky Floors: 5 Flooring Fixes for 2026 [Checklist]](https://tilecraftsmens.com/wp-content/uploads/2026/01/Stop-Squeaky-Floors-5-Flooring-Fixes-for-2026-Checklist-150x150.jpeg)
