It was a mess. My newly installed hardwood floors cupped and creaked, and I felt that familiar wave of frustration—and a tiny flash of regret. I realized I had jumped into this project without understanding the intricacies of proper installation and maintenance. That was my lightbulb moment. If you’re reading this, chances are you’ve faced a similar situation or fear making costly mistakes with your flooring. Believe me, I’ve been there, and I want to share what I’ve learned to help you avoid the pitfalls and achieve stunning, lasting results.
Why Your Flooring Project Might Be Falling Flat—And How to Fix It
We often underestimate how critical details are in flooring installation. From choosing the right materials to preparing the subfloor properly, every step influences the final look and longevity. I learned this the hard way when my inexperience led to uneven surfaces and loose boards that needed redoing. After some research and a few costly lessons, I discovered proven strategies that make all the difference. Today, I’ll walk you through simple but powerful tips that can save you time, money, and frustration, ensuring your floors not only look beautiful but stand the test of time.
Is All Flooring Installation Equally Reliable? The Truth About the Hype
Early on, I thought that any DIY approach would save money and effort. Turns out, rushing through critical tasks like acclimating materials or checking moisture levels can sabotage your project. I once skipped a moisture test because I believed my subfloor was dry enough—big mistake. According to industry experts, improper preparation can lead to problems down the line, including warping or mold. Want to learn how to avoid these common blunders? Keep reading, because I’ll share insider tips to help you get it right from the start.
Now that you know why proper flooring installation is more complex than it appears, let’s dive into the practical steps that will transform your space into a durable masterpiece. Interested in tips that will make your project smoother and your results flawless? Click here to explore the ultimate guide to durable flooring installation, and let’s get started!
Prepare Your Subfloor Thoroughly
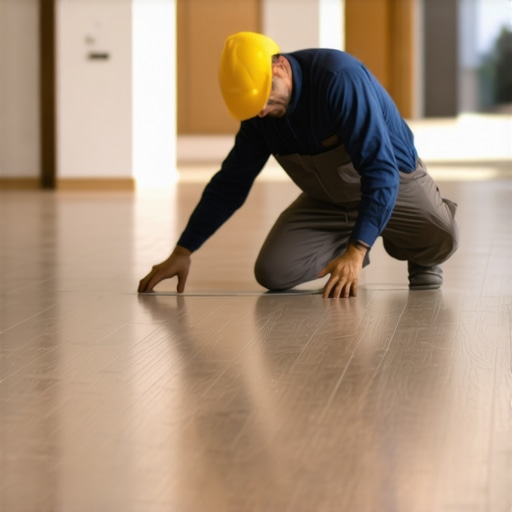
Start by cleaning the subfloor removing debris and dust. Use a moisture meter to ensure the moisture levels are within the acceptable range for your flooring type—this prevents future warping or mold. I once skipped this step, and weeks later, my hardwood began cupping—everything went downhill from there. Think of the subfloor as the foundation of a house; if it’s uneven or damp, artful flooring installation won’t save the structure.
Acclimate Materials to Your Space
Bring your flooring into the room at least 48 hours before installation. Store the materials flat and expand naturally, similar to how a sponge relaxes after being squeezed. For carpeting, you need to let the fibers adjust to room humidity and temperature to prevent post-installation buckling or gaps. I learned this by mistakenly installing a laminate floor the same day I brought it home—large gaps appeared because it hadn’t acclimated properly. Compatibility here is key, just like making sure your paint matches the walls.
Accurate Measurements and Planning
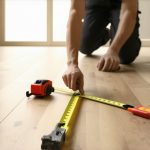
Measure your space twice and plan your layout to minimize waste and awkward cuts. Use a chalk line or laser for straight guidelines. When I measured my living room, I didn’t account for baseboard thickness, leading to uneven edges and a less polished look. Think of this as drawing a blueprint before building—precision saves headaches later.
Cutting Materials Smartly
Invest in a good saw—whether a miter or tile saw. Make clean, precise cuts, especially for edge pieces. For complex cuts around door frames, use a jigsaw or coping saw, which gives a more natural fit. I once tried to cut eternity-style pieces with a dull blade; it was messy and uneven. Imagine trying to cut a cake with a butter knife—accuracy and tools matter.
Installation: Laying the Materials
Start from the longest, straightest wall, working towards the door. Use spacers to maintain expansion gaps, similar to leaving a margin around a painting. For hardwood or laminate, click-lock systems simplify the process, but ensure the tongue and groove are well-connected. I once forced a board that didn’t click properly, which caused future squeaks. Proper technique here is like puzzle assembly—every piece must fit snugly.
Securing and Finishing Edges
Once laid, fasten the flooring according to manufacturer instructions—nails, staples, or adhesive. For carpets, stretch and tack the edges firmly, anchoring them to the tack strip. When I installed a new carpet, I used a knee kicker to tension the fibers evenly, preventing ripples. Edges should be smooth and flush for a professional look. Think of finishing like dressing a wound—attention to detail counts.
Installing Baseboards and Trim
Measure, cut, and install baseboards last, sealing gaps with caulk for a seamless transition. Use a miter saw for angled cuts at corners. I replaced my outdated baseboards with stylish profiles, enhancing the room’s aesthetics. For tips that can make your baseboard upgrade effortless, visit this guide. Proper trim installation ties the entire look together, much like jewelry completes an outfit.
Final Inspection and Care
Check for uneven seams, gaps, or loose boards. Use a tapping block to gently click stubborn pieces into place. After completing, wait 72 hours before moving furniture to allow everything to settle. Regular cleaning and avoiding excessive moisture extend your floors’ life. I learned that patience here pays off—it’s worth waiting a few days to see a flawless finish that lasts years.
Many DIY enthusiasts and even some professionals tend to believe that finishing touches like baseboards, carpet installation, and shower renovations are straightforward tasks, but this assumption is often far from reality. One common myth is the idea that as long as the materials look good, the job is done. In truth, the nuances of precise measurements, material compatibility, and proper sealing can make or break the final appearance and durability. For example, many overlook the importance of accommodating expansion gaps in baseboards or ensuring that carpets are stretched evenly to prevent ripples. These seemingly minor details have a significant impact on longevity and aesthetics.
Another frequent mistake involves underestimating the importance of moisture and temperature control when installing showers. I’ve seen homeowners neglect to follow manufacturer guidelines or skip moisture barriers, leading to mold or leaks down the line. It’s not just about picking the right tile or shower design but also about understanding the complex layers involved in a proper installation. According to expert insights from shower renovation specialists, neglecting these critical layers can result in costly repairs within a few years.
What do even seasoned DIYers often get wrong in the final stages of their projects?
One overlooked aspect is the alignment and levelness during installation. For instance, when attaching baseboards or laying down flooring, small misalignments can become glaringly obvious over time, especially in high-traffic areas. Many underestimate how crucial a level foundation is for the transition pieces, such as thresholds or transition strips, which need to be perfectly flush for both functional and aesthetic reasons. Installing these components without careful measurement can inadvertently cause gaps or uneven surfaces that deteriorate faster. An article by flooring experts emphasizes that precision at this stage ensures a professional finish and prevents future complaints about cracked or warped materials.
Furthermore, understanding the environmental impact on your materials is often dismissed. For example, choosing a carpet without considering the humidity levels in your home can lead to mildew or fiber damage. Similarly, improper sealing around shower edges not only causes water damage but can also invite mold growth, which is difficult to eradicate. Experts recommend a thorough knowledge of your environment combined with meticulous execution — a step that often distinguishes amateur results from truly professional work. If you want to master this, check out this guide on durable flooring techniques.
Are you guilty of assuming that these finishing steps are foolproof or overlook certain layers? Recognizing these hidden details can save you from costly repairs and help achieve that sleek, professional look you desire. Every fraction of an inch and every material choice impacts the durability and beauty of your home’s finishing touches. For further insights and personalized advice, don’t hesitate to reach out here. Have you ever fallen into this trap? Let me know in the comments.
Keep Your Floors and Showers in Top Shape: Essential Tools and Maintenance Strategies
Maintaining your flooring, showers, and baseboards isn’t just about fixing problems when they arise—it’s about proactive care that preserves their beauty and functionality over time. To do this effectively, investing in the right tools and following disciplined maintenance routines is crucial.
One versatile tool I swear by is the cordless oscillating multi-tool. Its precise blades make quick work of sealing imperfections around baseboards or smoothing out grout lines in showers. Personally, I prefer models like the Dremel Multi-Max because of their ergonomic design and variety of attachments, which save me time and reduce fatigue during detailed jobs. For cleaning, a microfiber mop paired with eco-friendly, pH-neutral cleaning solutions keeps surfaces free of dirt without risking damage. Regularly wiping down baseboards and tiles with a soft cloth prevents dust buildup and mold.
For deeper maintenance, I rely on a handheld steam cleaner. It effectively sanitizes grout lines and shower corners without harsh chemicals. According to industry experts, consistent cleaning with steam vastly reduces mold and mildew buildup, extending the time between costly overhauls. Incorporating a quality water softener into your home’s plumbing system can also be a game-changer for long-term care, particularly in hard water regions, as it prevents mineral deposits that can cause staining and corroding on fixtures and grout.
Looking ahead, I predict that smart home maintenance tools will become increasingly prevalent. Devices with sensors that monitor moisture levels or detect early signs of mold could alert homeowners before problems become visible, enabling preventative action. Embracing these innovations can keep your home healthier and more beautiful with less manual effort.
How do I maintain flooring and showers over time?
Routine inspections and swift repairs are key. Check grout lines and sealants regularly for cracks or deterioration; reapply sealant every 2-3 years to prevent water infiltration. Also, avoid using abrasive scrubbers that can scratch surfaces or dislodge tiles—soft sponges or brushes are gentler and just as effective. For flooring, maintain a consistent cleaning schedule, and place doormats to reduce dirt and grit that cause scratches. Be cautious with moisture; using a dehumidifier in damp areas ensures your materials stay dry and mold-free. For comprehensive guidance on long-term flooring tips, consider reviewing this resource by flooring specialists.
Don’t forget to integrate regular maintenance checks into your cleaning routine—this proactive approach can save you significant time and money down the line. Why not try using a cordless oscillating multi-tool for those tricky caulking or grout tasks? It’s a small investment that yields big rewards in maintaining your home’s beauty and durability. If you need tailored advice, reach out to experts through this contact page. What maintenance habit has kept your home looking its best? Share your tips in the comments!
My Biggest Breakthrough About the Final Stages of Home Renovations
- The importance of meticulous measurement and planning became crystal clear when I realized the slightest misalignment in baseboards or transition strips could ruin an entire look—attention to detail at this stage defines the outcome.
- Understanding that each environment demands tailored solutions—what works in a humid bathroom might falter in a dry living room—taught me to avoid a one-size-fits-all mindset and to customize my approach accordingly.
- Embracing patience during the final inspection phase, waiting a full 72 hours before furniture placement, prevents premature wear and ensures the installation settles properly.
- Recognizing that high-quality tools, like a good miter saw or a cordless oscillating multi-tool, make complex tasks smoother and more precise, ultimately elevating the entire project.
- Realizing that these finishing steps are as vital as the initial installation—diligence here guarantees long-lasting beauty and saves costly repairs later.
Tools and Resources That Changed My Approach
- The ultimate flooring installation guide from industry veterans offered step-by-step insights, helping me tackle tricky edges and transitions with confidence.
- An excellent resource on creative baseboard designs expanded my options beyond standard profiles, allowing my spaces to feel more polished and personalized.
- A quality moisture meter became indispensable during both the planning and final inspection phases, alerting me to issues before they escalated into problems.
- Design-focused blogs and forums provided fresh ideas on modern shower and bathroom renovations, inspiring me to think beyond basic tile choices and incorporate trendy, durable options.
- Finally, connecting with professionals through this contact page allowed me to troubleshoot specific challenges and refine my techniques, ensuring expert advice when I needed it most.
Your Next Step Toward Flawless Floors and Showers
Remember, turning your renovation dreams into reality hinges on attention to detail, patience, and the right resources. Don’t let small mistakes undermine your hard work—embrace these insights, and you’ll enjoy stunning results that withstand the test of time. Are you ready to elevate your home with these expert finishing touches? Share your plans or questions below, and let’s achieve excellence together!