I still remember the moment when I finished installing new baseboards in my living room, only to realize I had left a gap that was glaringly obvious. It was a real lightbulb moment for me—simple mistakes can ruin even the best DIY efforts. Over the years, I’ve learned that the secret to a truly professional-looking finish isn’t just about the tools or materials; it’s about understanding the finer details that most people overlook, especially when it comes to carpet and baseboard installation.
Why Perfecting Your Carpet & Baseboards Matters More Than You Think
When I first started, I thought a quick job was enough to make my home look good. Turns out, those quick fixes often lead to uneven edges, gaps, or crooked lines that scream amateur. Real progress came when I shifted my focus to the small, often overlooked details—like how to cut a perfect corner or how to hide those pesky gaps behind the baseboards. The impact? A clean, seamless look that makes any room feel polished and inviting. Trust me, it’s worth the effort. And if you’re tired of seeing uneven seams or baseboards that look like they’ve been through a war, keep reading. We’re going to tackle these issues head-on, sharing insider tips that I’ve picked up along the way.
Is the Hype About Baseboard and Carpet Installation Tricks Legitimate?
Honestly, I used to think most of it was just marketing hype—until I made my own mistakes. One early blunder was rushing through a corner cut, which left a jagged edge that I couldn’t hide. It taught me a valuable lesson: patience and proper technique are everything. Now, I swear by a few key strategies that have transformed my projects from sloppy to stunning. Want to avoid my early mistakes? I’ll show you exactly how to do it right. And if you’re curious about whether these tips really work, I can tell you that proper planning and attention to detail make all the difference. For example, mastering corner joints can elevate your entire installation. Curious about more? Check out detailed guides like this resource for expert advice.
So, are you ready to ditch the uneven edges and lackluster results? Let’s dive into the practical steps that will turn your DIY project into a professional finish. Because once you learn these secrets, you’ll wonder how you ever did without them.
Prepare Your Workspace with Precision
Start by clearing the room completely and removing any existing baseboards or carpeting if necessary. Use a level and a measuring tape to mark your new baseboard height, ensuring consistency around the room. For the carpet, check the subfloor for debris or uneven spots that could compromise the installation. I once overlooked a slightly uneven patch, which caused my new carpet to look lumpy—learning from that, I now double-check the subfloor beforehand.
Cutting and Fitting Your Materials
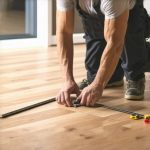
Measuring and Cutting Baseboards
Measure each wall accurately with a tape measure, adding about 1/8 inch for expansion. When cutting corners, miter the edges at a 45-degree angle to create seamless joints. I vividly remember my first attempt at a corner—my cuts were off, leaving gaps. Using a miter saw made this much easier and more precise. For longer walls, cut the pieces slightly longer and sand down for a perfect fit. This prevents gaps that can ruin the clean look.
Handling Carpet with Care
When installing carpet, measure the room’s dimensions and add a few extra inches for adjustments. Use a utility knife for precise cuts, mimicking the way I once trimmed a stubborn edge—slow and steady wins the race. For tight corners, employ a knee kicker to stretch the carpet evenly. This tool made a huge difference in avoiding wrinkles, which I used to struggle with endlessly.
Attaching and Securing for a Lasting Finish
Fastening Baseboards Properly
Secure the baseboards with finishing nails, using a nail gun for speed and accuracy. Countersink the nails slightly below the surface, then fill the holes with wood filler. I once skipped this step, and the nail heads were visible—distracting and amateurish. Painting over the filler after sanding creates a seamless look. Pay attention to corners—use a nail set to avoid splitting the wood when nailing in tight spots.
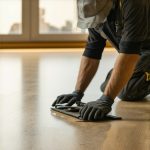
Stretching and Securing Carpet Effectively
Use a power stretcher to pull the carpet tight, avoiding any slack or wrinkles. Start at one corner, working your way across the room methodically. I learned this the hard way when my carpet sagged after a few weeks because I didn’t stretch it properly. Tacking it down with a power stretcher ensures a smooth, lasting finish that stands the test of time.
Finishing Touches to Elevate Your Project
Caulk the edges where the baseboards meet the wall for a clean, professional appearance. Use painter’s tape to get straight lines if painting the baseboards. Once everything is secured and painted, do a final walk-through, checking for gaps or loose spots. Small details like these transform a basic installation into a polished look, much like my recent makeover inspired by this expert guide.
When it comes to flooring, carpet, showers, and baseboards, many DIY enthusiasts and even seasoned professionals fall prey to misconceptions that can jeopardize the quality of the finished project. Let’s dig deeper into these pitfalls and reveal some expert insights that can save you time, money, and frustration.
Why the ‘One-Size-Fits-All’ Approach Fails in Installation
A prevalent myth is that standard techniques work universally. For instance, many believe that simply using the same adhesive or seam method for all types of flooring guarantees perfect results. In reality, different materials require tailored approaches. For example, engineered hardwood needs a different subfloor preparation than vinyl planks, and ignoring this can lead to warping or gaps. Similarly, carpet installation isn’t just about stretching and tacking; understanding the specific fiber type and pile height influences the stretching technique. For in-depth guidance, check out this comprehensive guide.
Beware of Overlooking the Subfloor or Substrate
This is a classic trap. Many assume their existing subfloor is flat and stable, but even minor imperfections can cause uneven surfaces, wrinkles, or cracked tiles over time. A common mistake is to skip detailed subfloor inspections or not addressing moisture issues beforehand. For instance, moisture buildup beneath the floor is a silent killer, leading to mold, warping, and delamination. Experts suggest testing for moisture and leveling uneven surfaces before starting. Remember, a flawless finish starts from a solid foundation. For tips on durable flooring, see this expert advice.
Advanced Trick: Managing Expansion Gaps Effectively
One advanced nuance often missed is correctly handling expansion gaps, especially in large rooms. Many installers either fill gaps with caulk or ignore them altogether, leading to buckling or cracking as the material expands and contracts with temperature changes. The secret is to leave a consistent gap around the perimeter and use trim or baseboards to hide it, ensuring the flooring can breathe. This technique is particularly critical in shower installations, where moisture and temperature fluctuations are intense. For modern ideas on shower renovations, visit this resource.
Have you ever fallen into this trap? Let me know in the comments. Remember, understanding these hidden nuances makes a significant difference in achieving that professional, lasting finish. For more expert tips on baseboards and interior updates, check out this post.
Keep It Working with the Right Tools and Practices
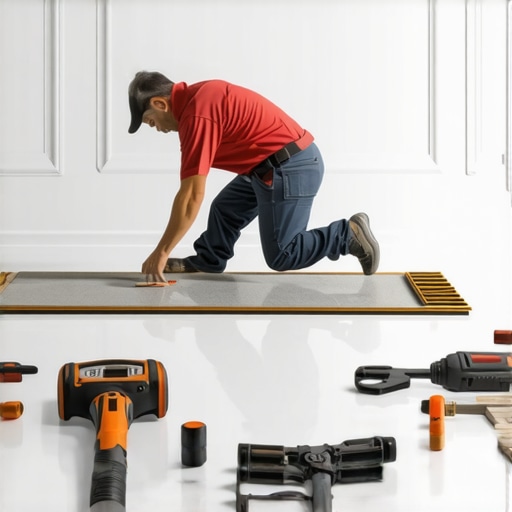
Maintaining your flooring, showers, and baseboards over time requires more than just initial installation skills. It’s about investing in the right tools and adopting proven methods to ensure longevity and ease of maintenance. Personally, I recommend using a high-quality oscillating multi-tool for trimming and detailed work. Its versatility allows you to make precise cuts around corners or fixtures without damaging the surrounding material, which is crucial for both flooring and shower renovations. Additionally, a good cordless drill with various bits speeds up tasks like securing baseboards or installing new fixtures, saving you time and effort. For leveling uneven surfaces, I rely on a self-leveling compound applied with a putty knife, ensuring a smooth foundation that prevents future issues like cracking or warping. These tools have become staples in my projects and consistently deliver professional results. For more advanced projects, I use laser distance meters to measure distances with pinpoint accuracy, especially when fitting large tiles or expansive flooring sections, reducing waste and errors. Looking ahead, the trend is moving toward smart tools that connect via Bluetooth or Wi-Fi, providing real-time data and guidance directly on your device, making DIY projects even more precise and accessible.
How do I maintain my floors and showers over time?
Regular cleaning is the foundation, but deeper maintenance involves inspecting for damage or wear every few months. For flooring, I recommend sealing hardwood or laminate surfaces annually with a quality sealant to prevent moisture damage. For carpets, professional deep cleaning every 12 to 18 months keeps fibers vibrant and free of allergens. Showers benefit from routine grout sealing, which prevents water infiltration and mold growth; I typically reseal every two years. Baseboards can accumulate dust and scuffs, so a quick wipe with a damp cloth every month keeps them looking fresh. To address persistent issues or upgrade your space, consider consulting specialists or exploring innovative products—such as waterproof paint for bathrooms or anti-scratch coatings for high-traffic baseboards. Implementing a maintenance routine with these tools and tips will extend the lifespan of your installations and keep your home looking impeccable. If you’re planning your next upgrade, don’t forget to try out a laser level for perfect alignment or a handheld steam cleaner for deep cleaning showers—these small investments make a significant difference. For tailored advice or professional assistance, contact me via this contact page.
The Hardest Lesson I Learned About Flooring and Finishing Touches
One of my biggest lightbulb moments was realizing that rushing through the corners or ignoring expansion gaps can turn a professional-looking project into a disaster. Patience and precise measurements are everything—those small details make the difference between a flawless finish and a lumpy, uneven surface. I learned this the hard way, and now I always double-check my work before moving on.
Top Tools That Changed My Approach to Home Renovations
Investing in quality tools like a miter saw, a power stretcher, and a laser level transformed my DIY projects. These tools help me achieve perfect cuts, tight seams, and accurate measurements—all crucial for professional results. Trust me, a good toolkit is worth every penny and saves countless hours of frustration. For the best results, I rely on trusted sources like this comprehensive guide.
Don’t Let Fear Hold You Back from Starting Your Home Upgrade
Taking the first step can be intimidating, but remember, every expert started as a beginner. Focus on mastering small, critical skills—like how to properly cut and fit baseboards or stretch a carpet—and the rest will follow. Your home deserves that polished, professional look, and with patience and practice, you can achieve it. Ready to transform your space? Dive into your project today and see how far you can go. Your future self will thank you for it.