I still remember the moment I realized I’d been doing my carpet and baseboard installations all wrong. It was late one evening, after hours of fiddling with tricky corners and uneven cuts, and I looked at my work in frustration. The edges weren’t seamless, and I knew that if I wanted a professional-looking finish, I had to rethink my approach. That lightbulb moment changed everything for me—and it can do the same for you.
Why Cutting Corners Isn’t an Option
The truth is, your flooring project isn’t just about laying down carpet or attaching baseboards. It’s about creating a space that looks polished and feels inviting. And that starts with the details—like perfect seams, clean corners, and a smooth finish. But here’s the thing: many DIYers and even some pros overlook the small steps that make a huge difference. I used to be guilty of rushing through those tricky spots, which led to visible gaps and uneven lines. Over time, I discovered that mastering these little secrets transforms your result from okay to stunning.
Today, I promise to share with you the best-kept installation secrets that will elevate your home’s look and durability. We’ll cover how to cut and fit like a pro, how to tackle corners without frustration, and how to finish with clean, sharp lines. Whether you’re updating your living room or doing a full renovation, these tips will save you time and headaches. Ready to learn how to make your project truly stand out? Let’s dive in!
Is Flawless Installation Really Worth the Extra Effort?
I remember thinking that rushing through the process would save me time. Spoiler: it didn’t. I made costly mistakes early on—like uneven cuts and loose seams—that I had to fix later. That’s why I always recommend taking your time and doing it right the first time. The difference is clear: a professional finish not only looks better but lasts longer and adds value to your home. If you’ve ever faced a project that looked great initially but fell apart after a few months, you know what I mean.
Interestingly, experts emphasize that proper installation can extend the lifespan of your flooring and baseboards. For instance, [this article](https://tilecraftsmens.com/carpet-install-secrets-achieving-flawless-results-every-time) highlights the importance of precision and technique. So, if you’re serious about a perfect finish, it’s worth investing that extra effort now.
Now that we’ve set the stage, I’ll walk you through some practical steps to master the art of flawless installation. Trust me, once you see the difference, you’ll wonder why you didn’t start sooner. Let’s get to it!
Cut with Precision to Avoid Gaps
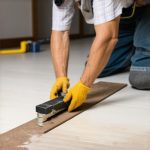
When I first started installing baseboards, I used a dull saw and rushed through cuts. The result was jagged edges and gaps that ruined the look. Now, I always use a sharp miter saw for clean, accurate cuts. I measure carefully, mark precisely, and cut slowly to ensure perfect angles. Think of it like slicing a cake — steady, confident strokes make all the difference. For tricky corners, I cut each piece at a 45-degree angle and test-fit before finalizing. This approach prevents misalignment and makes your lines seamless.
Align and Secure for a Tight Fit
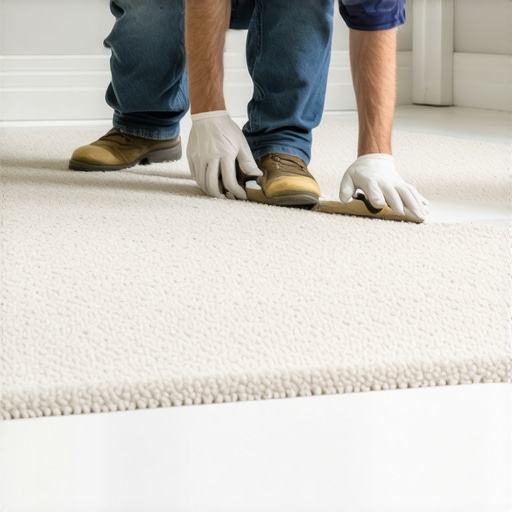
Once the pieces are cut, the next step is fitting. I hold each piece in place, checking for gaps or uneven joins. Using painter’s tape temporarily helps hold pieces while I nail or glue them. When securing, I use finishing nails spaced about 16 inches apart, driving them slightly below the surface with a nail set. This is like assembling a puzzle — every piece must click into place. If a piece doesn’t fit flush, I sand the edges lightly, which smooths out minor imperfections and ensures a tight, professional finish.
Seal Corners and Joints for a Flawless Look
Corners are the most challenging part. I often use caulk to fill small gaps and create a smooth transition between pieces. For a seamless appearance, I apply a bead of paintable caulk along the joint, then smooth it with a damp finger or a caulk finishing tool. I learned this trick after a messy first attempt left visible gaps. It’s like filling in the cracks in a painting — small touches make a huge difference. For external corners, I use corner blocks or mitered cuts to ensure sharp, clean edges that draw the eye instead of hiding imperfections.
Finish with Paint or Clear Coat for Durability
After installation, I sand lightly to remove any rough edges, then apply a coat of paint or clear finish, depending on the material. This step protects your work from moisture, scratches, and daily wear. When painting, I use a small brush for tight spots and a roller for larger surfaces, ensuring even coverage. For baseboards in high-traffic areas, I prefer a satin or semi-gloss finish for easy cleaning. This final touch transforms your installation from rough to refined, highlighting your craftsmanship and adding that pro-quality shine.
Additional Tips for Success
Remember, patience beats speed. Taking your time with each step results in a flawless finish. Use quality tools, measure twice, and don’t rush the caulking or painting. For more detailed techniques, check out this guide on installing baseboards and carpets perfectly. With these core methods, your next project will look polished and last for years to come.
While most DIY enthusiasts and even some seasoned pros believe they understand the nuances of flooring installation, there are hidden pitfalls that can undermine the entire project. One of the most pervasive myths is that rushing through cuts and measurements doesn’t significantly impact the final look or durability. In reality, precision at every step—especially during cutting and fitting—is critical for a seamless finish and long-lasting results. For example, using a dull saw or neglecting to measure twice often results in gaps and misaligned edges, which are difficult to correct once the flooring is laid. To avoid this, invest in quality tools and take your time to double-check measurements, as highlighted in expert guides like this resource.
Another common mistake is overlooking the importance of proper expansion gaps, especially in large rooms. Many people believe that a tight fit is always best, but without allowing space for expansion, your flooring can buckle or warp over time. A nuanced understanding of the material’s requirements and the climate’s influence is essential. For instance, hardwood and laminate floors need specific expansion gaps, which if ignored, can lead to costly repairs or replacements. Experts advise consulting the manufacturer’s guidelines and planning for these details from the outset—details often missed by DIYers eager to complete the job quickly. For more insights, check this detailed guide.
What Advanced Techniques Can Elevate Your Flooring Game?
For the advanced installer, understanding the subtle differences in subfloor preparation can make a world of difference. Many overlook that a perfectly level and clean subfloor is the foundation of a flawless finish. Even small dips or debris can cause uneven wear or gaps over time. Techniques like using a self-leveling compound or moisture barriers are often skipped but are critical for high-moisture areas or uneven surfaces. Additionally, mastering the art of seamless transitions between different flooring types or room layouts requires precise measurements and often custom cuts, which are seldom discussed in basic tutorials. These advanced nuances, backed by industry standards outlined in expert publications, can significantly elevate the quality of your work.
Finally, when installing showers or baseboards, many underestimate the importance of detailed sealing and caulking. Proper sealing prevents water intrusion and damage, which can compromise your entire installation. Remember, a professional finish isn’t just about appearance but also about functionality and longevity. Taking the time for meticulous sealing and finishing touches ensures your project remains beautiful and durable for years. Have you ever fallen into this trap? Let me know in the comments.
Maintaining your flooring, showers, and baseboards is key to ensuring they stay beautiful and functional for years to come. One of my favorite tools to keep my installations in top shape is a high-quality orbital sander. I use it regularly to smooth out any rough spots or imperfections that may develop over time, especially on painted baseboards or wood flooring. Its versatility allows me to refresh surfaces without the need for complete replacement, saving both time and money.
Another essential piece of equipment I rely on is a moisture meter. Particularly when dealing with showers or areas prone to humidity, this device helps me monitor moisture levels in the subfloor and walls. Keeping moisture in check prevents mold, warping, or deterioration, ensuring your investment lasts longer. For those contemplating upgrades, I recommend reading this guide for advanced shower maintenance techniques that can extend the life of your tiles and grout.
Power caulking guns are also a game-changer in maintenance routines. Applying fresh caulk around your shower edges or baseboards prevents water intrusion, which is a common culprit of damage. I always choose a silicone-based, mildew-resistant caulk for durability. The gun makes it easy to apply smooth, even beads, which not only look professional but also seal effectively. Remember, regular re-caulking is one of the simplest ways to keep your shower and baseboards in tip-top shape.
For cleaning and upkeep, I recommend a microfiber mop for floors and a soft brush for grout lines. These tools are gentle yet effective at removing dirt and preventing buildup that can wear down surfaces over time. I also swear by a multipurpose cleaner that’s safe for your specific flooring material—whether it’s tile, vinyl, or hardwood—to avoid unnecessary damage.
Looking ahead, I predict that smart maintenance tools—like app-connected moisture sensors or AI-powered cleaning devices—will become standard in home renovation. These innovations will help homeowners catch issues early and perform targeted upkeep, reducing long-term costs. To stay ahead, it’s worth investing in quality tools now and establishing a regular maintenance schedule.
How do I maintain my shower and flooring over time?
The secret is consistency. Regularly inspect grout lines, caulk, and seals, and address issues promptly. Keep surfaces clean with gentle, appropriate cleaners, and reapply protective finishes or caulk as needed. For showers, ensuring proper ventilation minimizes mold growth, while for floors, controlling humidity prevents warping and cracking. With these practices, your home will continue to look stunning and function flawlessly for years.
Don’t forget to try out one of these techniques or tools during your next project. For example, using a moisture meter regularly can save you from costly repairs down the line. If you’re considering a major upgrade, explore this guide for expert tips on long-lasting results. Taking proactive steps today ensures your investment pays off long term.
The Hardest Lesson I Learned About Flooring and Baseboards
One of my most valuable lessons came early when I underestimated the importance of precise measurements. Rushing led to gaps and uneven seams, which I only realized after stepping back and inspecting my work. That experience taught me to double-check every cut and measurement—trust me, it’s a game changer for a flawless finish.
How Cutting Corners Can Cost You Time and Money
I used to think that speed was more important than accuracy. Turns out, taking the extra few minutes to cut carefully prevents costly fixes down the line. For example, using a quality miter saw and measuring twice ensures tight joints and a seamless look, saving hours of frustration.
Sealing Corners and Joints: The Secret Weapon
Applying caulk at corners was a revelation for me. It filled small gaps and created a smooth transition, elevating the overall appearance. I learned that patience in this step leads to a professional-looking finish that stands the test of time.
Investing in Quality Tools and Resources
Over the years, I’ve come to trust specific tools and guides. My go-to saw is a sharp miter saw, and I rely on expert installation tips for techniques that deliver lasting results. These resources have been instrumental in elevating my craftsmanship.
Encouragement to Take Action and Elevate Your Skills
Remember, every project is an opportunity to learn and improve. Don’t shy away from the details—mastering them will make your work stand out. So, what’s the next flooring or baseboard project you’re excited to tackle? Share your plans below and let’s inspire each other!