Ever spent hours laying down flooring, only to end up with uneven edges, gaps, or worse—having to redo the whole thing? I remember my first big project. I was so eager to see my living room transformed that I skipped a few crucial prep steps. Big mistake. The frustration of seeing my efforts unravel before my eyes was a lightbulb moment that changed everything for me. Since then, I’ve learned that flawless flooring isn’t about luck; it’s about following the right steps and avoiding common pitfalls.
Why Proper Installation Matters More Than You Think
In my early days, I didn’t realize that a poorly installed floor could haunt me for years—causing damage, uneven wear, and even safety hazards. Believe it or not, according to industry experts, improper installation is one of the top reasons flooring fails prematurely. That’s why I want to share my insights to help you avoid my mistakes and achieve stunning results that last.
Have You Faced This Common Flooring Frustration?
If you’ve ever struggled with uneven seams, gaps, or bubbles after installing your floors, you’re not alone. I’ve been there. The good news is, with a solid plan, you can sidestep these issues and enjoy a flawlessly finished space.
Today, I’ll walk you through the essential steps to ensure your flooring project turns out perfectly. From surface prep to finishing touches, these tips will help you get professional results without breaking the bank or losing your sanity.
If you’re ready to transform your space with confidence, stick around. We’re about to dive into the secret techniques that pros swear by, and I’ll even share a few insider tricks I wish I knew from the start. Ready to get started? Let’s go!
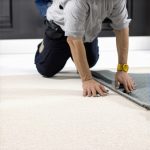
Prepare Your Surface Like a Pro
Start by removing all furniture, carpets, and baseboards from the area. Use a pry bar and a utility knife to carefully detach existing moldings without damaging the walls. Sweep thoroughly to eliminate dust and debris that could interfere with adhesion. I once skipped this step, and I ended up with uneven flooring that creaked underfoot. Proper surface prep is the foundation for flawless results.
Level the Subfloor for Stability
Check for any dips or high spots using a level. Fill low areas with a self-leveling compound, and sand down high spots. This ensures the floor is perfectly even, preventing future gaps or squeaks. I learned this the hard way when a slight dip caused tiles to crack after installation. A stable, level subfloor is non-negotiable.
Acclimate Your Flooring Material
Before installation, store your flooring in the room for at least 48 hours. This allows the material to adjust to the room’s temperature and humidity, reducing the risk of warping or expansion later. I once brought home hardwood from a different climate and watched it swell after installation—an avoidable mistake with proper acclimation.
Plan Your Layout Carefully
Measure the room and decide on the direction of the planks. Use chalk lines to mark the starting point, ensuring the planks run parallel to the longest wall or the main light source. I recommend laying a few rows without adhesive to visualize the pattern and make adjustments. Taking the time to plan prevents awkward cuts and uneven edges.
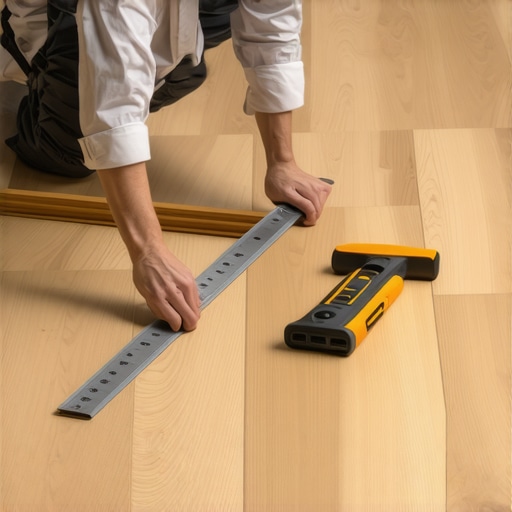
Install with Precision
Apply adhesive or lay tongue-and-groove planks according to the manufacturer’s instructions. Use spacers to maintain expansion gaps around the perimeter—at least ¼ inch. When I first installed laminate flooring, I forgot this gap, and the planks buckled during hot days. Always leave room for natural expansion and contraction.
Stagger the Seams for Strength
Offset the joints by at least 6 inches to create a stronger, more natural look. Use a tapping block and mallet to snug each plank tightly without damaging it. I once forced a tight joint and chipped the edge—patience and proper tools are your best friends here.
Finish with Finesse
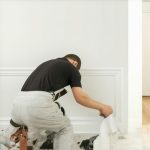
Remove spacers and install baseboards or molding to cover expansion gaps. Use a nail gun for clean, even nails, and caulk any small gaps for a seamless appearance. If you’re updating your baseboards, check out this guide for stylish ideas. Finally, clean the floor thoroughly and enjoy your professional-looking result.
When I first started working on flooring projects, I believed many of the myths circulating among DIY enthusiasts. One of the most persistent misconceptions is that if a floor looks good initially, it will last forever. In reality, superficial aesthetics can hide underlying issues caused by overlooked details or improper techniques. For example, some think that using the cheapest adhesive or materials will save money, but this often leads to early failure and costly repairs down the line. Let’s dig deeper into what most people get wrong about flooring installation and how to avoid these pitfalls.
Myth: All Subfloors Are Equal
Many assume that any subfloor will do as long as it’s level. However, subtle imperfections or moisture issues can cause significant problems over time. A common mistake is neglecting to assess moisture levels, which can lead to warping or mold growth, especially with hardwoods or laminate. Pro tip: Use a moisture meter before installation, and consider a vapor barrier if necessary. Industry experts emphasize that proper subfloor assessment is crucial for long-lasting results, as noted in this comprehensive guide.
Myth: Acclimation is Optional
Some think that storing flooring in the room for a few hours is enough. In truth, proper acclimation—typically 48 to 72 hours—is vital to prevent expansion, contraction, or warping. Skipping this step can lead to gaps or buckling after installation, especially with solid hardwood or engineered flooring. Here’s the oops: I once installed hardwood without acclimating it, and within weeks, the planks warped because they adjusted to the room’s humidity levels post-installation. This mistake cost me extra time and money. For advanced readers, this article discusses the science behind acclimation and material stability.
Advanced Question: How Do Temperature Fluctuations Affect Flooring Durability?
Temperature swings can cause materials to expand or contract, impacting the longevity of your floor. For instance, vinyl and laminate are more sensitive to temperature changes, which can lead to gaps or buckling if not installed with proper expansion gaps and climate control. Experts advise maintaining consistent indoor temperatures and humidity levels for optimal results. According to a study published in the Journal of Building Physics, fluctuations beyond recommended ranges significantly reduce the lifespan of flooring materials. So, your investment in quality installation must be complemented by climate management to truly benefit from it.
Have you ever fallen into this trap? Let me know in the comments. Remember, understanding these nuances helps you avoid costly mistakes and ensures your flooring remains beautiful and durable for years to come.
Keeping your flooring tools in top shape is essential for achieving professional results every time. Over the years, I’ve tried various maintenance routines, and I can confidently say that investing in quality tools and proper upkeep saves you time, money, and frustration. Today, I want to share my favorite equipment and maintenance tips that ensure your tools stay reliable and effective for countless projects.
Choose the Right Tools for the Job
High-quality tools might cost more upfront, but they often come with better durability and precision. For instance, I swear by my Milwaukee cordless drill. Its brushless motor offers longer run time and less wear over time, making it perfect for installing baseboards or fixing subfloor issues. When selecting a hammer or pry bar, I opt for stainless steel options, which resist rust and maintain strength after heavy use. Investing in well-made tools is the first step toward long-term success.
Perform Regular Cleaning and Inspection
After each project, I clean my tools thoroughly—removing dust, adhesive residue, and debris. For power tools, I use compressed air to blow out dust from vents and moving parts, preventing overheating and mechanical failure. I also inspect for signs of wear, such as loose screws or dull blades. Addressing small issues early, like sharpening blades or tightening bolts, extends the lifespan of your equipment significantly.
Apply Lubrication and Protective Coatings
Lubricating moving parts with light machine oil prevents corrosion and ensures smooth operation. For example, I regularly oil the blades of my utility knives and the gears in my circular saws. For metal surfaces prone to rust, I apply a thin layer of WD-40 or a similar protective spray, especially if I store tools in humid environments. Proper lubrication reduces wear and keeps your tools functioning like new.
Store Tools Properly for Longevity
Storing your tools in a dry, organized space is crucial. I use a dedicated toolbox with compartments to prevent tools from banging or scratching each other. Hanging power tools on wall mounts keeps them off the floor and reduces accidental damage. Additionally, I keep my tools covered with silicone spray to repel moisture. Proper storage not only preserves your tools but also makes your workflow more efficient.
Update Your Equipment with the Future in Mind
As technology advances, I predict more tools will incorporate smart diagnostics or self-maintenance features, helping DIYers and professionals alike. For example, upcoming cordless drills may monitor battery health and suggest optimal charging cycles. Staying informed about these innovations can help you maintain your toolkit proactively. To stay ahead, I recommend following manufacturers’ guidelines and subscribing to industry updates.
How do I maintain my flooring tools over time?
Consistent cleaning, lubrication, and proper storage are key. Regularly inspect your equipment for signs of wear and replace parts as needed. Using high-quality tools from reputable brands also minimizes issues. For power tools, I perform a quick check-up before each use—ensuring blades are sharp, batteries are charged, and cords are intact. These habits prevent costly repairs and keep your tools ready for action whenever you need them.
Try implementing a simple routine today: after your next project, clean and lubricate your tools thoroughly. It will pay off in the long run with smoother operation and longer lifespan. Remember, well-maintained tools are the backbone of durable, flawless flooring installations. For more detailed tips, check out this comprehensive guide.
Lessons That Changed My Approach to Flooring
- One of my biggest lightbulb moments was realizing that proper surface preparation can make or break the final look. Skipping steps like cleaning and leveling cost me time and money, and I learned to prioritize groundwork every single time.
- I used to underestimate the importance of acclimating flooring materials. Waiting 48 hours in the room where they’ll be installed prevented warping and buckling—simple but game-changing advice I wish I knew sooner.
- Staggering seams might seem like a small detail, but it dramatically increases the strength and aesthetic appeal of your floor. Patience and precision here pay off with a professional finish that lasts.
- Investing in high-quality tools and maintaining them properly isn’t just about convenience—it’s about ensuring every project looks flawless and endures the test of time. Regular cleaning, lubrication, and smart storage are my go-to habits.
- The biggest myth I uncovered was that any subfloor will do. Assessing moisture levels and addressing issues early have saved me from costly repairs and headaches later on.
Tools and Resources That Elevated My Projects
- Milwaukee cordless drill: Reliable power and long battery life make it indispensable for flooring projects. I trust it for precision and durability.
- Moisture meter: Ensuring the subfloor is dry is crucial. This small device saved me from installing over damp surfaces that would warp or grow mold.
- This comprehensive guide helped me understand the science behind proper installation and material stability.
- Quality saw blades and spacers: They keep cuts clean and allow for proper expansion gaps, leading to a seamless, durable finish.
Keep Moving Forward with Confidence
Every flooring project is a chance to learn and improve. Don’t let fear or past mistakes hold you back—embrace the process, and you’ll be amazed at what you can achieve. Whether you’re tackling a small upgrade or a major renovation, the key is to stay patient, prepared, and open to learning. Ready to transform your space? Dive into your next project with the mindset of a pro and enjoy the beautiful results that follow.
Have you ever faced a challenge during flooring installation that taught you a valuable lesson? Share your experience below—I’d love to hear your story!