I remember the exact moment I noticed it—standing in my living room, brushing past a piece of furniture, only to catch a glimpse of my baseboards. Instead of being perfectly straight, they seemed to sag and warp, betraying the reality of the sloping floor beneath. That small crooked line drove me crazy, making the entire room feel uneven and unfinished, even though I’d spent so much time choosing the perfect paint and decor.
Initially, I blamed the installation—perhaps the trim was cut crooked or not properly aligned. But soon I realized that the real culprit was my uneven floor, a common issue many homeowners face as floors settle or shift over time. The frustration was real. And I bet many of you have faced the same dilemma: your baseboards look crooked, and you feel powerless to fix it without tearing out walls or calling in pros.
Here’s the truth—this problem isn’t as hopeless as it seems. In fact, there are simple, effective fixes that can make a significant difference, and I’ll walk you through them today. Whether your floors gently slope or have more pronounced dips, I’ve discovered four key strategies to correct crooked baseboards and restore your room’s harmony. Believe me, I’ve tried them all, and the results are nothing short of transformative.
Why Seriously, Fixing Crooked Baseboards Isn’t Just About Looks
There’s more at stake than aesthetics. Crooked baseboards can be a sign of underlying issues with your flooring—issues that might lead to further damage if left unaddressed. Plus, uneven floors can cause problems with doors, cabinets, and even your furniture arrangement. Addressing this now saves you headaches down the line and boosts your home’s value. According to industry experts, uneven floors and warped trim can decrease a home’s overall appeal and market worth, especially in 2026’s competitive market. DIY fixes are often enough to tackle minor slopes, saving you money and time.
But here’s a question I know some of you might be asking: Is fixing a sloping floor just a temporary band-aid, or can I truly make it right? Early on, I made the mistake of thinking that simply caulking gaps or trimming the baseboards more aggressively would do the trick. It took perseverance and some expert tips from seasoned pros to realize that addressing the root cause—floor slope—is essential for a long-lasting solution. If you’d like to delve into professional flooring insights, I recommend checking out this guide on durable flooring installation.
So, if you’re tired of fighting with uneven floors and crooked trim, stay with me. We’re about to explore four actionable fixes that will help you straighten those baseboards and bring balance back to your space. Ready to learn how to handle sloping floors like a pro? Let’s get started!
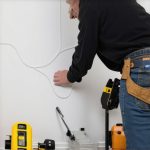
Assess the Floor Slope with a Simple Level
Start by determining the extent of your floor’s unevenness. Take a carpenter’s level or a long straightedge and place it along the length of your baseboard line. Check for gaps or tilts—these will tell you where the slopes are most pronounced. I vividly recall setting up a level across my living room’s baseboards and discovering a two-inch dip over ten feet—making me realize that a quick fix needed a more strategic approach.
Use Shims to Level the Subfloor or Framing
Target the Underlying Structure
Shims are thin wedges of wood or composite material that can be inserted between the subfloor or joists and the foundation. If the slope is minor—say less than 1/4 inch—placing shims beneath the joists can bring the floor closer to level. When I tackled my basement’s uneven flooring, I first identified the high spots and then slid shims between the joists and support beams, securing them with screws. This approach corrected the slope before re-installing baseboards, leading to a clean, level look afterward.
Be Precise with Measurements
Measure the height difference at various points and cut shims accordingly. Remember: small increments make a big difference. A miscalculation can lead to new irregularities, so double-check your measurements before fastening anything permanently. I recommend keeping a detailed log for each adjustment to track progress accurately. For comprehensive guidance on fixing foundational issues that cause floor slope, you might find this resource helpful: durable flooring installation tips.
Sand or Fill Low Spots Before Replacing Baseboards
If shimming isn’t feasible or the unevenness is confined to surface irregularities, consider applying leveling compounds or sanding down high spots. For small dips, using a self-leveling compound poured over the low areas creates a smooth surface, similar to pouring epoxy over a cracked countertop to seal and level it. I once used a floor leveling compound on a warped section of my living room, and after sanding it smooth, the new baseboards sat flush against the wall, dramatically improving the aesthetic.
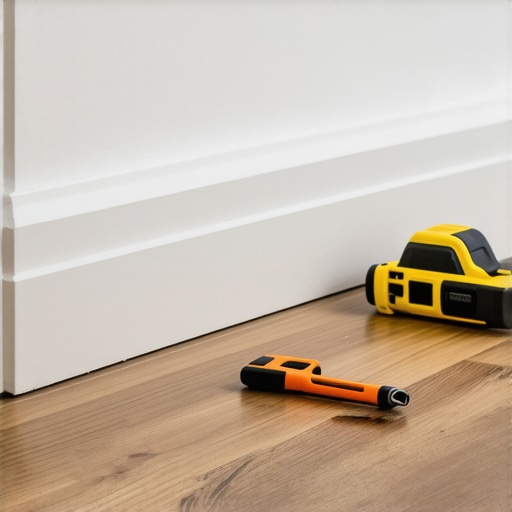
Adjust and Reinstall Your Baseboards Correctly
The final step involves scribing and trimming your baseboards to match the now-level surface. Use a specialized scribing tool—this helps cut the baseboard to replicate wall imperfections, ensuring a tight fit. I recommend setting your saw at a 45-degree miter and cutting slightly longer than needed—then fine-tune the fit with a sanding block. Once cut, secure the baseboards with finishing nails, making sure they align perfectly with the wall’s irregularities. For a flawless finish that feels professional, check out these baseboard installation tips.
Seal Gaps for a Clean Look
After fastening, fill any gaps or nail holes with wood filler or caulk. For uneven corners or gaps due to wall irregularities, use flexible caulking—this allows movement without cracking. A neat job here prevents dust and drafts from creeping behind the trim, maintaining both comfort and style. Remember, attention to detail at this stage pays off in the final outcome, making your repair indistinguishable from professional work.
Regular Maintenance to Prevent Future Warping
Keep your floors dry and avoid excessive humidity, as moisture can cause wood to warp. Use dehumidifiers in basements and ensure proper ventilation. Regularly inspect the trim and floor for signs of shifting, which allows you to address small problems before they escalate. With consistent care, your baseboards will stay straight and your floors stable for years.
 Many homeowners believe that installing a shower or flooring is simply about selecting the right materials and following basic instructions, but the real nuance lies beneath the surface. A common misconception is that waterproofing showers is just about sealing tiles; in reality, proper slope, waterproof barrier layers, and drainage design play a crucial role in long-term success. Ignoring these details can lead to costly leaks and mold issues down the line. Similarly, when installing flooring, many think that a standard subfloor is sufficient, but differences in subfloor preparedness or moisture content can cause warping, gaps, or squeaks later. Advanced installers know that thorough moisture testing and proper acclimation are key to durable results.
One trap I see frequently is the assumption that carpet installation is straightforward—lay it down and staple. Yet, without precise stretching, proper padding, and seam sealing, carpets can ripple, buckle, or wear unevenly over time. Achieving that smooth, lasting finish requires specialized techniques and understanding the subtle tensioning involved. For example, professionals expertly use power stretchers to ensure carpet remains tight and flat, a step often overlooked by DIYers.
Beyond the basics, many home improvement enthusiasts don’t realize the importance of properly scribing baseboards to wall irregularities. It’s tempting to miter cuts perfectly and call it a day, but walls and floors are rarely perfectly straight or level. Skilled carpenters adjust and scribe baseboards to fit these imperfections seamlessly, avoiding gaps that trap dust or spoil the aesthetics. If you want to elevate your interior, check out how simple updates to baseboards can make a dramatic difference.
Now, let’s tackle a complex question I often encounter: How can I ensure waterproofing in a shower niche won’t fail over time? The secret lies in proper layering—installing a waterproof membrane behind the niche, sealing seams meticulously, and ensuring that no water can bypass these barriers. Even minor lapses can result in leaks that damage drywall or cabinetry. For a comprehensive strategy, explore expert tips on shower waterproofing and prevent costly repairs down the line.
Remember, understanding these nuances helps you avoid common pitfalls and ensures your renovations stand the test of time. For more insights, visit our guide on durable flooring installation or check out specialized tips for shower waterproofing. Have you ever fallen into this trap? Let me know in the comments.
Invest in Quality Tools for Long-Term Durability
Having the right tools on hand makes all the difference when maintaining or repairing your floors, showers, or baseboards. I personally swear by a high-grade oscillating multi-tool because of its versatility—whether you’re trimming baseboards, removing caulk, or working in tight spots. Its precision blades allow me to make clean cuts without damaging adjoining surfaces, saving me time and reducing frustration.
For assessing uneven floors or slopes, a professional-grade laser level is invaluable. Unlike traditional bubble levels, laser levels project a bright, straight line across large surfaces, ensuring accuracy over longer distances. I use a laser level equipped with detectors because it maintains calibration even in well-lit rooms, which is crucial for complex projects like shower installations or flooring alignments. This investment has helped me prevent costly mistakes and ensures my work remains consistent over time.
Embrace Digital Tools for Precision and Planning
Beyond physical tools, software like SketchUp or floor planning apps streamline your layout and measurement tasks. When planning a flooring transformation, I input room dimensions and experiment with tile or plank placements virtually. This visualization helps me anticipate issues like pattern mismatches or tight corners, and it can be adjusted before any physical work begins. Adopting these digital tools saves money by reducing material waste and guides me towards more polished results, especially for intricate projects like custom showers or detailed baseboard designs.
Prioritize Routine Maintenance to Extend Lifespan
Maintenance isn’t just about fixing problems when they appear; it’s about proactive care. For showers, regularly inspecting waterproof seals and drain fittings prevents leaks. I recommend monthly checks for grout cracks or signs of mold, applying silicone caulk or waterproofing sealants as needed. Using a grout haze remover periodically keeps tiles looking fresh and prevents deterioration.
Flooring and baseboards also benefit from scheduled inspections. Every few months, I vacuum behind baseboards and around edges to clear dust and debris. This simple step prevents buildup that can warp or stain materials over time. Additionally, applying a protective finish or sealant periodically can defend against water damage, especially in high-humidity areas like bathrooms. A dedicated water-resistant spray can be a game-changer for ceramic tiles and wood-based flooring, extending their lifespan significantly.
Scaling Up With Advanced Techniques
Looking ahead, I see advances in smart maintenance technologies. Moisture sensors embedded in subfloors or shower areas can trigger alerts when water leakage occurs, allowing for immediate action before extensive damage. Installing smart water shutoff systems is another step towards automation, providing peace of mind for busy homeowners.
How do I maintain my flooring and fixtures over time?
Consistency is key. Regular cleaning with gentle, non-abrasive products preserves the finish and prevents buildup. For deeper maintenance, consider professional inspections every couple of years—experts can identify issues like hidden water damage or subfloor rot early, saving you money and headaches. Remember, investing in quality tools and software not only simplifies repairs but also improves the durability of your installations.
Try integrating a laser level into your next project for unprecedented accuracy. It’s a game-changer that promises superior results and long-term satisfaction. For more in-depth tips on durable flooring, check out this comprehensive guide.
Let me know in the comments which maintenance technique has worked best for your home improvements or if you’ve tried a new tool recently. Happy renovating!

Throughout my home renovation journey, the most unexpected lessons often came from the tiniest details—like that crooked line along my baseboards or a slight slope on my living room floor. These imperfections taught me that patience, attention to nuance, and leveraging the right techniques can truly transform a space from okay to breathtaking. So, if you’ve felt overwhelmed by seemingly minor flaws, know that mastery is within reach, and the results are worth every effort.
One crucial insight I’ve gained is that addressing underlying issues—such as floor slope or wall irregularities—pays dividends in the long run. It’s tempting to fix surface-level flaws with quick fixes, but I’ve found that comprehensive strategies, like precise shimming and careful scribing, create seamless, professional-looking results that stand the test of time. Trust me, these small details can elevate your entire home’s aesthetic and value.
Another lesson from experience is that patience in measurement and deliberate execution—not rushing through cuts or adjustments—makes all the difference. Investing in quality tools like laser levels and scribing templates may seem like extra steps, but they dramatically improve accuracy and reduce frustration. Additionally, regularly maintaining and inspecting your work helps prevent future setbacks, turning a one-time project into a long-term investment in your home’s integrity.
Finally, embracing a mindset of learning and adaptation has been my most profound takeaway. Each project teaches something new—whether it’s a better way to tape a level line or a smarter method to fill gaps. I encourage you to see imperfections not as failures but as opportunities to refine your skills, deepen your understanding, and craft spaces that reflect your unique style and patience.
Lessons I Wish I Knew When I Started Fixing My Floors and Baseboards
- The importance of understanding the root cause: Fixing the surface won’t last if the floor is sloped. Addressing structural issues upfront ensures stability and longevity.
- Precision over haste makes a difference: Taking the time to measure carefully and cut accurately results in cleaner, more professional finishes.
- Tool investments are worth it: A good laser level and scribing tools save time and improve quality far more than cheaper alternatives.
- Patience is a virtue: Rushing through installations leads to mistakes. Taking longer yields better results.
- Learn from every project: Each attempt offers new insights—embrace them to continually improve your craft.
My Favorite Resources for Home Renovation Wizards
- Durable flooring installation guide – An extensive resource that helped me understand foundational principles beyond basics.
- Baseboard makeover tips – Practical advice for a flawless carpentry finish that elevates any room.
- Carpet installation secrets – For achieving seamless, long-lasting results even in tricky spaces.
- Shower renovation ideas – Inspiring ideas to create a luxurious, functional shower area that complements your refinished flooring.
Step Into Your Renovation Future Today
Remember, home improvement isn’t about perfection—it’s about progress. Every nail driven, every shim placed, and every measurement perfected brings you closer to the home you envision. Embrace the process, trust your tools, and celebrate your growth as a DIY maestro. Your home’s transformation awaits, and with each step, you’re making it more uniquely yours.
What’s one small change you plan to make on your next project that will make a big difference? Share your thoughts below—we’d love to cheer you on!
![3 Carpet Stretching Hacks for a Tight 2026 Fit [Pro Secrets]](https://tilecraftsmens.com/wp-content/uploads/2026/02/3-Carpet-Stretching-Hacks-for-a-Tight-2026-Fit-Pro-Secrets-150x150.jpeg)