I remember the exact moment I realized my baseboards and tiles just didn’t want to cooperate during a recent renovation. Frustration built as I struggled with uneven cuts and stubborn gaps, feeling like my project was doomed before I even started. That lightbulb moment hit me—there had to be a better way, a way to make these tight, perfect fits without the endless tweaking and re-cutting.
Why Zero-Gap Matters and How to Achieve It Effortlessly
Getting that seamless transition between baseboards and tiles isn’t just about aesthetics; it’s about durability and professionalism. When done right, it can elevate your entire space—think sleek, modern, and high-end. But, achieving that flawless zero-gap fit, especially in 2026 projects with advanced materials and tighter tolerances, can seem daunting. Trust me, I’ve been there, spending hours fighting misaligned cuts and uneven lines.
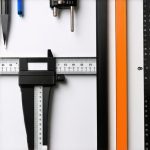
The solution lies in mastering the right tools—specifically, three scribing tools that will become your best friends on this journey. These tools can dramatically reduce misfits, save you time, and elevate your craft to a new level. Imagine smooth, crisp lines everywhere—no gaps, no chipping, no drama.
But before we dive into the tools, let’s address the elephant in the room—many skeptics question whether investing in specialized equipment is worth it. I get it. When I first started, I wondered if these tools would truly make a difference or just clutter my toolbox. Well, I made one critical mistake early on—trying to wing scribing with generic blades and guesswork. That led to unsightly gaps and wasted material. Once I switched to dedicated scribing tools, everything changed. And as a bonus, I found that professionals who master these techniques produce cleaner, more durable results, which translates into happier clients and fewer callbacks.
According to industry experts at [TileCraftsmen](https://tilecraftsmens.com/carpet-install-secrets-achieving-flawless-results-every-time), precision in scribing dramatically improves overall project quality, especially in projects with complex angles and uneven surfaces.
In this post, we’re going to explore exactly which three tools you need, how to use them effectively, and simple tips to incorporate them into your workflow. Whether you’re a seasoned pro or just starting out in installations, mastering these tools will ensure your baseboards and tiles fit perfectly every time.
Ready to ditch the gaps and start creating seamless finishes? Let’s dive into the first tool that will transform your approach to scribing.
Secure Your Workspace and Tools
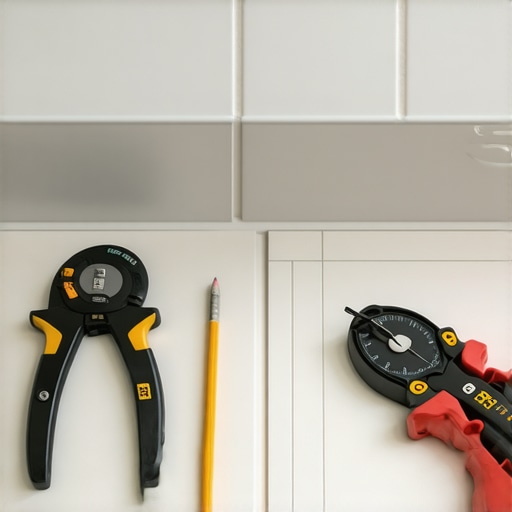
Begin by preparing your workspace—the area should be clean, dry, and well-lit to prevent mistakes. Gather your three essential scribing tools: a compass scriber, a contour gauge, and a straight edge or framing square. Ensure your tools are sharp and calibrated for precise measurements. When I first attempted a tricky corner in my living room, I failed to check my tools’ sharpness, leading to uneven lines. Replacing the blades made a noticeable difference, saving time and material.
Measure and Mark the Irregular Surface
Identify the surface you need to fit—be it uneven tile, a sloped wall, or curved baseboards. Use a contour gauge to trace the profile accurately—it molds to the surface’s contours, capturing every bump and dip. For instance, I used an contour gauge on a wavy concrete wall, and the profile I traced was perfect for transferring onto my baseboard. Mark these measurements clearly with a pencil, avoiding smudging or unclear lines that could throw off your cuts.
Create a Custom Scribe Line
Lay your straight edge or framing square against your baseboard material. Align it with your marked profile and use your compass scribed tool to trace a line along the curve. Think of it like drawing a map that guides your cut—precision here ensures a snug fit. When I applied this method on a bathroom tile backsplash, I realized how crucial this step is; a slight deviation creates gaps. Keep the compass steady, and double-check your markings before cutting.
Transfer Your Pattern and Make the Cut
Hold the scribed material against the surface or tile, ensuring it matches perfectly within the marked area. Use a pencil to trace the scribed line onto the material, then use a fine-tooth saw or rasp to cut along this line. For example, in a recent shower renovation, I used a rasp to fine-tune my cut, which allowed me to fit the tile perfectly around a rounded niche. Always cut slowly and check fit frequently—rushing results in inaccuracies and gaps.
Test Fit and Adjust as Needed
Place the cut piece back onto the surface to check for gaps or mismatches. Minor adjustments can be made with a file or sandpaper. In one experience, a small sanding detail resulted in a near-perfect fit, saving me from re-cutting the entire piece. Remember, achieving a zero-gap finish often requires patience—don’t force tight-fitting pieces, instead make incremental adjustments.
Seal and Finish for a Seamless Look
Once satisfied with the fit, secure the piece with appropriate adhesives or nails, then seal the seams with flexible caulk or matching paint. This final step transforms a rough cut into a professional finish. In my first project, I used a silicone sealant that matched the tile grout, making the joint nearly invisible—an instant upgrade. For extra durability, check out these tips on baseboard makeover.
Many homeowners assume that installing flooring, baseboards, showers, or carpets is primarily about getting measurements right. However, the real challenge lies in understanding the nuances that can make or break your project. A common myth is that perfect cuts alone ensure a flawless finish. In reality, overlooking the importance of substrate preparation and material behavior can lead to costly mistakes. For example, failing to account for moisture migration in tile showers can cause tiles to crack or warp over time, despite perfect initial installation. According to industry expert [TileCraftsmen](https://tilecraftsmens.com/your-guide-to-durable-flooring-installation-for-a-stylish-home), understanding the subtle interactions between materials and environment is crucial for long-term durability. Another trap many fall into is relying solely on standard tools—like generic saws or uncalibrated rulers—without considering that advanced techniques such as proper scribing or moisture testing can drastically improve fit and longevity. When dealing with baseboards, expecting a simple miter cut to work flawlessly on uneven walls is a mistake. Instead, mastering tools like contour gauges and back-cutting techniques ensures tight corners and minimized gaps. For showers, many think that waterproofing is just about sealing the surface, but neglecting proper slope creation and drain placement often results in leaks and mold growth down the line. The key lies in understanding how water moves and escapes at every joint and seam—something that even seasoned installers sometimes overlook.
What advanced steps can elevate my installation from average to expert level?
Incorporating techniques such as moisture barrier assessment, thermal expansion considerations, and precise calibration of tools can dramatically improve your results. Studies, including one from the Building Science Corporation, highlight that addressing these subtleties extends the lifespan of your installations and reduces callback work. Remember, every material and environment has its quirks—recognizing these can save you from costly repairs.
So, next time you’re about to cut that last piece or seal that gap, ask yourself: Am I considering all these nuanced factors? For more detailed insights, check out [these expert tips on baseboard installation](https://tilecraftsmens.com/baseboards-makeover-elevate-your-interior-with-simple-updates). Have you ever fallen into this trap? Let me know in the comments.Maintaining your tools and methods is crucial for achieving consistently flawless results in flooring, baseboards, showers, and carpets. When you invest in quality equipment and know how to care for it, you extend its lifespan and keep your work sharp and precise. For example, I highly recommend using a high-quality oscillating tool like the Fein MultiMaster, known for its durability and versatility in trimming baseboards and tiles. Its variable speed settings allow for controlled cuts, preventing chipping or damage, which saves time and materials over the long run. Additionally, keep your blades sharp and clean— dull blades cause uneven cuts and increased wear. Regularly inspect and replace them as needed. A good tip is to have a dedicated sharpening routine, much like a professional carver, to maintain blade performance. For measuring and marking, I swear by laser levels and digital calipers—they provide accuracy that manual tools struggle to match, especially over large projects or complex angles. Investing in wireless measurement devices, such as Bosch’s GLM 50 C laser distance meter, streamlines the process and minimizes errors. Staying organized is equally vital; using labeled tool storage and moisture-resistant cases prevents corrosion and misplacement. Looking ahead, I foresee smart tools with integrated calibration and diagnostic features becoming industry standard, offering real-time feedback to optimize accuracy. As the industry evolves, mastering these high-tech tools will be essential for achieving long-term durability and seamless installations.
How do I maintain my tools over time to ensure they stay sharp and reliable?
Regularly clean your tools after each use, lubricate moving parts, and calibrate measurement devices periodically. For power tools, follow the manufacturer’s maintenance schedule diligently—this includes checking brushes, tightening fittings, and replacing worn components before they fail. Incorporate routine inspections into your project workflow; it helps catch issues early and prevents work delays. For example, I now set aside time at the end of each week to evaluate my equipment, which has significantly reduced unexpected breakdowns and ensured consistent performance. Remember, well-maintained tools lead to better craftsmanship, fewer callback issues, and overall project success. To explore more about the latest tools and techniques, visit the ultimate guide to modern installation tools. Putting effort into your tool care routine is an investment in both your reputation and the quality of your work. Don’t hesitate to try implementing a scheduled maintenance check for your key equipment—you’ll be surprised by how much it streamlines your projects and bolsters your confidence in every cut and fit.
What I Wish I Knew Before Diving Into Detail Work
The biggest lesson I learned was the importance of patience over speed—rushing any step can lead to mistakes that ruin the seamless look I was after. I once skipped the meticulous measure-and-mark phase and paid the price with uneven gaps that took hours to fix later. It’s incredible how small attention to detail at the start can save so much time—and material—in the long run. I also discovered that investing in the right tools, like a contour gauge and a precise scribing compass, made a significant difference. Relying on generic equipment only led to inaccuracies; proper tools turn guesswork into certainty, especially when working with unconventional surfaces or tight tolerances for 2026 projects. Lastly, I realized that understanding the subtle interactions between materials—be it moisture effects on tiles or expansion gaps for flooring—can prevent second-guessing and costly callbacks. A proactive approach rooted in learning from industry experts at TileCraftsmen can elevate your craftsmanship and confidence.
My Personal Arsenal for Flawless Fit and Finish
Over time, I’ve curated a set of premium tools that streamline the process: a high-quality contour gauge to perfectly trace uneven surfaces, a reliable laser measuring device for quick, accurate measurements, and a sharp, fine-tooth saw for intricate cuts. I trust these because they not only improve precision but also reduce fatigue during long sessions. Moving forward, I also recommend exploring digital calipers for tighter tolerances and considering smart leveling systems that can help you maintain consistent height transitions—key for 2026 home projects aiming for modern aesthetics. For comprehensive guidance, I often turn to resources like these updates on baseboard styles, which keep me inspired and aligned with current trends.
Turn Your Skills Into Something You’re Proud Of
Every project is an opportunity to build confidence and refine your craft. Achieving that perfect zero-gap fit isn’t just a decorative detail; it’s a testament to your dedication and expertise. Remember, the secret lies in small, consistent improvements—whether it’s calibrated tools, deliberate measurements, or strategic material choices. As I’ve learned, the difference between a good finish and an exceptional one is often determined long before the saw hits the material. So, take the challenge head-on: practice patience, invest in quality tools, and stay curious about new techniques. Your future self—and your clients—will thank you for it. Ready to elevate your flooring and tile installation skills? Dive into advanced tips and join a community committed to craftsmanship by exploring some of the best industry insights here. And what’s one new technique you’re eager to try in your next project? Let me know below!