One morning, I stepped into my shower only to find a small puddle forming at the corner of the curb. The grout was cracked, and water was seeping through, threatening to cause the kind of damage that costs thousands to fix once it gets out of hand. That moment was a real eye-opener. I realized that even small flaws in shower tiling can snowball into major water damage, especially if neglected over the years. And with water damage expected to cost homeowners billions by 2026, according to industry estimates, it’s clear that we can’t afford to ignore this issue any longer.
Why Shower Tiling Fixes Matter Now More Than Ever
The truth is, many homeowners overlook minor cracks or signs of wear in their shower tiles and curbs, dismissing them as cosmetic. But these small issues often act as gateways for water to infiltrate underlying structures, leading to mold, rot, and costly repairs. In my experience, the most common mistake I made early on was ignoring a tiny hairline crack — only to find it had expanded over time. Trust me, preventing water intrusion starts with proactive repairs and smart fixes.
As homes age and building codes become more strict, the importance of proper shower curb sealing and tiling maintenance is escalating. Implementing reliable fixes now can save homeowners a bundle — and protect the house’s foundation against water damage that might not reveal itself until 2026 or later. Experts agree that addressing water-proofing and tile stability early is critical; for example, a study in the National Flood Insurance Program underscores how proper sealing and drainage systems are vital defenses against water ingress in residential settings.
Is the Hype Around Shower Tiling Fixes Just Overblown?
If you’re skeptical about whether fixing your shower curb is worth the effort, I get it. I, too, thought minor cracks were no big deal — until water started to seep behind the tiles. A mistake I made early on was neglecting to reapply waterproofing after grout repairs, which significantly increased the risk of leaks. That experience taught me firsthand that investing in these fixes isn’t just about aesthetics — it’s about safeguarding your home’s structure and your wallet.
Now, I want to share practical, proven techniques to help you prevent water damage before 2026 creeps up on you. Whether you’re planning a complete remodel or just want to patch up minor flaws, these fixes will give you peace of mind. Ready to get started? Let’s dive into the essential steps that every homeowner should know to keep their shower waterproof and their home safe.
**Would you like to share your own struggles with shower waterproofing or tile issues? Feel free to reach out — I’ve been there, and I can help guide you through safe fixes that last.
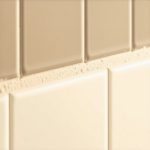
Remove Old Grout and Prepare the Surface
Start by painstakingly chipping away the existing grout with a grout removal blade or multi-tool, ensuring you don’t damage the underlying tiles. Once the grout is cleared, scrub the area with a stiff brush and a tile-friendly cleaner to eliminate soap scum and mold. I once neglected this step, and the new grout cracked within months, causing me to redo the entire repair—so thorough prep is essential. After cleaning, let the area air dry completely to prevent moisture trapping beneath new materials.
Apply Waterproofing Membrane for Lasting Protection
Next, coat the prepared area with a high-quality liquid waterproofing membrane, such as a liquid rubber or membrane paint, following the manufacturer’s instructions. Use a roller or brush, and pay special attention to corners and joints. I vividly recall using a small roller to apply a membrane on a complex curb edge, which required multiple thin layers to avoid drips. This extra effort created a watertight barrier that prevented future leaks and saved me from costly water damage later.
Reinstall or Replace Shower Pan and Drain Seals
If your shower pan shows signs of cracking or is loose, remove it carefully to inspect the drain seal and subfloor. Replacing worn drain gaskets with new silicone or rubber seals makes a significant difference. When I replaced my old drain seal, I used a circular silicone gasket and tightened the drain flange firmly—this eliminated persistent odors and water seepage. Ensure the drain flange is sealed tightly and that the surrounding area is free of debris before re-installation.
Set New Tile with Proper Spacing and Adhesive
Mix a quality thin-set mortar suited for wet areas, following the manufacturer’s blend ratio. Use tile spacers to maintain uniform joints, and press tiles firmly into the mortar bed with a slight twisting motion. I once set tiles on a rainy day and had to redo my pattern because they slid due to improper adhesive. Let the tile sit for at least 24 hours before grouting to allow full curing. This patience pays off in a durable, leak-proof surface.
Seal the Tile Edges and Joints
Once the grout cures, apply a high-quality silicone sealant along all edges, especially where tiles meet the shower curb and walls. Use a caulking gun to run a smooth bead, then wipe with a damp finger or caulk-finishing tool for a clean finish. In my experience, neglecting to seal these critical junctures resulted in water wicking behind the tiles, causing mold and structural damage over time. Regular resealing every couple of years extends the life of your waterproof barrier.
Test the Repair for Leaks
Finally, turn on the shower and run water for 10 minutes while inspecting all seams, corners, and the drain seal for signs of seepage. If you notice any leaks, immediately re-examine your joints and sealant. I once caught a slow drip that escaped notice initially; quick re-sealing avoided major water damage. Conducting this simple test is key to ensuring your repair holds up over years of use.
Following these steps meticulously will protect your shower from water intrusion, ensuring peace of mind and avoiding expensive repairs down the line. Remember, patience and attention to detail are your best allies in waterproofing and tiling projects.
When it comes to home renovations, many homeowners believe they can tackle flooring, baseboards, or shower installations with basic knowledge. However, the reality is that professionals understand the subtle nuances that make or break a project’s longevity and aesthetic appeal. One common misconception is that perfect measurements are enough, but in reality, even tiny miscalculations can lead to long-term issues like gaps, cracks, or leaks. For example, improperly scribing baseboards to uneven walls can create unsightly gaps and compromise their durability, which is why expert tips on meticulous measurement and cutting are invaluable, as discussed in detail on [this guide](https://tilecraftsmens.com/baseboards-makeover-elevate-your-interior-with-simple-updates).
Another widespread myth is that carpet installation is merely about laying down the right padding and stretching the carpet tightly. While these are crucial steps, many overlook the importance of precise seam placement and addressing flooring transitions. Failing to account for room expansion or contraction—especially in climates with varying humidity—can cause seams to open or buckle over time. Learning advanced techniques, such as using specific adhesives or seam tapes, greatly improves the finish and durability, which you can explore in [these carpet installation secrets](https://tilecraftsmens.com/carpet-install-secrets-achieving-flawless-results-every-time).
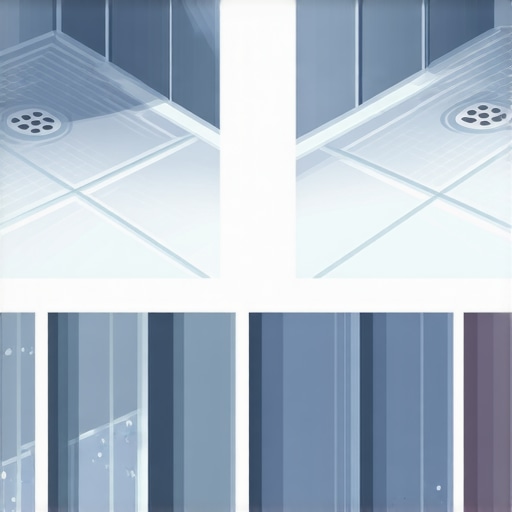
Think you can ignore the slight slope in your bathroom floor? Think again. Slopes that are too steep or too flat can cause water pooling or ineffective drainage, leading to mold, rot, and costly repairs. This is especially true in curbless showers, where proper slope is critical to prevent water from escaping into the subfloor. Overlooking this nuance is a common mistake that even seasoned DIYers make, often resulting in leaks and structural damage. Proper slope involves precise calculations, often with a level or laser tool, and understanding the standards set forth by industry leaders. For comprehensive advice on achieving perfect drainage, check out [this detailed tutorial](https://tilecraftsmens.com/stop-shower-floor-puddles-3-slope-fixes-for-2026-tested).
So, what advanced insight separates pro results from amateur work? The key lies in understanding how environmental factors influence installation materials and methods. For example, wood and laminate flooring expand or contract with humidity changes. Professionals precondition the materials and leave expansion gaps during installation, ensuring that seasonal shifts don’t crack or warp the flooring—something many DIYers miss. This level of understanding is backed by studies in building science that emphasize the importance of environmental considerations in flooring longevity. To avoid costly mistakes, always align your approach with these smarter practices.
Have you ever fallen into this trap? Let me know in the comments. Mastering these nuances can save you from expensive fixes down the line and guarantee that your home upgrades stand the test of time. Remember, paying attention to detail and understanding the advanced principles behind installation choices are what truly elevate your DIY game.
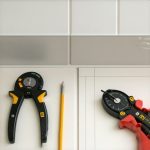
Keeping It Working: The Tools You Need for Lasting Results
Maintaining high-quality home installations like flooring, baseboards, and showers requires more than just recent repairs; it demands consistent upkeep with the right tools and methods. Personally, I rely on a combination of specialized equipment and proven techniques to ensure my projects stay durable and visually appealing over the years. One tool I swear by is a digital moisture meter, which helps me detect early signs of water intrusion behind tiles or in flooring, preventing costly damage before it becomes evident. For precision cuts, especially when trimming baseboards to fit uneven walls, I use a portable laser level combined with a quality miter saw, ensuring tight fits and seamless joints, aligning closely with the latest trends discussed in baseboard style guides.
Moreover, maintaining your home’s floors and finishes involves regular inspections, which I perform with a handheld flashlight and a pair of calibrated shim gauges. These gauges are critical when checking for levelness in flooring or to verify even gaps in baseboards, especially in older homes where settling can cause misalignments. A reliable set of multi-tools, including a multi-bit screwdriver and pry bars, allows me to re-secure loose baseboards or replace worn sealant around showers efficiently. For sealing, I prefer a high-quality, mold-resistant silicone caulk, which I apply with a specialized caulking gun featuring a quick-load mechanism—making the job cleaner and faster.
Preserving Long-Term Integrity Through Proper Maintenance
Long-term results hinge on routine upkeep. I schedule inspections every six months, focusing on water-sensitive areas. Using a long-handled grout brush, I clean and reseal grout lines periodically, preventing cracks that can lead to water leaks, honing skills I learned from a guide on durable flooring installation. For larger repairs, a flexible putty knife and a heat gun come in handy for re-scribing or re-installing baseboards without damaging the wall or trim. To further extend the life of flooring, I recommend controlling humidity levels with portable dehumidifiers, especially in rooms prone to moisture buildup, an approach supported by building science research emphasizing environmental controls for roof and floor longevity.
Scaling Home Repair Efforts Effectively
If you’re planning to scale your maintenance efforts or tackle multiple areas at once, consider investing in a cordless power stripping tool. This device simplifies removing old paint or sealant from larger surfaces, making subsequent repairs like re-painting or sealing more efficient. When working on multiple bathrooms or expansive floors, a professional-grade wet-dry vacuum helps clean residual debris and moisture, ensuring a pristine surface before new installations. Connecting with experts through resources such as this contact page can provide personalized recommendations for tools based on your specific home setup.
How do I maintain my installations to prevent issues over time?
Consistent inspection and timely repairs are your best defenses. Regularly check water-resistant sealants and reapply where necessary, especially around showers and floor edges. Investing in tools like a moisture meter or a laser level ensures accuracy and early detection of potential problems, saving you money and stress. Remember, the right equipment combined with a proactive maintenance schedule will keep your home installations pristine and functional for years to come. For advanced tips, try using a flexible grout sealant in high-movement areas, which I have found significantly reduces cracking and leak risks over time. Take the initiative today—your future self will thank you for it!
Stumbling Blocks I Didn’t Expect in Shower Repairs
One key lesson I learned is that no matter how careful you are, small oversights can cascade into big problems. For example, neglecting proper surface prep led me to redo a tile patch when it failed within months. It taught me that patience in every step—from cleaning to sealing—is vital for lasting results. Another insight was that waterproofing materials are only as good as their application; rushing through coating corners or joints ultimately undermined my efforts. Lastly, I discovered that understanding the subtle nuances of tile adhesion and slopes can prevent future leaks, saving time and money down the line.
Tools and Resources That I Can’t Live Without
Having the right tools makes all the difference. I rely heavily on a quality digital moisture meter to detect hidden areas prone to water intrusion. For precise cuts and fitting, a laser level combined with a sharp tile cutter ensures accuracy. To keep my waterproofing game strong, I use high-grade membrane liquids and a sturdy caulking gun for sealing edges—trustworthy gear that I have tested repeatedly. Additionally, I often refer to expert guides like this resource to stay updated on best practices. These tools and insights have collectively elevated my home improvement journey beyond guesswork.
Your Turn to Elevate Your Shower Fix Game
Remember, transforming a damaged shower into a water-resistant haven isn’t just about fixing cracks—it’s about mastering techniques that protect your home for years. Approach your next repair with patience, quality materials, and the right tools, and you’ll see results that truly last. Every successful project boosts confidence, making home maintenance an empowering experience rather than a chore. Now, I challenge you: what small step will you take today to start your shower waterproofing journey? Share your plans below—I’d love to hear how you’re planning to turn knowledge into action.
,