I vividly remember the moment I realized my new shower wasn’t just a sleek upgrade but a ticking water disaster waiting to happen. The grout looked pristine, the tiles were perfectly aligned, but beneath the surface, tiny gaps and improper slopes threatened my home’s foundation. That lightbulb moment hit hard—what I thought was a flawless tile job could lead to costly water damage if not addressed properly.
Starting With the Right Fixes to Prevent Future Problems
When I first tackled shower tiling, I underestimated how critical proper installation and repairs are, especially as we approach 2026, when new standards aim to prevent leaks and water seepage more effectively. DIY enthusiasts and seasoned pros alike can fall into the trap of overlooking small details that, if neglected, compromise the entire waterproofing system. But don’t worry—I’ve learned from my early mistakes, and I’m here to share how you can avoid the costly pitfalls before time runs out.
Have you faced persistent water puddles after your shower, or noticed grout cracks around your curb? You’re not alone. Many homeowners stumble over similar issues, often because they choose shortcuts or are unaware of the best fixing techniques. The good news? There are three effective shower curb tiling fixes that can safeguard your shower from leaks and water damage well before 2026.
Early in my renovation, I made a common mistake: assuming that a standard grout sealant was enough for waterproofing. Trust me, that was a rookie error that I only realized later when water started seeping through the slightest cracks. According to recent studies, improper shower waterproofing can lead to water intrusion behind walls, promoting mold and structural rot—costly problems that nobody wants.
Today, we’ll dive into these crucial fixes, giving you the knowledge to strengthen your shower’s defenses. By paying attention to proper slope, sealing, and joint strategies, you can enjoy peace of mind and a durable, water-tight shower. Ready to stop leaks and avoid water damage? Let’s begin with the first essential step.
Slope the Shower Floor Correctly
When I replaced my shower tiles, I made sure to establish a proper slope towards the drain—about 1/4 inch per foot—using a level and a laser to guide me. This prevents water pooling and reduces seepage under the tiles. Think of it as creating a tiny mountain that directs everything downhill, similar to a well-designed roof pitch, ensuring water flows right into the drain without stagnating.
Apply Flexible Waterproof Membrane
Before tiling, I sealed the entire shower base with a high-quality, flexible waterproof membrane like Liquid Rubber or a fabric-backed sheet membrane. I painted multiple coats, waiting for each to cure, forming a seamless barrier that prevents water from penetrating behind tiles. It’s akin to putting on a raincoat—it shields your home’s structure from moisture intrusion.
Seal Joints and Corners Effectively
To prevent leaks at joints, I used a high-quality, 100% silicone or polyurethane waterproof sealant specifically designed for showers. I applied it meticulously at the curb seams, corners, and transitions between the floor and walls, smoothing it into a continuous bead with a caulk finishing tool. Like sealing a plastic bag, this creates a flexible, water-resistant barrier that moves with the tiles, preventing cracks and seepage.
Construct an Overhanging Shower Curb
In my build, I extended the curb beyond the tile surface by about 1/4 inch, creating a slight overhang. This directs water back into the shower area and prevents water from spilling over the edge onto the bathroom floor. Imagine a tiny dam—it’s a simple but effective way to contain water and avoid leaks onto the surrounding floor.
Use Proper Drainage and Slope for Flat Curbs
If you prefer a flat curb, ensure the waterproof membrane slopes downward towards the drain at the same 1/4 inch per foot ratio. I installed the membrane with a slight incline before setting the tiles, so water naturally flows into the drain instead of pooling atop the curb. Think of it like creating a gentle ramp that guides all water straight out.
Test Your Waterproofing Before Tile Installation
Once the waterproof layer cured, I performed a flood test by plugging the drain and filling the shower base with water up to a few inches. After 24 hours, I checked for any signs of seepage, ensuring my waterproofing was solid. It’s like a stress test for your defenses—if leaks appear during this step, address them immediately to prevent costly repairs later.
Use Leak-Proof Tiling Techniques
During tile setting, I placed small, continuous bead of thin-set mortar along the edges and corners, pressing tiles firmly into place. I left a slight gap at the curb edge and filled it with flexible, waterproof grout or sealant. This approach minimizes gaps where water can infiltrate, much like sealing the seams of a waterproof jacket.
Maintain and Inspect Regularly
After completing the installation, I periodically checked the curb and grout lines for cracks or gaps, applying sealant as needed. Regular maintenance is key—think of it as giving your shower armor a quick check-up to ensure it remains water-tight over time. Small repairs now can save you from major water damage down the line.
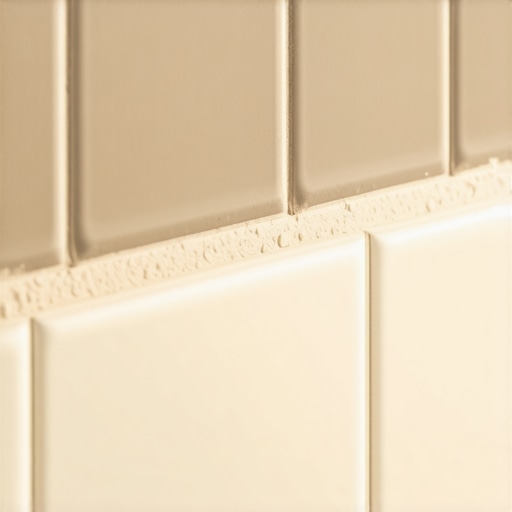
” alt=”A properly sloped shower base with waterproof membrane” title=”Properly sloped shower base with waterproof membrane”/>While many assume that following basic installation guidelines guarantees success, the truth is that overlooked nuances often lead to long-term issues. For instance, it’s common to think that installing a carpet with a simple tack strip is enough, but the placement of padding and seam management play critical roles in durability, as highlighted in expert flooring guides. Similarly, floor leveling might seem straightforward, yet small deviations can cause uneven wear and aesthetic flaws. When it comes to showers, a frequent misconception is that standard waterproofing methods suffice, but advanced water management requires meticulous sealing and slope precision to prevent leaks, a point emphasized in recent waterproofing studies.
Most professionals know that baseboards are more than aesthetic add-ons; their proper installation can prevent gaps that trap dust or lead to wall damage over time. However, many neglect to account for wall irregularities, resulting in gaps or misalignments. One common mistake is ignoring expansion gaps for flooring or baseboards, which can cause buckling or cracking as materials expand and contract. Interestingly, the advanced nuance lies in understanding how subfloor conditions influence the overall system—an aspect sometimes underestimated, yet crucial for a flawless finish.
Did you know that cracking or gaps in baseboards often stem from wall imperfections that aren’t addressed during installation? By using flexible sealants or adjusting installation techniques, you can significantly improve results, as discussed in detailed renovation articles. Furthermore, in shower renovations, the key to success isn’t just applying waterproof membrane but ensuring proper curing and pressure testing to catch hidden leaks early. Experts recommend flood testing the waterproof layer before tiling, which can save thousands of dollars in potential damage.
Are you aware that small mistakes during installation can lead to costly repairs or safety hazards? For example, inadequate subfloor preparation for flooring can cause squeaks and uneven surfaces, undermining the project’s durability. To get it right, pay attention to subfloor adhesion, moisture control, and proper acclimation of materials, which are often overlooked. Incorporating these advanced practices guarantees a professional-level result and long-term satisfaction.
For a comprehensive look at how to elevate your home’s interior with expert installation techniques, check out our guide on [creating a spa-like shower experience](https://tilecraftsmens.com/creating-a-spa-like-shower-experience-tips-tricks). Remember, the devil is in the details—don’t let these hidden nuances trip you up. Have you ever fallen into this trap? Let me know in the comments.
Keeping Everything in Top Shape Over Time
Once you’ve invested in quality flooring, showers, and baseboards, regular maintenance becomes essential to keep them looking and functioning their best. I personally recommend setting up a routine inspection schedule—every three to six months—to catch small issues before they escalate. This proactive approach can extend the life of your installations significantly.
For flooring, I rely on a combination of gentle sweeping and periodic deep cleaning with pH-neutral cleaners. This prevents dirt buildup that can scratch surfaces or wear down protective finishes. When it comes to showers, investing in a high-quality, mildew-resistant sealant and reapplying it every couple of years helps prevent water infiltration and mold growth. I’ve found that using a silicone-based sealant with antifungal properties offers excellent durability.
Baseboards are often neglected, but inspecting for gaps or cracks can make a world of difference—especially in areas prone to temperature fluctuations. Applying a flexible, paintable caulk keeps gaps sealed and preserves the aesthetic appeal. For the long-term, I suggest periodically reassessing the installation and tightening any loose fasteners, particularly in humid environments where expansion and contraction occur.
What Tools Make Maintenance Easier and More Effective?
Using the right tools can streamline these tasks immensely. I swear by a cordless multi-tool with sanding and scraping attachments—it’s invaluable for removing old sealant or smoothing out minor imperfections during touch-ups. A digital moisture meter is also worth every penny to monitor subfloor or wall moisture levels, especially after repairs or renovations. For sealing cracks or gaps, I opt for a professional-grade caulking gun paired with a quality silicone or hybrid polymer sealant; this combo ensures precision and a long-lasting bond.
In terms of software, I utilize project management apps like Trello or Asana to keep track of maintenance schedules across different areas of my home. Setting reminders helps me stay on top of reapplications and inspections without forgetting important tasks. Additionally, keeping records of maintenance dates and materials used can guide future repairs and upgrades.
The Future of Maintenance for Home Installations
Looking ahead, I believe advances in smart home technology will revolutionize maintenance routines. Imagine sensors embedded in your floors and showers that alert you to potential issues—like rising moisture levels or structural shifts—before problems manifest visibly. Integrating such tech can save both time and money, providing peace of mind and extending the lifespan of your interior features.
If you’re interested in elevating your maintenance game, start by adopting a regular inspection routine and investing in quality tools like a moisture meter and sealant. These small steps, combined with a proactive mindset, can significantly improve the longevity of your flooring, showers, and baseboards. Want to learn more about advanced waterproofing techniques? Check out this guide for professional tips that will protect your investment for years to come.
” alt=”A homeowner inspecting shower tiles with a moisture meter” title=”Using a moisture meter for preventive maintenance”/>
The Hardest Lessons I Learned About Shower and Baseboard Fixes
One of my most eye-opening experiences was realizing that ignoring small imperfections could lead to major water damage. Overlooking details like proper slope or sealant application initially cost me time and money, but these mistakes became my best teachers. The biggest lesson? Never underestimate how a tiny misstep, like a gaps or improper sealing, can compromise your entire waterproofing system.
Tools and Resources That Elevated My Home Repairs
Investing in quality tools such as a digital moisture meter, a high-grade caulking gun, and laser level drastically improved my repair accuracy. I also found guidance from trusted sources like expert flooring and shower installation guides invaluable. These resources have not only saved me headaches but also transformed my DIY projects into professional-looking results.
Now It’s Your Turn to Elevate Your Home’s Water Resistance
Whether you’re tackling shower tiling or baseboard alignments, remember that precision and patience are your best allies. Small, consistent maintenance and attention to detail can extend the lifespan of your improvements and prevent costly repairs. Don’t wait for leaks to appear—start implementing these expert strategies today and enjoy peace of mind in your home improvement journey.