

Have you ever installed new baseboards only to find they don’t sit flush against your uneven concrete wall? I remember thinking I had botched the entire job, feeling that sinking frustration when gaps pop up, making the whole room look like a DIY disaster. That lightbulb moment hit me—there’s more to fixing baseboard gaps than just nailing them in place.
If you’ve faced this problem, you’re not alone. Gaps between baseboards and uneven concrete are common, but they don’t have to ruin your project or your home’s appearance. Today, I’ll share how I conquered gaps with three proven methods. These techniques are practical, affordable, and surprisingly simple once you know the tricks. Whether you’re tackling a small one-room job or revamping an entire basement, these fixes will elevate your finish from sloppy to sleek.
Why Gaps Between Baseboards Matter More Than You Think
First impressions count, especially in a space’s details. Small gaps may seem minor, but over time, they can collect dust, dirt, and even moisture, leading to warping or damage. Plus, gaps are visually distracting—they break the clean lines that make a room feel polished. Knowing how to address uneven concrete walls and floors is crucial for achieving a professional look.
Early in my own renovation, I made a critical mistake: I assumed that just nailing the baseboards would do the trick. But concrete surfaces aren’t level or smooth, and nails alone won’t solve the problem. This oversight caused my baseboards to wobble and leave obvious gaps. After a lot of trial and error—and some research—I discovered that there are specific techniques to make baseboards fit flawlessly against uneven surfaces.
Interestingly, experts agree that properly addressing surface irregularities can increase the durability and aesthetic appeal of your trim. For example, a study on flooring installations highlights that ignoring uneven surfaces can cost both time and money in repairs later on (source).
Before we dive into solutions, I want to be upfront: the key to a clean, gap-free finish starts with understanding your specific surface condition. Are you dealing with slight dips or serious unevenness? This assessment guides which of the following fixes will work best for you. Ready? Let’s get into the practical steps that turned my crooked baseboards into sleek, seamless trim.
Is Fixing Gaps on Uneven Concrete Worth the Effort?
Honestly, yes. The frustration of imperfect lines is real, but so is the satisfaction of completing a project that looks professionally done. In my early days, I underestimated just how much a simple shift—like scribing or shim placement—could make a difference. Trust me, the small effort to learn these tricks pays off in the long run, transforming your space into something you’ll be proud of. Now, let’s look at how to put these ideas into action.
Assess the Surface Irregularities
Start by inspecting your wall and floor for dips, humps, or uneven spots. Use a straightedge or level to identify high and low points. I once used a long piece of straight plywood across my basement wall to see where the gaps were most pronounced—this gave me a clear visual of the irregularities to address.
Prepare Your Materials and Tools
Gather supplies like shims, wood filler, a putty knife, sandpaper, and construction adhesive. For larger gaps, foam backer rods can be helpful. I learned the importance of having the right tools when I tried stuffing foam in a big gap without proper backing—results were messy, and I had to redo the work.
Apply the Fixes for a Flawless Finish
Shim Strategy
For minor dips, insert thin shims behind the baseboard at strategic points, then nail or screw the board into place. Secure the shim and trim excess. I once used a handful of shims on my uneven wall, which smoothed out the line remarkably, resembling a professional finish.
Filling Larger Gaps
For bigger spaces, stuff foam backer rods into the gap, then seal over with flexible caulk or wood filler. After drying, sand smooth for a seamless look. I found that using painter’s putty for the finishing layer helped blend the repair into the existing baseboard aesthetic.
Scribing and Cutting Technique
If the baseboard doesn’t sit flush due to wall irregularities, measure the uneven area, then use a coping saw to cut the baseboard to match the wall contour. When I tackled an uneven stone wall, I used this method to achieve a tight, gapless fit that looked intentional. Check out details on scribing techniques for similar applicative insights.
Finishing Touches
After installing and filling, sand the area lightly, then paint or stain to match the existing trim. Using a small brush to apply paint in tight corners prevents over-spraying onto the wall. I kept a damp cloth nearby to wipe excess paint, ensuring a crisp, clean look that boosts your room’s overall appearance.
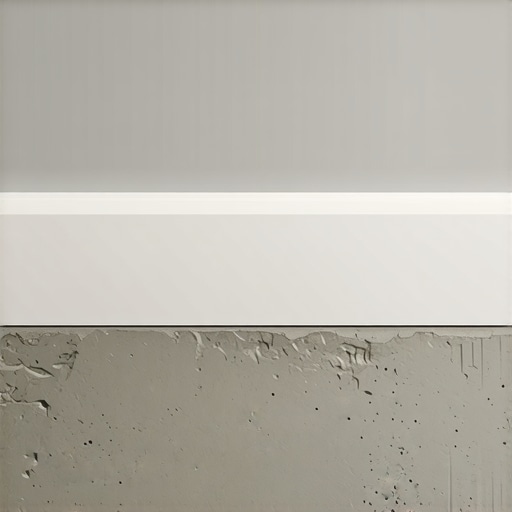 Many homeowners believe that installing flooring, baseboards, showers, or carpets is straightforward—simply measure, cut, and secure. However, this oversimplification often leads to costly mistakes. Let’s dig deeper into what most people get wrong about these projects.
A common myth is that a perfectly level subfloor isn’t necessary for a flawless finish. In reality, uneven subfloors can cause tiles to crack, baseboards to warp, and carpets to develop unsightly seams. Experts suggest that addressing subfloor irregularities with proper leveling techniques is crucial for long-term durability (source).
Another misconception revolves around moisture barriers. Many think applying a basic vapor barrier suffices, but without understanding humidity levels and material compatibility, this can lead to mold, warping, or delamination. Consulting a specialist about moisture mitigation strategies is often overlooked but vital for bathrooms and basements (source).
When it comes to baseboards, many underestimate the importance of accurate miter cuts. Rushing through miters without proper measurement or using the wrong tools results in gaps and misalignments that compromise the entire aesthetic. Utilizing techniques like the back-beveling trick can dramatically improve fit—check out this guide for mastering miter joints.
A sneaky trap in shower installations involves neglecting proper sealing of joints and niches. Skimping on caulk or sealant can lead to leaks and water damage over time, which many homeowners only discover after significant damage occurs. Being meticulous with waterproofing is non-negotiable; experts recommend using the right sealant for your material and application (source).
And finally, carpet installation isn’t just about laying down a pad and carpet. Overlooking stretching techniques can result in ripple and wrinkle formation, especially in high-traffic areas. Employing professional stretching methods or understanding the importance of correct seam placement ensures a seamless look that lasts. Discover how proper installation techniques can elevate your results here.
**Ever fallen into these traps?** Share your experiences in the comments—let’s learn from each other’s mistakes! Remember, attention to detail and understanding the hidden nuances can make all the difference in creating a truly professional finish in your home projects.Maintaining your flooring, baseboards, and showers over time requires more than just initial installation skills—it demands the right tools, regular upkeep, and an understanding of long-term practices. One tool I swear by is a high-quality multi-tool like the Oscillating Tool, which eliminates the guesswork from precision cuts and grout maintenance. Its variable speed and convenient attachments allow me to sand, cut, and scrape stubborn residues with minimal effort. I especially use it when re-sealing grout lines or cleaning caulk joints in showers, ensuring longevity and preventing leaks.
For routine inspections, a moisture meter is indispensable. It helps detect hidden water issues behind walls or under floors before they worsen. Regular checks prevent costly repairs down the line and protect your investment. I recommend models like the Wagner.Meters MMC2200, known for their accuracy and reliability, particularly in humid environments such as bathrooms and basements. Maintaining your shower’s waterproof barrier also involves periodic reapplication of sealants, especially around niches and corners. Using a silicone sealant meant for showers, like GE Silicone II, and applying it with a caulk gun that features a **pistol grip** makes this task more controlled and precise.
How do I maintain my flooring and shower systems over time?
Implementing routine cleaning with non-abrasive solutions and inspecting for signs of wear prevents deterioration. For floors, vacuuming with a beater brush setting followed by damp mopping with a gentle cleaner preserves the surface. In showers, wiping down tiles and grout after each use minimizes mold and mildew buildup. Periodic resealing of grout lines—typically once every 1-2 years depending on usage—keeps water from penetrating and causing damage.
Tools like a grout saw or a handheld rotary carver with diamond bits can be invaluable for spot repairs, especially in stubborn areas. For instance, if grout starts to crack, carefully removing the compromised sections and reapplying new grout prevents water intrusion and extends tile life. Additionally, using a specialized grout colorant can refresh the look without further major renovations, which is especially useful for high-traffic or visible shower zones. In the future, I believe automation and smart maintenance sensors will become standard, alerting homeowners immediately when moisture levels rise or when seals need reapplication. Staying ahead of these issues ensures your investments look impeccable for years to come.
If you’re ready to level up your maintenance game, start by investing in a quality moisture meter and a flexible grout repair kit. These small additions can dramatically streamline your routine and prevent larger problems later. Remember, proactive care is key to keeping your flooring and showers pristine—so treat your home the way a professional would, with regular checks and timely fixes.
Unearthed Secrets That Changed My Approach to Home Finishes
One of my biggest lightbulb moments was realizing that surface irregularities demand more than just basic nailing or gluing. It’s about meticulous assessment upfront—using a laser level or straightedge to identify dips and humps. This proactive step saves time and avoids unsightly gaps later.
Another lesson was understanding the power of proper tools—shims, backer rods, and quality caulk are game changers. I used to overlook these in favor of quick fixes, but now I see they’re essential for a clean, long-lasting finish.
Finally, I learned that patience with detailed techniques like scribing and precise cutting elevates your work from amateurish to professional. Taking the extra time to tailor baseboards to wall contours results in flawless lines that truly impress. Trust me, embracing these nuanced methods transforms your projects more than any cosmetic touch-up could.
My Toolbox for Perfect Home Upgrades
For tackling uneven surfaces, I rely on a high-quality oscillating multi-tool—it’s invaluable for precise cuts and detail work. To assess moisture and ensure long-term durability, a reliable moisture meter like the Wagner.Meters MMC2200 has become indispensable. When sealing showers or baseboards, I choose flexible, mold-resistant sealants such as GE Silicone II, avoiding generic options that often fail prematurely. And for selecting the right materials, books like Creating a Spa-Like Shower Experience have broadened my understanding of waterproofing and tile installation. These tools and resources empower me to execute projects with confidence, and I recommend them to anyone serious about professional results.
Embrace Your Home Transformation Journey
Every home improvement project, big or small, is an opportunity to learn and refine your skills. Don’t let doubts hold you back—start with a plan, gather your tools, and take deliberate steps. Remember, mastery isn’t about perfection from the start; it’s about progress and persistence. By applying these insights, you’re well on your way to creating spaces that reflect your pride and personality. So, why wait? Your next project could be your best yet—dive in and make it happen!
What has been your biggest challenge with installing baseboards or fixing gaps? Share below—let’s help each other improve!
**