

Walking into a room where the baseboards meet at odd angles or gaps can feel like stepping into a poorly curated magazine shot—disappointing and a bit awkward. I remember the first time I tried to install new flooring and thought I could skip the door casings entirely. Turns out, the gaps around the baseboards became a glaring eyesore, and no amount of caulk could hide stubborn cracks. That was my lightbulb moment—sorry, no door casing means you need to get creative with transitions to keep things looking sharp.
Why Flawless Transitions Matter More Than You Think
As a homeowner or DIY enthusiast, you might overlook the importance of neat baseboard transitions. But trust me, these small details make or break the overall vibe of your space. When door casings aren’t present, the way your baseboards meet at different floors or room junctions becomes front and center. Poor transitions can ruin an otherwise polished look, making your effort seem incomplete. On the flip side, a clean, professional transition can elevate your interior design and boost your confidence in tackling future projects.
According to interior design expert Emily Henderson, finishing touches like baseboard transitions are what give rooms that high-end feel. She emphasizes that paying attention to such details isn’t just about aesthetics; it also prevents issues like drafts and unintentional damage over time. So, what’s the secret? My experience shows that installing proper transitions, especially in houses with no door casing, requires a mix of technique, patience, and knowing the right tools.
Have you ever faced this exact problem—trying to create seamless baseboard connections in a space lacking door casings? If yes, you’re not alone. Many overlook this critical detail until they see the unprofessional gaps or mismatched heights, which then demand costly repairs or rework. But don’t worry—I’ll guide you through the simple steps I used to solve this issue. We’ll explore how to make your transitions look intentional, clean, and built to last.
Ready to avoid those lumpy, uneven transitions and save yourself some frustration? Let’s dive into the practical solutions that will give your home a polished finish, whether you’re installing new flooring, updating your decor, or simply aiming for that perfect look. And if you’re curious about related interior upgrades, feel free to check out my tips on [baseboard styles that elevate your interior](https://tilecraftsmens.com/baseboard-styles-that-elevate-your-interior-design). Now, onto the key techniques that will transform your space from okay to stunning.
Preparing for a Flawless Transition
Start by assessing the height difference between your existing baseboards and the flooring or adjoining walls. Use a low-profile shim or a piece of scrap wood to temporarily elevate or lower the baseboard, ensuring it aligns with the adjacent surfaces. For instance, in one project, I used a scrap 1×2 to simulate height adjustments, which helped me visualize the final look before permanent installation.
Cutting and Fitting the Corners Precisely
Measure the length of each wall and mark your cuts on a miter saw set to 45 degrees for inside corners or appropriate angles for uneven corners. Use a carpenter’s square to verify your measurements. I once miscalculated an angle, resulting in gaps at the corner, but re-cutting with a contour gauge helped me achieve a tight fit.
Scribing for Irregular Walls or Flooring
If your wall isn’t perfectly straight or the floor levels vary, scribing the baseboard creates a custom fit. Clamp a scrap piece of baseboard against the irregular surface and trace its profile onto your actual piece with a pencil. Then, use a handsaw or jigsaw to cut along this line. I employed this technique in my living room, where an uneven brick wall required precise fitting, resulting in a professional appearance.
Sealing and Finishing Transitions
Apply painter’s tape along the edges to create clean caulk lines. Use a high-quality flexible caulk suitable for baseboards to fill small gaps, then smooth with a damp finger or a caulk finishing tool. To prevent paint or caulk from bleeding onto adjacent surfaces, I recommend a quick wipe with a damp cloth immediately after tooling. For added durability, consider painting or staining the baseboard before installation, especially if you plan to use the latest baseboard trends to elevate your interior style.
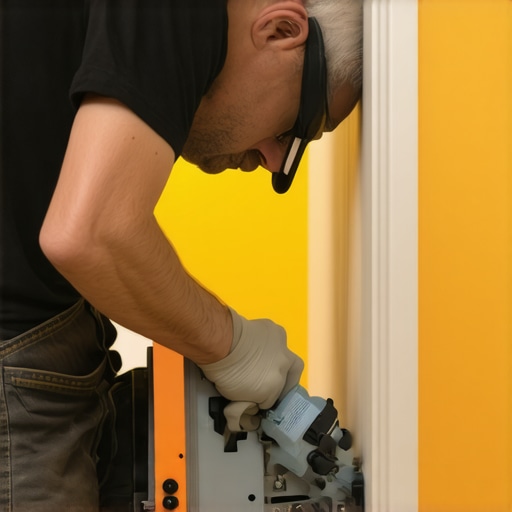
Insert an image showing the step-by-step process of scribing and fitting a baseboard against an uneven wall, illustrating the use of a contour gauge and cut lines.
Many homeowners believe they can save time and money by skipping detailed steps during renovations like shower installs, carpet laying, flooring, or baseboard finishing. However, this common misconception often leads to overlooked nuances that can compromise the entire project. For instance, a prevalent mistake is assuming that a simple caulking job can fix gaps around baseboards in a house lacking door casings—that’s a false economy. The reality is, detailed measurements, precise cuts, and patience are essential to avoid gaps and uneven transitions that diminish the aesthetic and durability of your work.
Professionals emphasize that rushing through certain tasks can result in lasting issues. For example, uneven floors or walls might seem manageable but can cause problems later if not properly addressed with techniques like scribing or shimming. Skipping these nuances often leads to uneven seams or gaps that are only visible after the fact—costly to fix and frustrating to live with. Many DIYers fall into the trap of neglecting the significance of subfloor conditions, which directly impact the longevity of flooring installation. According to experts in the field, ensuring a flat, dry, and clean subfloor is foundational for a perfect finish, yet it’s a step many overlook, leading to peaking or separating floors over time.
Why do advanced DIY mistakes undermine long-term results?
Inadequate preparation or shortcuts in critical steps can amplify minor issues into major fixes down the line. For example, failing to properly seal grout or neglecting to use the right adhesive can cause moisture seepage and mold growth, especially in showers. Studies from the Building Research Establishment highlight that proper waterproofing and meticulous sealing are paramount in wet areas, significantly reducing long-term damage. Therefore, understanding and respecting these nuanced details is the difference between a professional-looking finish and an amateurish mishap. Have you ever fallen into this trap? Let me know in the comments.Maintaining the longevity and appearance of your baseboards, flooring, and shower installations requires more than just initial effort; it demands the right tools, regular upkeep, and a keen eye for detail. Investing in quality equipment not only simplifies the process but also ensures professional results that stand the test of time. One indispensable tool I swear by is a good-quality miter saw with adjustable angles, which allows for precise cuts on baseboards and trim pieces, reducing gaps and uneven joints. Pair this with a contour gauge to meticulously trace irregular wall surfaces, ensuring that every piece fits snugly, especially when scribing against uneven surfaces. Regularly inspecting caulking and sealants is equally crucial, as deterioration over time can lead to gaps that compromise both aesthetics and moisture resistance. Using a flexible, paintable caulk saves you from future touch-ups and maintains seamless transitions between flooring and baseboards. For cleaning and touch-up, a damp microfiber cloth combined with a light sanding sponge can refresh scuffed surfaces without damaging the finish. Prediction-wise, I think the trend toward smarter, more durable materials—like composite baseboards and water-resistant adhesives—will grow, making DIY projects more forgiving and long-lasting. To keep everything working smoothly, develop a maintenance schedule: periodically check and touch up caulking, confirm that baseboard nails are secure, and clean surfaces to prevent dust buildup. How do I maintain baseboards and flooring over time? The key is regular inspection and timely repairs—small issues now prevent costly replacements later. For example, applying a fresh coat of stain or paint to baseboards every few years can preserve their appearance and prevent chips or scratches from worsening. Remember, using quality tools and techniques pays off in the long run. If you’re interested in elevating your space further, explore tips on [baseboard styles that elevate your interior](https://tilecraftsmens.com/baseboard-styles-that-elevate-your-interior-design). Now, I challenge you to try re-caulking your baseboards with a high-quality flexible sealant—this simple step can dramatically improve both appearance and moisture resistance, especially in high-humidity areas like bathrooms.
Overcoming the pitfalls of uneven baseboard transitions taught me that patience and precision are your best allies. I once rushed a project where uneven walls caused gaps, and it took me twice as long to fix later. Recognizing the importance of scribing and proper tools, like contour gauges, transformed my work and boosted my confidence in tackling tricky spaces. Embracing these lessons, I now approach each installation as a creative challenge rather than a chore, ensuring every corner and seam feels intentional and professional.
Lessons You Won’t Find in Basic Guides
- Don’t underestimate the power of a contour gauge—almost every irregular surface benefits from custom-fitting baseboards, preventing gaps and ensuring a sleek look.
- Patience with scribing and precise cuts saves you time and frustration in the long run; rushing usually results in noticeable flaws that are tougher to correct later.
- Invest in quality tools—like a sharp miter saw and high-quality caulk—to make your transitions seamless and durable.
- The smallest details, such as applying painter’s tape for clean caulk lines, elevate your work from DIY to pro-quality.
- Remember, each project is an opportunity to learn. The more you fine-tune your techniques, the more confident you’ll become in achieving flawless results.
Tools and Resources That Elevated My Skills
- Contoured Scribing Tools: Essential for adapting baseboards to uneven surfaces, saving hours of rework. I rely on these for a tight fit every time.
- High-Quality Caulk and Finishing Tools: Using flexible, paintable caulk ensures long-lasting results with crisp, clean lines.
- Online Workshops and Tutorials: Platforms like [TileCraftsmen’s detailed guides](https://tilecraftsmens.com/baseboards-makeover-elevate-your-interior-with-simple-updates) have been invaluable for mastering techniques and troubleshooting.
- Project Planning Apps: Visualizing measurements and cuts beforehand minimizes errors and streamlines workflow.
Your Next Step Towards Perfect Baseboards
Remember, each successful project builds your confidence. By focusing on accurate measurements, patience during fitting, and quality finishes, you can transform simple baseboard installation into a striking design feature. Don’t shy away from experimenting with different molding styles or transitions—your home’s character is worth it. Start small, apply these insights, and watch your skills grow. What’s the biggest challenge you’ve faced in baseboard installation? Share your story below and let’s troubleshoot together!