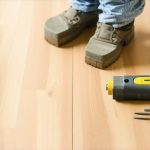
It was a classic Saturday morning when I stepped into my bathroom, expecting a relaxing shower. Instead, I was greeted by a small puddle pooling around the drain, and a faint, unpleasant odor wafting up. I had just finished installing a new shower floor, but the drainage was already acting up. That lightbulb moment made me realize: if I didn’t find a quick fix, I’d be dealing with persistent water damage and mold in no time.
Why Shower Drain Problems Drive Us Crazy—and Why You Should Care
If you’re like me, you probably thought installing a shower drain was just about getting the water to go somewhere. But it’s more than that. Proper drainage isn’t just about convenience; it’s crucial for your home’s durability, hygiene, and even your health. A poorly functioning drain can lead to leaks seeping into your subfloor, mold growth, and costly repairs down the line. And let’s be honest—nobody wants a soggy bathroom floor or that annoying smell that refuses to go away, no matter how much you scrub.
Early in my DIY journey, I made a rookie mistake that many homeowners fall into: ignoring the importance of the drain slope and sealant integrity. I thought a quick fix would do, but it only made things worse. That experience taught me that tackling drainage issues requires a blend of proven techniques and a little inside knowledge—like those shared by seasoned professionals.
Did you know that according to a study by the American Society of Home Inspectors, drainage issues account for nearly 70% of bathroom renovation problems? That’s a staggering number, highlighting just how common—and costly—these issues can be if not addressed correctly.
But here’s the good news: with a few insider secrets, you can troubleshoot and fix your shower drainage FAST. No need for expensive professional help every time. I’ll walk you through my top five pro tips, so you can restore your shower’s performance and peace of mind, just like I did.
Getting to the Bottom of Shower Drain Woes
Assess the Drain and Identify the Issue
Start by removing the shower drain cover using a screwdriver or pliers, then inspect for debris or buildup that might be causing a blockage. Use a flashlight to look into the drain pipe for signs of damage or clogs. Remember, a clogged or misaligned drain is often the culprit behind pooling water. I once encountered a stubborn clog that looked minor but was actually a buildup of soap scum and hair deep within the pipe; clearing it drastically improved drainage.
Clear Obstructions and Maintain the Drain
Pour a mixture of hot water and baking soda followed by vinegar into the drain to dissolve minor clogs. Use a plumber’s snake or auger for stubborn blockages—insert it carefully and rotate to dislodge debris. For instance, I used a snake in one case where hair was tightly wrapped around the pipe’s interior, and after a few turns, water started draining smoothly. Always wear gloves and work slowly to prevent damage to the pipes. Regular maintenance here can prevent future backups.
Check the Drain Seal and Slope
A vital aspect is the seal integrity around the drain. If it’s compromised or damaged, water can leak and pool. Examine the rubber gasket; replace it if cracked or worn. Proper slope is also crucial—aim for a 1-2% downward incline so water flows efficiently toward the drain. I once had to reconfigure the shower floor slightly, adding a slight pitch with self-leveling mortar, which made a significant difference in drainage. This step often involves removing tiles temporarily, so proceed carefully.
Reinforce Proper Shower Floor Installation
If you detect that the floor isn’t sloped correctly or the mortar bed is uneven, consider redoing it. Use a tar-paper or waterproof membrane underneath to prevent water seepage. After applying mortar, guide it with a straightedge to create a gentle slope towards the drain. Allow it to cure fully before replacing tiles. For detailed techniques, check out tips on shower renovation. In my experience, investing time here avoids costly leaks down the line.
Test the Drainage and Seal the System
Once reassembled, run water to confirm it drains quickly without pooling. Watch for leaks around seals or tiles. For issues with persistent odor, ensure the P-trap is filled; add water if it’s dried out. I recommend performing a pressure test: plug the drain, fill the shower with water, then check for leaks over 24 hours. This proactive step can reveal hidden issues before they become major repairs.
Additional Tips for Long-Term Maintenance
Regularly remove debris from the drain cover and avoid using harsh chemical cleaners that can damage pipes. Consider applying waterproof sealant around tiles to prevent water seepage. To elevate your shower area’s aesthetics and function, explore expert tips in creating a spa-like shower or upgrade your flooring with durable materials from flooring installation tips. Consistent upkeep saves money and keeps your shower performing flawlessly.While many homeowners believe that laying down flooring, installing carpets, or fitting baseboards is straightforward, there’s a wealth of nuanced details that often go unnoticed—and these can make or break the final result. For example, a common misconception is that flooring can be installed directly over old material without prepping the subfloor. In reality, this oversight can lead to buckling, gaps, or even damage over time. Professional installers meticulously prepare the surface, understanding that even slight imperfections can cause long-term issues, a nuance sometimes underestimated by DIY enthusiasts.
What advanced techniques can prevent moisture issues in tile and shower installations?
Experts emphasize proper waterproofing layers and vapor barriers, backed by research showing that neglecting these steps increases mold and rot risks (Source: Building Science Corporation). Moreover, many believe that baseboards can simply be nailed or glued in place, but neglecting expansion gaps or using the wrong adhesive can result in gaps, cracking, or warping, especially with seasonal humidity shifts. A subtle, yet crucial, detail is ensuring the baseboard height aligns with flooring thickness to prevent gaps and uneven edges—something experienced craftsmen pay close attention to. When it comes to showers, the myth that a simple sealant can prevent leaks is still prevalent. However, the real trick lies in precise waterproofing methods, such as properly sloping floors, installing high-quality membranes, and sealing drain connections with the right sealant. Underestimating these ‘hidden’ technicalities often leads to costly repairs down the line. In my own projects, I’ve learned that understanding the specific requirements for different materials and applications saves time and money—be it achieving a seamless carpet seam or ensuring a shower pan is leak-proof. Want to avoid amateur pitfalls? Check out pro tips for a luxury shower experience or explore updates to elevate your baseboards. Are you aware of these subtle details? Have you ever fallen into this trap? Let me know in the comments.Maintaining your home improvements requires the right tools and a keen understanding of the process. When it comes to flooring, carpet installation, baseboards, or shower setups, having specialized equipment can make a significant difference in longevity and appearance.
One tool I rely on heavily for precise measurement is the laser level. Unlike traditional bubble levels, laser levels project a perfectly straight, visible line across walls and floors, ensuring that everything from tile to baseboards aligns flawlessly. I personally prefer models like the Johnson Level & Tool 40-6510 for its durability and accuracy, especially when working on larger surfaces that demand precision. Using a laser level regularly during installation helps prevent issues like uneven gaps or warped seams, saving time and rework in the long run.
How Do I Maintain My Installations Over Time?
Long-term upkeep involves more than just initial setup. Regular inspections and quick fixes can extend the lifespan of your flooring and shower areas. For instance, scheduled resealing of grout lines and reapplying waterproof sealants around shower niches prevents water seepage that can lead to mold or rot. Equipment like grout renew kits or waterproofing membranes make this process straightforward. Understanding the products and techniques that suit your specific materials is crucial, and consulting experts through resources like professional renovation tips can guide your maintenance routine.
Part of maintaining your installations includes monitoring for subtle shifts or gaps that develop over time. For example, using a moisture meter can detect early signs of water intrusion behind walls or under floors, allowing for preemptive repairs before significant damage occurs. Investing in these diagnostic tools now can prevent costly repairs later, ensuring your home remains both beautiful and functional for years to come.
Tools I Recommend for Ongoing Upkeep
To keep your work pristine, I recommend a few specialized tools. A handheld caulking gun with adjustable pressure, such as the GE Sure-Drive, provides consistent sealant application around baseboards or shower edges. It’s essential for ensuring sealant adherence and preventing leaks. Additionally, a grout cleaning brush with stiff bristles helps maintain the cleanliness and integrity of tiled surfaces, especially in high-moisture areas.
Looking ahead, trends in home renovation point toward smarter, sensor-based maintenance solutions. Moisture sensors integrated with home automation systems can alert you immediately if leaks occur, enabling faster response and reducing damage. This tech evolution underscores the importance of staying current with advancements and investing in high-quality tools.
Start with a Pro Tip: Waterproofing Secrets
If you’re tackling a new shower installation or renovation, applying a high-quality waterproof membrane is non-negotiable. Not only does it provide a barrier against water intrusion, but it also fortifies the entire structure. Professionals often use products like Schluter-KERDI, which adhere seamlessly to surfaces and are designed for long-term performance. Incorporate this step into your workflow to avoid common pitfalls and enhance durability—try it on your next project!
Existing building standards, such as those outlined by the Building Science Corporation, emphasize the critical role of proper waterproofing to prevent mold and structural issues. Incorporating these insights and tools into your routine can transform your DIY efforts into professional-quality results, ensuring your home investments stand the test of time.
Lessons the Hard Way: What I Wish I Knew About Shower Drains
One of the biggest realizations in my renovation journey was the importance of meticulous slope and sealant application. Rushing through these steps led to leaks and mold, teaching me to always prioritize these details. Additionally, I learned that investing in quality waterproof membranes saves time and money down the line, rather than cutting corners with cheap materials.
Another lightbulb moment was understanding the significance of proper maintenance routines. Regularly inspecting seals, grout, and drain components prevents minor issues from becoming major repairs. I also discovered that using tools like laser levels during installation not only improves precision but also boosts confidence that everything aligns perfectly, preventing future adjustments.
Finally, I realized that patience and thoroughness are key. Taking the time to reconfigure a slightly uneven mortar bed or carefully apply waterproofing can be the difference between a leak-proof shower and costly regrets. Embracing these lessons has transformed my approach, turning DIY challenges into professional results.
Tools and Resources That Changed My Approach
- Schluter-KERDI Membrane: This waterproofing layer is a game-changer, offering reliable protection against leaks when properly installed. I trust it because of its proven durability and ease of application.
- Johnson Level & Tool Laser Level: For ensuring perfect slopes and alignments, this laser level is indispensable. It brings precision that traditional bubble levels can’t match, making installations smoother and more accurate.
- MOISTURE METER: Early detection of hidden water intrusion has saved me from extensive damage. Monitoring moisture behind walls or under floors helps catch issues before they escalate.
- Professional Guides and Websites: Resources like [creating a spa-like shower](https://tilecraftsmens.com/creating-a-spa-like-shower-experience-tips-tricks) and [home upgrade tips](https://tilecraftsmens.com/transform-your-home-expert-flooring-installation-tips-for-2025) have provided invaluable insights from seasoned experts, guiding me through complex steps with confidence.
Your Next Idea for Home Transformation
Now that you’re equipped with insider tips and trusted tools, there’s no limit to what you can achieve. Whether it’s a luxurious new shower setup or a sleek, durable floor, taking the time to do it right pays off. Remember, every detail, from sealing to slope, contributes to long-term satisfaction and home safety. Don’t wait—start your next project today, and enjoy the rewarding experience of a space you’ll love for years to come.
Have you ever struggled with a tricky drain or misaligned baseboard? Share your story below—I’d love to hear your experiences and tips!