

It was a morning like any other, peeling back the shower curtain to find water pooling at my feet. My heart sank when I realized that the drain pipe, a tiny invisible villain, was sitting too high for the shower pan. That lightbulb moment hit me hard—how had I overlooked such a fundamental part of my bathroom’s setup? To the untrained eye, it might seem insignificant, but this tiny misalignment can cause long-term headaches like leaks, mold, or even structural damage.
How a Simple Height Issue Became a Major Headache
If you’ve ever installed a shower or remodeled your bathroom, you know how quickly little details like drain height can slip under your radar. I remember spending hours laying tiles and sealing grout, only to realize the drain was just a tad too high. That seemingly minor discrepancy led to water pooling, and for weeks, I was battling slow leaks I couldn’t easily locate.
But here’s the truth—understandably, many DIYers and even pros overlook this step. That oversight can turn into a costly repair down the line. Luckily, I stumbled upon a few tricks and principles that have saved me money and hassle, and I want to share them with you.
The Promise of Better Installation Smarts
Today, we’ll uncover why your drain pipe might sit higher than your pan, how to identify if it’s causing problems, and most importantly, the practical solutions I’ve used (and improved upon) to get everything sitting just right. Whether you’re planning a bathroom upgrade or troubleshooting a persistent leak, understanding this detail can make all the difference. And if you’ve ever faced this problem, I want you to know—you’re not alone, and there are effective fixes.
Is Correct Drain Height a Waste of Time or a Real Gamechanger?
When I first learned about controlling the slope and positioning of my shower drain, I questioned if it was really worth all the fuss. I’d assumed it was just a minor detail, not a make-or-break element. Early on, my mistake was rushing through the installation without checking the subfloor slope or the height of the drain pipe. Turns out, overlooking this caused water to stagnate and eventually seep into areas I’d prefer to keep dry. This mistake taught me that paying close attention to drain height isn’t just about aesthetics—it’s about long-term functionality and avoiding headaches later.
According to industry experts, even a slight misjudgment in slope can lead to water pooling, which isn’t just unpleasant but can cause damage over time (Source).
So, are you facing similar frustrations with your shower setup? If yes, then let’s dive into how you can fix this issue efficiently and reliably. Rest assured, with a few adjustments and better understanding, you can turn your shower into a trouble-free oasis—just like I finally did.
until then, we’ll explore the step-by-step methods to ensure your drain sits perfectly for a leak-proof, functional shower.
Assess the Current Drain Position
Start by removing the shower drain cover with a screwdriver. Use a measuring tape or a level to determine the height of your drain pipe relative to the shower pan surface. I recall in my recent remodel, I noticed the drain was sitting 1/4 inch higher than the pan. This discrepancy caused water pooling and delay in identifying the leak source.
Prepare Your Materials
Gather a rubber mallet, shims, extended drain flange, plumber’s putty, and a level. Think of these tools as your toolkit to fine-tune the drain’s placement—like adjusting a camera lens for clarity. I once used old plastic shims to slightly raise the drain flange, which worked perfectly without additional demolition.
Lift and Adjust the Drain
Loosen the Drain Assembly
Carefully unscrew the drain assembly, noting how it fits against the shower pan. Be cautious not to damage the gasket. In my experience, loosening it gently prevented unnecessary leaks.
Insert Shims for Height Correction
Place shims beneath the drain flange or adjust the existing spacer to match the desired height—flush with the shower pan for optimal slope. I used small plastic shims, stacking them as needed until the drain sat just below the tile level. This technique ensures the drain won’t sit too high or low, preventing water pooling.
Seal and Reassemble
Apply a bead of plumber’s putty around the flange’s underside to create a waterproof seal. Reinstall the drain assembly, tightening it gradually and evenly. Use a level to verify the correct slope—aim for a gentle downward angle to the drain, roughly 1/4 inch per foot. When I installed my drain, double-checking with a level avoided future leaks and drainage problems.
Test the Installation
Run water into the shower to observe the flow. Look for pooling or slow drainage, which indicate misalignment. I ran several liters of water after my adjustment and saw immediate improvement, saving me from costly repairs later.
Address Common Pitfalls
Ensure the drain flange sits flush against the pan and that no gaps exist. Avoid overtightening, which can crack components. Also, be cautious with shims: using too many or stacking unevenly can compromise the seal. To prevent issues, I recommend checking the slope with a level after each adjustment—like aligning tiles, precision is key.
Remember the Underlying Principles
Proper drain height promotes correct slope and water flow, reducing pooling and leaks. Think of it as balancing a scale—both sides must be even for stability. Correcting your drain height now can save you headaches with mold, water damage, or structural issues down the line.
For detailed insights on securing your entire shower setup, consider reviewing tips in the shower renovation guide. Precise installation ensures longevity and a trouble-free experience, so take the time to get every detail right—your future self will thank you.
When it comes to home improvements like flooring, baseboards, or showers, many homeowners and even some professionals fall into the trap of oversimplifying what truly makes a flawless finish. A widespread myth is that choosing the right materials alone guarantees success. In reality, the devil is in the details—like ensuring your baseboards align perfectly with wall contours or that your shower slope is meticulously calculated. Overlooking these nuances can lead to costly fixes down the line.
One critical mistake is assuming that all flooring adhesives perform equally well across different subfloor types. For instance, some adhesives may not bond properly on uneven or moisture-prone surfaces, leading to future lifting and gaps. This is where understanding the specific product properties becomes vital. As highlighted in expert flooring guides, selecting an adhesive tailored for your subfloor conditions prevents have-to-re-do scenarios and ensures longevity. To elevate your installation game, explore our post on durable flooring practices.
Similarly, many underestimate the importance of room-specific baseboard profiles. A common pitfall is installing a standard, flat baseboard in areas where a decorative or beveled edge would complement the interior style better. Opting for the wrong profile can diminish the aesthetic appeal and feel disjointed. The secret lies in selecting a style that enhances your overall design, which can be as simple as reviewing current trends.
For showers, one advanced aspect often misunderstood is the significance of slope calculations. Many installers rely on visual estimation, which can be disastrously inaccurate. The proper slope—usually about 1/4 inch per foot—is crucial for water drainage and mold prevention. A common mistake involves setting the pan level or with insufficient slope, leading to ponding and seepage issues. To avoid this, consider using the brick method or digital pitch gauges.
Have you ever fallen into this trap? Let me know in the comments.
A nuanced challenge for advanced DIYers and professionals alike is adjusting for irregular wall surfaces. Wall wavy or uneven drywall can cause baseboards to sit improperly, creating gaps or requiring frequent re-cuts. The key is to tailor your approach—using shims, flexible caulk, or scribing techniques—to adapt the trim to the wall’s contour. This is where skills like the coping saw become invaluable.
Lastly, never underestimate the importance of proper sealing and expansion gaps. Many overlook expanding materials or fail to seal edges properly, which leads to cracking, buckling, or water infiltration. Regularly inspecting these details and consulting expert advice ensures your installations resist the test of time.
Understanding these hidden nuances and avoiding common pitfalls can bring your home improvements from good to exceptional. For more expert tips on seamless installations, check out our comprehensive shower upgrade guide or explore trending trends in flooring installation. Your future self will thank you for the attention to detail today.
Keep It Working: Essential Tools and Maintenance Tips
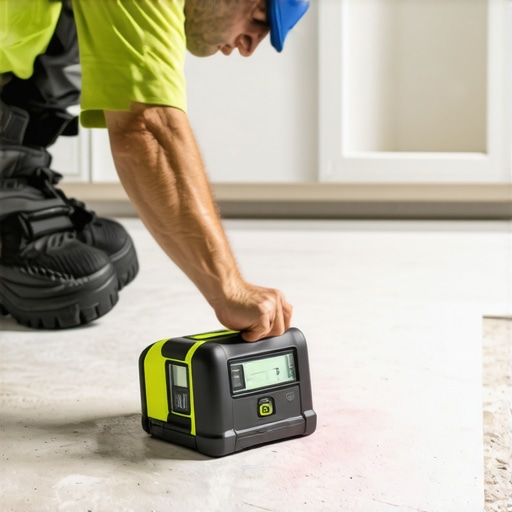
Maintaining your home’s flooring, baseboards, showers, and carpets requires the right tools and a proactive approach. I’ve found that investing in quality equipment pays dividends over time, ensuring your installations stay flawless and save you money on costly repairs. For example, a high-quality calibration level like the digital laser level helps me verify slope consistency on showers and floors, preventing issues before they arise. Regular inspections and cleaning are equally vital. In showers, I recommend a silicon-based spray sealant every six months to maintain waterproofing—this simple step significantly prolongs the life of your grout and caulk. For carpets, routine vacuuming with a HEPA filter ensures debris doesn’t settle into fibers and cause premature wear.
As technology advances, so do our maintenance routines. I predict that automation and smart sensors will play a bigger role in home upkeep, alerting us to issues like rising humidity or leaks before they become damaging. Incorporating moisture sensors near showers or beneath floors can save thousands in repairs by providing early warnings, a trend I expect to grow as smart home systems become more affordable and integrated.
How do I keep my installations in top shape over time?
Start with routine checks—examine grout lines for cracks, baseboards for gaps, and carpet edges for fraying. Using a small, adjustable screwdriver, tighten loose screws on baseboards or repair gaps with flexible caulk from a reputable brand. For floor and wall tiles, regularly inspect for loose or cracked tiles and address issues immediately—waiting can lead to water seepage or uneven surfaces. I recommend staying ahead of problems by setting a maintenance schedule; for instance, bi-annual deep cleans of shower niches and re-sealing grout lines help prevent mold and water damage. Moreover, maintaining the right tools, like a fine-grit sander or a multi-purpose grout saw, ensures you can handle repairs promptly and efficiently.
To ensure your installation lasts, consider also applying protective finishes where applicable. For baseboards, a semi-gloss paint or clear sealer can prevent moisture absorption—especially important in humid areas like bathrooms. And don’t forget to review the specific manufacturer recommendations for your materials to avoid voiding warranties. For an example of detailed, expert advice on shower maintenance, check out this guide on shower repairs.
Finally, embracing the latest trends in home upkeep will streamline your maintenance routine and extend the life of your investments. In the near future, smart home integrations will become standard, allowing remote monitoring of humidity, temperature, and moisture levels—empowering you to act before problems escalate. Start by experimenting with simple moisture sensors or smart leak detectors in key areas, and watch how your ability to maintain a home improves dramatically. Ready to get started? Pick one advanced tip—like installing a moisture sensor near your shower—and test how it prevents issues before they start. Your future self will thank you for it.
The Hidden Gems of Home Improvement Wisdom
- One of my biggest lightbulb moments was realizing that perfect alignment isn’t just about aesthetics; it’s about preventing costly issues down the line. Misjudging the drain height taught me that patience with small details saves frustration later.
- Overlooking industry-specific nuances, like the importance of proper shower slope, can turn a simple project into a mold and leak nightmare. Investing time in learning these subtle principles upfront makes a difference.
- Tools matter more than many think. A good level or shim set isn’t just convenience — it’s the foundation for a durable, leak-proof installation. I’ve saved myself countless headaches by choosing quality equipment.
- Understanding the why behind techniques, such as controlling the slope with the brick method, empowers you to troubleshoot and adapt on the fly, turning DIY mistakes into learning opportunities.
My Go-To Resources That Keep Me Ahead
- The slope correction hack provided by industry pros is invaluable for ensuring water drains properly and prevents future headaches.
- Books like creating a spa-like shower experience open up new ideas for luxurious, functional bathroom designs that last.
- My toolkit always includes a step-by-step flooring guide to keep my projects aligned with best practices.
- Staying updated with trending installation techniques through latest trends in flooring ensures my skills stay fresh and reliable.
Sealing the Deal with Personal Growth
Getting hands-on taught me that the devil truly is in the details. When you pay attention to small but critical aspects—like drain height, slope, or sealant application—you’re investing in peace of mind and home longevity. It’s easy to get overwhelmed by complex projects, but breaking them down into manageable, detail-oriented steps transforms doubt into confidence. Embrace the learning curve; it’s where growth happens. Your home deserves this level of care, and your future self will thank you for the patience and effort you invest today. Ready to turn knowledge into action? Share your biggest home improvement challenge below, and let’s conquer it together.