

I remember the day I stepped into my bathroom and noticed a small, almost imperceptible puddle forming around the base of my shower bench. At first, I thought it was just water splashing or humidity, but as days went by, the problem grew. That lightbulb moment hit me—this was a leak, and ignoring it would lead to bigger issues like mold or structural damage. Sound familiar? Many homeowners face this frustrating dilemma, often discovering leaks too late, with costly consequences.
Why Leaky Shower Benches Can Ruin More Than Just Your Morning Routine
When your shower bench starts leaking, it feels like an endless battle against moisture. Not only does it create a mess, but it jeopardizes your bathroom’s integrity. Water seeping into the subfloor can cause warping, mold growth, and even compromise the surrounding walls. The tricky part is that leaks are often hidden, sneaking behind tiles or under layers of sealant, making detection and repair difficult.
A common mistake I made early on was neglecting the sealing process during installation. I thought a standard grout was enough to keep water out—spoiler: it’s not. I learned that traditional sealing methods often fail over time, especially if the right waterproofing measures aren’t in place. That’s when I encountered the Liquid-Membrane Fix for Leaky Shower Benches. This innovative approach creates a flexible, durable barrier that adapts to movement and temp fluctuations, preventing leaks before they start.
Have you ever faced a persistent leak that seemed impossible to fix? If your bathroom has been plagued by similar issues, you’ll appreciate the solution I’m about to share. But first, let’s address the skeptics—yes, you might wonder if this liquid-membrane method is worth the effort or just another gimmick. I was skeptical too, but the results speak for themselves.
Is the Liquid-Membrane Fix Really a Game Changer or Just Hype?
Early in my DIY adventures, I overlooked the importance of proper waterproofing around the shower bench. I thought sealing the grout properly was enough. However, I soon discovered that even small gaps could let water sneak through. This initial mistake made me realize that a more reliable, long-lasting solution was necessary—one that worked with the tile, not against it.
In my next steps, I’ll guide you through how to implement this liquid-membrane fix effectively, so you can prevent leaks and save yourself from future headaches. If you’re tired of patching up water damage or dealing with hidden mold, keep reading. Together, we’ll turn your shower area into a water-tight haven, backed by proven methods. For more insights into modern bathroom upgrades, check out our [expert tips on shower enclosures](https://tilecraftsmens.com/shower-enclosures-101-expert-tips-for-modern-bathroom-makeovers). Now, let’s get started on making your shower bench leak-proof once and for all.
Apply Waterproofing Membrane Carefully
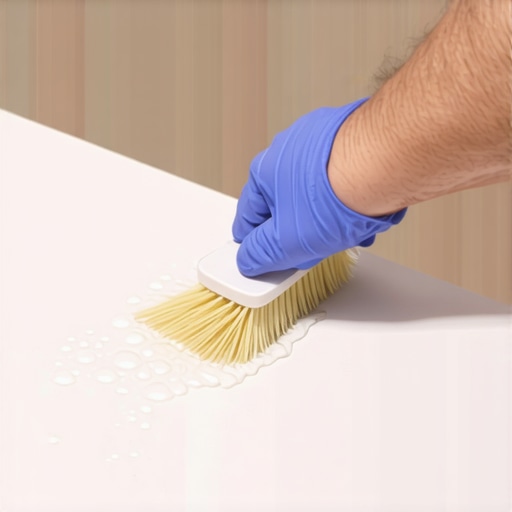
Begin by cleaning the surface of your shower bench thoroughly to remove any dirt, soap scum, or existing sealant. Use a stiff brush and a compatible cleaning solution, then allow it to dry completely. This step ensures proper adhesion of the waterproof membrane. I vividly recall a time I skipped this step, resulting in a failed seal that led to water seeping behind the tiles—messy and costly to repair.
Prepare the Liquid Membrane
Mix your liquid waterproof membrane according to the manufacturer’s instructions. Usually, this involves stirring a two-part compound until fully blended. Think of it like preparing pancake batter — consistency is key. I once faced a clumpy mixture that didn’t spread evenly, so I adjusted my stirring technique to achieve a smooth, pourable consistency, which made application much easier.
Apply the First Coat with Precision
Using a high-quality brush or roller, apply the first thin, even layer of the liquid membrane over the bench surface, paying special attention to corners and seams. Work systematically to avoid missed spots. I learned that rushing this step results in uneven coverage, which can develop into leaks over time. Keep a wet edge to prevent streaks and ensure seamless coverage.
Seal All Edges and Joints Thoroughly
Focus on the edges, corners, and where the bench meets the wall. These are the most vulnerable points for leaks. Use a small brush to carefully paint along seams and any cracks. I once missed sealing a corner, which eventually became a leak after heavy use. Double-check these areas before the membrane dries.
Apply Additional Layers for Durability
Once the first coat dries (usually 90 minutes to 2 hours), apply a second coat following the same technique. Two coats ensure a more resilient barrier. Remember, the thicker and more uniform the membrane, the better its leak-proof qualities. I once tried a single thick coat; it cracked during installation, compromising the seal. Multiple thin coats are more reliable.
Allow Proper Curing Time
After the final coat, let the membrane cure fully—typically 24 to 48 hours—before exposing it to water. During this period, avoid using the shower to ensure the membrane sets perfectly. I once hurried the process, and the membrane peeled during the first shower, illustrating why patience is critical.
Test for Leaks Before Tiling
Pressurize the bench by gently pouring water over it or using a small spray. Observe for dampness or leaks over the next 30 minutes. If any water seeps through, reapply the membrane to the affected areas. This step is crucial; I once skipped this, and an undetected leak caused mold growth behind the tiles months later.
Finish with Quality Tile Installation
Once you’re confident in the waterproofing, proceed with tiling. Use a suitable thin-set mortar, and grout carefully to avoid gaps. Proper sealing at this stage protects your waterproof membrane from damage. For inspiration on modern designs, check out our expert shower enclosure tips.
 Many homeowners believe that installing baseboards is simply about aesthetic appeal, but the reality involves intricate details that can make or break your project. One prevalent misconception is that matching the color of baseboards to walls is sufficient; however, choosing the right style and material for your space is crucial for longevity and style elevation, as discussed in our expert guide. When it comes to carpet installation, many think that a taut, wrinkle-free surface is easy to achieve with a quick stretch, but improper techniques can lead to premature wear and unsightly look, which is why understanding the secrets of flawless carpet install is vital.Achieving professional results in home renovation projects like baseboard installation, flooring, or shower upgrades hinges on using the right tools. One game-changing instrument I swear by is the **laser level**. Unlike traditional bubble levels, laser levels project a continuous, straight line across multiple surfaces, ensuring perfect alignment over long distances. This is particularly helpful when installing baseboards in large or irregularly shaped rooms, preventing uneven gaps and gaps that can compromise both aesthetics and structural integrity. I personally use the **Bosch GLL 3-50** because of its durability, bright laser beam, and ability to project lines both vertically and horizontally, reducing the need for manual measurements and guesswork.
Another essential tool is the **digital moisture meter**. Moisture detection is crucial before pouring new subfloor leveling compound or applying sealants around showers. The **Protimeter Surveymaster** has proven effective in my projects, as it provides precise readings that help avoid future issues like mold or subfloor rot. Ignoring moisture levels early on can lead to costly repairs down the line, especially with flooring types like tile or vinyl that require a dry, stable base.
For intricate tasks such as scribing or custom cuts on baseboards or trim, I rely on the **contour gauge**. This simple yet powerful device allows you to accurately trace irregular shapes directly onto material, saving time and reducing waste. My personal favorite is the **Waxey Contour Gauge**, thanks to its sturdy stainless steel pins and ease of resetting.
When it’s time to seal joints or corners, I prefer using the **caulking gun with a precision nozzle**. The **Dap 200-RT** gun, paired with a fine-tipped nozzle, gives me control over application, ensuring clean lines and reducing cleanup time. Proper sealing around showers or between baseboards and walls is vital for preventing water infiltration.
Looking ahead, I predict that automation and smart tools will increasingly dominate home improvement. Tools integrated with Bluetooth and app connectivity will allow for real-time diagnostics and more precise measurements, further reducing errors.
How do I maintain my tools over time? Regular cleaning after each project is essential—using appropriate solvents for each tool, storing everything in a dry environment, and calibrating laser levels annually. For example, calibrating a laser level ensures its accuracy, preventing skewed lines that could compromise your entire project. Investing time in proper maintenance prolongs your equipment’s lifespan and ensures consistent results.
If you’re aiming for flawless results in your next project, I highly recommend investing in a **laser level** and mastering its calibration. Not only does it streamline your workflow, but it also elevates the precision of your installations.
For more tips on advanced techniques, check out our guide on [modern bathroom enclosures](https://tilecraftsmens.com/shower-enclosures-101-expert-tips-for-modern-bathroom-makeovers). Ready to up your renovation game? Start by integrating a laser level into your toolkit and discover the difference it makes in achieving perfectly aligned, professional-quality results.
What I Wish I Knew Before Starting My Shower Waterproofing Journey
- Patience is your best friend; rushing the sealing process often leads to future headaches. Taking the time to do multiple thin coats of the liquid membrane ensured my leak-proof success.
- Preparation can’t be overstated—cleaning and drying the surface thoroughly made all the difference in adhesion and durability.
- Testing thoroughly after applying the membrane saved me from unexpected surprises later, especially when hidden leaks caused mold issues behind tiles.
- Investing in quality tools like a good brush, roller, and even a moisture meter prevented minor mistakes from escalating into costly repairs.
- Understanding the importance of sealing vulnerable points like corners, seams, and edges early on saved me from recurring issues down the line.
My Top Picks for Making Your Home Renovation Smooth and Successful
- Expert tips on modern shower enclosures—This resource provided insights that aligned with my waterproofing approach and inspired me to design stylish, water-tight bathrooms.
- Baseboard styles that elevate your interior—Choosing the right baseboards can seamlessly complement your renovation, avoiding common pitfalls like mismatched styles or poor material choices.
- Expert flooring installation tips—This guide assisted me in selecting durable flooring that withstands moisture and traffic, crucial in bathroom spaces.