

I’ll never forget the moment when I laid a beautiful, large-format tile in my bathroom, only to find it cracked and wobbly just a few weeks later. The culprit? An uneven concrete slab beneath. That lightbulb moment made me realize how critical a properly leveled foundation is for successful flooring projects—especially when dealing with large tiles that demand exceptional flatness. If you’ve ever experienced the frustration of tiles that don’t sit flush or crack prematurely, you’re not alone. It’s a common challenge many DIYers and even seasoned pros stumble over.
The Secret to Stable, Flawless Tile Floors Starts with a Level Surface
Today, we’re going to uncover the best techniques for leveling a concrete slab, ensuring your large tiles not only lay flat but stay that way for years to come. I’ll share my personal journey, mistakes I made early on, and proven methods that truly make a difference. Whether you’re remodeling a bathroom, upgrading your kitchen, or creating a stylish patio, a level slab is the foundation of success. Don’t settle for subpar results—let’s dive into how to achieve that perfect, even substrate that your tiles deserve.
Is It Really Worth the Effort? My Early Mistake Might Surprise You
When I first started, I underestimated how much unevenness in the slab could ruin the project. I thought a quick sweep and a bit of thinset would do the trick. Big mistake. That oversight led to cracked tiles and countless hours of rework. According to industry experts, addressing slab unevenness during prep can prevent up to 80% of tile failures, saving you time and money in the long run (learn more about flooring installation mistakes here). Trust me, taking the time to properly level your slab is a game-changer.
Now, you might be wondering: how do I know if my concrete is truly level? And more importantly, what’s the best way to fix it? That’s exactly what we’ll cover next—step-by-step, with all my tips and tricks to make your flooring project smooth and successful. Ready to get started?
Assessing the Existing Surface Carefully
Start by scrutinizing your concrete slab for uneven spots. Use a long, straight 2×4 board and a level to identify high and low areas. I recall a time when I casually checked my slab with a short spirit level — it missed subtle dips, leading to issues down the line. By placing a 2×4 across different sections and observing gaps with a level, you get a better understanding of the terrain. Mark these areas with chalk so you can focus your efforts on the problematic spots.
Preparing the Surface for a Proper Fix
Before making any adjustments, clean the slab thoroughly, removing dust, debris, and loose particles. Use a stiff broom or shop vac. If moisture is an issue, consider applying a moisture barrier. Remember, a clean surface ensures better adhesion of any leveling compounds. I once overlooked this step and faced bond failures with the self-leveling overlay, which caused more headaches later. Proper cleaning is a simple, yet crucial step.
Choosing the Right Leveling Method and Material
For minor dips under 1/4 inch, self-leveling underlayment works well. For larger low spots, consider using a polymer-modified concrete patch or deck mud. Think of it like filling in potholes on a road—precision matters. I used a quick-setting patch on a previous project, which allowed me to progress faster. Always follow manufacturer instructions for mixing and application. Mixing too thick or too thin can compromise the final flatness, so measure carefully. It might seem tedious but pays off in a perfectly flat surface.
Applying the Leveling Material Effectively
Pour the self-leveling compound or spread the patch mix in small sections, working from the high points toward low areas. Use a trowel or squeegee to feather the edges. To ensure even distribution, I found that gently vibrating the poured material with a nail gun or tapping it with a rubber mallet helps eliminate trapped air and achieve a smooth finish. Keep a damp sponge handy to wipe excess and shape the surface before it sets. This technique prevents ridges and ensures the slab will be ready for tile installation.
Finishing and Curing for Longevity
Allow the leveling material to cure fully—most compounds need 24 to 48 hours. During this process, avoid walking on or disturbing the surface. Cover it with plastic sheeting if dust or drafts threaten to compromise the curing. I once rushed the curing process, leading to surface cracks that marred my tiles’ lifespan. Patience here guarantees a stable, flat foundation.
Double Checking the Flatness
Once cured, re-test with the long straight edge and level. Any minor imperfections can be sanded down with a concrete grinder or patched again if needed. Remember, the goal is to have the surface absolutely flat for large-format tiles, which are unforgiving of uneven slabs. This extra step can save you from cracks, lippage, and future repairs, making your effort worthwhile.
When it comes to flooring, many assume that following basic instructions guarantees success, but seasoned professionals know there’s more beneath the surface. For example, a widespread belief is that selecting cheap materials saves money; however, in my experience, investing in high-quality underlayments and adhesives makes a noticeable difference in longevity and appearance, especially in high-traffic areas (see why quality matters). A common trap that many novices fall into is underestimating the importance of precise subfloor preparation — not just a clean slab but an understanding of subfloor stability and moisture levels, which can prevent costly repairs later. Overlooking this step can lead to uneven surfaces, squeaks, and even tile or laminate cracking, turning your project into a troubleshooting nightmare.
Are High-End Materials Always the Best Choice for Your Project?
Let’s challenge the myth that expensive materials automatically translate to durability. While premium options often offer better wear resistance and aesthetic appeal, their success truly depends on proper installation techniques and compatibility with the environment. For instance, even top-tier shower enclosures can leak or crack if not installed with proper sealing and moisture barriers (expert shower tips). An advanced mistake I often see is neglecting expansion gaps during flooring installation; neglecting these can cause buckling or gaps over time. For large format tiles, understanding the nuances of substrate flatness and the right thinset compatibility often surpasses material choice in importance. In fact, a study in the Journal of Building Science emphasizes that proper installation practices account for over 70% of flooring durability, regardless of material quality. Always remember, proper subfloor prep and precise application techniques are your best tools to ensure that your investment pays off. Have you ever fallen into this trap? Let me know in the comments.
Maintaining your flooring, baseboards, and shower installations over time is crucial to preserving their appearance and functionality. Having the right tools at your disposal makes routine maintenance and repairs more manageable and less time-consuming. For example, I swear by a high-quality grout removal tool—it’s indispensable for addressing tile cracks or re-grouting without damaging surrounding surfaces. The guide to durable flooring emphasizes the importance of specialized tools to extend the lifespan of your installations.
Keep It Working with Precision Equipment
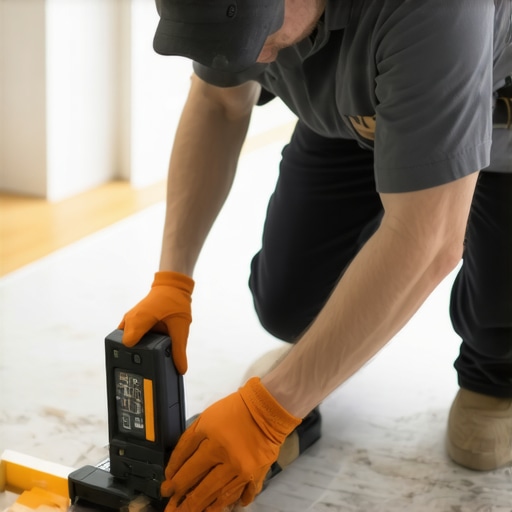
One key tool I rely on is a digital moisture meter. Concrete slabs and subfloors can hide moisture issues that lead to warping or mold over time. Testing moisture levels periodically ensures that your flooring remains stable and prevents costly damage. For baseboard installation, a laser level is invaluable—it’s quick, highly accurate, and helps achieve straight, professional-looking results without guesswork, especially when working on uneven walls or aiming for minimal gaps.
Power tools like oscillating multi-tools are also game-changers. They streamline tasks such as removing or trimming baseboards, repairing shower tile grout, or adjusting flooring lengths. Their versatility reduces labor time and enhances precision, which is critical for seamless finishes. Investing in quality blades and accessories specific to each task further enhances tool lifespan and effectiveness.
Routine Checks and Long-Term Care Strategies
Regular inspections of grout lines, sealant edges, and caulking points are essential. I check these every six months, reapplying or repairing as needed using a high-quality silicone sealant. A flexible sealant accommodates movement, preventing water infiltration or tile cracking, much like the methods outlined in this article about sealing joints effectively. Additionally, maintaining a clean environment—using gentle cleaners and avoiding harsh chemicals—helps preserve the finish and protect your investments.
The trend toward smart home maintenance is growing, with tools like app-connected moisture meters and laser levels becoming more affordable. These innovations promise to make ongoing upkeep more efficient and less guesswork-driven. In my experience, setting a scheduled maintenance routine using these tools ensures your floor and shower systems stay in prime condition, saving you money and stress in the long run. For instance, integrating a moisture meter check every quarter can catch hidden issues before they escalate, aligning with industry best practices.
Future of Flooring Care: Embrace Smart Tools
Looking ahead, I predict increasing adoption of AI-driven diagnostics and robotic cleaners tailored for flooring maintenance. These advancements will enable proactive care, catching issues as they develop and recommending precise solutions. I recommend trying out an advanced digital moisture meter combined with a laser level for your next annual check-up—a small investment that can dramatically extend your project’s lifespan.
Remember, proper maintenance isn’t just about fixing problems; it’s about preventing them. Incorporate these tools into your routine to keep your floors, baseboards, and showers functioning flawlessly for years. Have you used any of these tools before? Share your experiences or ask questions in the comments, and check out our detailed repair guides to keep everything working smoothly.
Insider Wisdom: Surprising Truths I Wish I Knew About Flooring Installation
One pivotal lesson I learned is that rushing the slab leveling process often leads to more headaches later. Skipping meticulous surface assessment or rushing the curing phase can cause uneven tiles and future cracks. Another insight is that investing in quality tools—like a reliable moisture meter and laser level—saves time and prevents costly mistakes, even if they seem expensive upfront. Lastly, understanding that every slab has its quirks, from minor dips to hidden moisture, has made me approach each project with patience and thoroughness, ultimately delivering better, longer-lasting results.
My Essential Toolkit for Flawless Flooring and Shower Installations
Over the years, I’ve come to rely on specific tools that truly elevate my work. A digital moisture meter helps me catch hidden issues before they cause damage, ensuring longevity. A high-grade laser level guarantees straight lines and perfect alignments in baseboards and tiles. For surface prep, a sturdy trowel and a vibrating screed are indispensable for achieving that perfectly flat surface. Lastly, quality grout and adhesive brands, tried and trusted, make a noticeable difference in durability and appearance. These tools, combined with proper techniques, have transformed my projects from good to exceptional.
Fuel Your Passion: Keep Improving Your Home with Confidence
Embracing the nuances of flooring and shower installation means recognizing that mastery is a journey, not a destination. Small details—like properly mixing leveling compounds or meticulously preparing your surface—can drastically influence your results. I encourage you to start with the fundamentals, invest in quality tools, and always be willing to learn from each project. The satisfaction of turning a rough slab or outdated shower into a sleek, durable masterpiece is unparalleled. Take that first step today; your dream space is within reach, and every effort brings you closer to a home that’s both beautiful and built to last.