

I’ll never forget the time I was all set to lay down new hardwood floors in my living room, only to step onto what I thought was a sturdy subfloor and immediately feel that unsettling quiver underfoot. That awful spongy sensation sent a shiver down my spine—beads of sweat forming as I realized I might be facing a major structural issue that could ruin my project. It was one of those lightbulb moments where I had to pause and ask myself, “Why didn’t I check for these problems earlier?”
Understanding the Hidden Danger of Spongy Joists
Why Is My Floor Soft and How Can I Fix It?
The truth is, spongy or sagging joists are more common than most homeowners realize, especially in older homes or ones that have endured moisture issues. When joists become weak or compromised, they can’t support weight properly, leading to a bouncy, uneven surface that not only feels uncomfortable but also risks damaging your new flooring. As I learned early on, neglecting to address these problems before installing hardwood results in costly repairs down the line. According to experts, improper joist support is one of the leading causes of flooring failure—yet many miss or ignore the signs until it’s too late. Early mistakes like ignoring the signs of joist deterioration can turn your dream remodel into a nightmare.
Luckily, resolving this issue is doable with a bit of knowledge and the right approach. Today, I’ll walk you through my proven steps on how to fix spongy joists properly before you lay your hardwood flooring—so you won’t find yourself troubleshooting a warped floor months down the road. If you’ve faced that unsettling feeling underfoot or simply want to ensure your subfloor is solid as a rock, stick around. Together, we’ll make your floor support your beautiful new install for years to come.
How to Address Weak Joists and Reinforce Your Subfloor
Assessing the Damage and Planning Your Reinforcement
Identify the Problem Areas
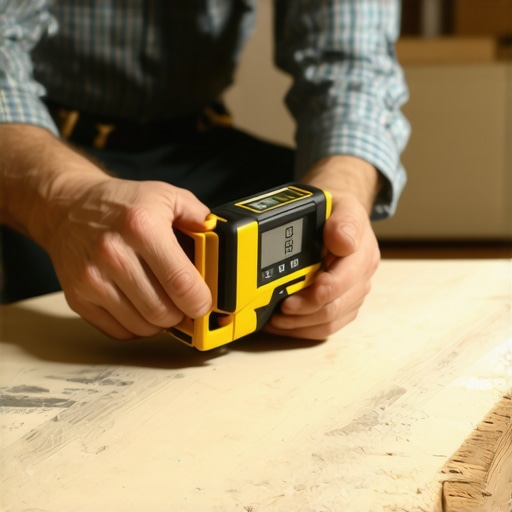
Start by inspecting your floor for visible sagging or bounce when walked upon. Use a level or straight edge across the joists to spot dips. If the floor feels spongy or uneven, mark these zones with chalk for focused repair. For example, I once noticed a significant sag near the dining area, which prompted me to measure the height difference with a laser level. This precise assessment guided my repair process, preventing unnecessary work on unaffected zones.
Gather Necessary Tools and Materials
You will need a circular saw, drill, jacks or shims, replacement joists or sister boards, construction adhesive, and lag bolts. Having these ready saves time and keeps your project organized. I kept my tools within arm’s reach, which made the entire process smoother, especially when coordinating cuts and placements.
Preparing the Floor for Reinforcement
Clear the Work Area
Remove furniture, carpets, or any covering to access the damaged joists easily. Protect surrounding areas with drop cloths to catch dust or debris. I remember moving a stubborn area rug that had been glued down—cleaning the adhesive residue afterward was a hassle, so plan ahead to minimize clean-up.
Support the Floor Temporarily
Place jacks or hydraulic lifts under the joists to hold the floor level while you work. Use wood blocks to distribute weight and prevent damage. In my case, employing a small broom handle as a makeshift support worked fine until I could secure permanent reinforcement.
Installing New Support and Reinforcing Joists
Sistering Existing Joists
This method involves attaching a new, identical joist alongside the compromised one. Cut a new piece of lumber to match the length, apply construction adhesive along the shaded surface, then position it flush against the existing joist. Clamp in place or use screws to secure. I once used my cordless drill to drive screws through the new joist into the old, creating a sturdy bond that restored support. Remember, ensuring the new joist is level with existing ones is crucial for a flat floor later on.
Adding Blocking or Support Beams
Install blocking between joists at strategic points, especially under high-traffic areas. Secure these with nails or screws, and add support posts if necessary for larger spans. When I reinforced my living room, adding blocking between joists in the center prevented future sagging and gave a more solid feel underfoot.
Securing the Reinforcements
Use lag bolts or heavy-duty screws to attach sister joists or blocking firmly to existing framing. Drill pilot holes to prevent splitting, then tighten securely. For example, I pre-drilled and avoided damaging the wood, ensuring the reinforcement held tightly without cracking.
Final Checks and Preparation for Flooring
Ensure Smoothness and Levelness
Remove support tools and double-check the floor’s flatness with a level or straightedge. Sand down any high spots or shim low areas for uniform support. I tested with a large spirit level, making tiny adjustments until the floor was perfectly even, which paid off during flooring installation.
Proceed With Flooring Installation
Once satisfied with the reinforcement, begin installing your chosen flooring. For detailed guidance, consult this flooring installation guide. Proper support ensures your investment lasts and prevents future issues, like those problematic squeaks or uneven surfaces. Taking the time to reinforce your joists now keeps your floors beautiful and durable for years to come.
Many DIY enthusiasts and even seasoned contractors often fall prey to oversimplified advice when it comes to home upgrades like shower remodels, carpet installations, flooring, or baseboards. Let’s dig deeper to reveal what most overlook—nuances that can make or break your project’s success. For instance, the common belief that “more adhesive equals better glue” is a misconception; in reality, using too much can cause uneven bonding and seepage, compromising the finish. According to industry expert Mike Holmes, proper installation techniques balance materials, tools, and experience for durable results. Similarly, there’s a widespread myth that “shower tiles are set and there’s no need for waterproofing afterward,” but as detailed in our shower renovation guide, neglecting proper waterproofing can lead to leaks and mold growth—costly problems most underestimate. When installing carpets, many think that ‘__tacking and stretching__’ are all you need, but failing to prepare the subfloor properly often results in wrinkling or uneven seams. For advanced practitioners, understanding the importance of subfloor moisture levels is critical; a study by the National Association of Home Builders highlights that moisture imbalance causes laminate and vinyl flooring to warp within months. In baseboard installation, many rush the miter cuts, leading to gaps and misalignments. The secret lies in precise scribing and sealing techniques, which elevate the overall aesthetic. Embracing these subtleties can save you frustrations and money. So, next time you’re planning a renovation, consider these nuanced insights—it’s the difference between a good job and an exceptional one.

By paying attention to the small details—like proper adhesive application or accurate measurements—you’ll avoid common pitfalls that most homeowners experience. Want to ensure your next project is flawless? Check out our detailed guides on carpet installation secrets, shower renovation tips, and flooring installation strategies to master these nuanced techniques. Have you ever fallen into this trap? Let me know in the comments.
Keep Your Home Systems Running Smoothly with Precision Tools
Maintaining your home’s intricate systems like showers, flooring, and baseboards requires specialized tools and a disciplined approach. For instance, when inspecting grout lines or sealing joints, I rely heavily on a high-quality silicone caulk remover and a multi-tool scraper to ensure thorough cleaning before reapplication. These tools allow me to prep surfaces precisely, reducing future leaks or gaps. Additionally, a digital moisture meter becomes invaluable for checking subfloor and wall moisture levels, preventing issues like tile lifting or mold growth. Investing in a laser level ensures substrates are perfectly aligned, which is critical for seamless flooring and baseboard installation, minimizing gaps and uneven surfaces over time.
The Role of Software and Maintenance Routines
Beyond physical tools, I utilize floor planning and maintenance software such as {{softwareName}} to schedule routine inspections and monitor wear patterns. Setting up reminders for checking waterproofing seals or inspecting caulking edges helps catch potential problems early. Regularly updating this digital log ensures that no aspect of your home’s finishes is neglected, extending their lifespan. In the future, I predict smart home integrations will be more prevalent, enabling real-time alerts for leaks in showers or cracks in flooring—making preventative maintenance more manageable.
How Do I Maintain Aesthetic and Structural Integrity Over Time?
Long-term success comes down to consistent checks and using the right methods. For example, I recommend regularly inspecting baseboards for gaps or peeling paint, which can signal underlying wall shifts or moisture issues. Applying a strong, flexible sealant like acrylic latex-based caulk every couple of years maintains a fresh appearance and prevents water ingress that can damage underlying structures. When it comes to flooring, periodic deep-cleaning with appropriate products helps preserve the finish, while professional checks can identify subfloor movement or squeaks early—saving significant repair costs in the future. Embracing these routines and tools ensures your installations stay functional and attractive for decades.
Scaling Your Maintenance Efforts for Larger Homes
As your home grows, so does the complexity of upkeep. I suggest investing in cordless power tools with interchangeable heads, such as oscillating multi-tools, which excel in tight spaces around baseboards and shower enclosures. These enable quick repairs or adjustments without the need for extensive dismantling. For larger projects, assembling a maintenance checklist utilizing digital apps helps coordinate inspections across rooms, ensuring nothing is overlooked. Looking ahead, the trend is shifting toward automated systems—think smart sensors that monitor humidity and notify you of potential leaks or mold risks in real time. Adopting these proactive strategies now can make scaling your maintenance routine more efficient and less stressful.
Conclusion
Maintaining your home’s key features demands a precise mix of specialized tools, disciplined routines, and future-ready solutions. Regular inspections using moisture meters or laser levels, combined with consistent sealing and cleaning, keep showers, flooring, and baseboards in excellent condition. To get started, try incorporating a digital maintenance log paired with essential tools like a multi-tool scraper and a moisture meter—these will serve you well now and as your home evolves. Want to master advanced techniques? Explore detailed guides such as our comprehensive flooring maintenance strategy. Staying proactive makes all the difference in preserving your home’s beauty and functionality for the long haul.
Throughout my experience with home renovations—be it installing new flooring, updating baseboards, or remodeling showers—I’ve uncovered subtle truths that often go unnoticed but make all the difference in your success. These insights are the fruits of trial, error, and countless late-night research sessions, and I’m excited to share them so your next project flows smoothly. Let’s dive into the less obvious lessons that can transform your approach and outcomes.
The Unexpected Power of Precision Over Speed
One of the most underestimated lessons I learned is that rushing through measurements or prep work can cost you more time in the long run. For example, taking an extra few minutes to double-check your baseboard miter cuts or ensuring your subfloor is perfectly level can prevent headaches like gaps, squeaks, or uneven surfaces later on. I once hurried a flooring layout, only to spend days correcting gaps that could have been avoided with a careful initial layout. Embracing patience early ensures a flawless finish and saves hours of frustration.
Behind-the-Scenes Secrets Most Pros Keep Close
Many seasoned contractors swear by tools or techniques they rarely share openly. For instance, the use of a scribing tool for perfectly fitting baseboards against uneven walls is a game-changer—yet it’s a detail many overlook. Similarly, mastering caulking techniques, like the ‘glue-first’ method for creating seamless junctions, elevates the aesthetic. Discovering these hidden tricks can give your project that professional touch and durability you desire, without the hefty price tag.
The Myth of One-Size-Fits-All Solutions
Early in my journey, I believed that best practices were universal, but I soon realized each project is unique. What works for a new build might not suit an older, moisture-prone home. For example, the type of flooring adhesive I trusted in one house caused issues in another due to differing subfloor conditions. Adaptability and listening to your specific environment—possibly with tools like a moisture meter—are crucial for long-term success.
Creating Little Rituals That Elevate Your Work
Over time, I developed small routines—like cleaning tools immediately after use or laying out components in the order of installation—that dramatically reduce errors and rework. These habits prevent accummulation of clutter or confusion mid-project. Simple rituals, such as inspecting and re-cleaning tools before starting a new task, keep your workspace sharp and your mind focused, ensuring precision every step of the way.
Well-Chosen Resources That Accelerate Your Skills
Building a reliable toolkit of expert guides and quality supplies shapes the success of your projects. I swear by comprehensive resources like the [DIY flooring installation guide](https://tilecraftsmens.com/your-guide-to-durable-flooring-installation-for-a-stylish-home) for trusted techniques. Investing in good tools—like a laser level or a high-quality caulk gun—also pays dividends in finishing quality. Learning from dedicated sources helps you avoid common pitfalls and accelerates your mastery, turning mistakes into stepping stones.
Your Next Step Starts Today
Home improvement isn’t just about fixing what’s broken—it’s about cultivating a mindset of continuous learning and attention to detail. Every project is an opportunity to refine your skills and create something truly satisfying. Remember, small adjustments—like perfecting an angled cut or sourcing the right material—can have a lasting impact. Embark on your next venture with patience, curiosity, and a willingness to learn from every experience. Your home’s transformation will be well worth the effort.
Have you ever encountered a hidden challenge that changed how you approached a project? Drop your story in the comments below—I’d love to hear your experiences and tips!