

Picture this: after hours of careful installation, you’re admiring your brand-new vinyl plank floor, only to notice small gaps forming along the short edges. It’s a frustrating moment that can make you question everything you did right—or wrong. I remember when I first faced this issue; I thought I had followed all the instructions perfectly. Yet, those pesky separations kept showing up, turning my dream floor into a source of constant worry.
Understanding the Culprits Behind Vinyl Plank Separation
Is Your Installation Method Letting You Down?
One of the most common reasons for short-end separation is the way the planks are installed. Vinyl planks are designed to lock together, but if the tapping block isn’t used correctly or if there’s excessive force, it can cause the locking tabs to misalign or break. Early on, I made the mistake of hammering too hard without a proper tapping technique, which resulted in tabs splitting, leading to gaps later. This taught me the importance of gentle, controlled taps—more about that soon.
Another culprit is insufficient expansion space around the perimeter. Vinyl expands and contracts with temperature changes. If the installation doesn’t leave enough room for movement, it can cause the planks to buckle or separate over time. Understanding and planning for this movement is crucial. For more detailed tips, check out the expert advice on flooring installation.
Before diving into fixes, it’s vital to recognize that the problem isn’t necessarily due to poor quality; often, it’s about installation nuances. I’ll share my experience and insights on how to prevent these issues from the start, and what to do if you’re already facing separation problems.
If you’ve encountered similar surprises on your flooring journey, you’re not alone. The good news? With some understanding and the right techniques, you can achieve a smooth, seamless look that lasts. Ready to uncover the secrets? Let’s get into the practical steps to fix and prevent vinyl plank separation.
Properly Lock the Planks with Controlled Tapping
During my first major vinyl plank install, I initially used too much force when tapping the planks together, which caused tabs to misalign. I quickly learned to use a tapping block and a rubber mallet, gently and precisely, to avoid damaging the locking mechanism. This approach ensures the planks fit snugly without gaps and reduces breakage.
Use the Right Tapping Tools and Techniques
Choose a suitable rubber or wood tapping block that matches the plank thickness. Place it against the long or short lock sides, then tap gently with a rubber mallet—never a hammer directly on the planks. This controlled method prevents deformation of the locking tabs and guarantees a tight fit, adding to the floor’s durability. Remember, patience beats brute force every time.
Maintain Adequate Expansion Space
Vinyl expands and contracts with temperature changes—think of it like a flexible plastic band. When installing, I left a ¼ inch gap around the perimeter, as recommended by manufacturers. During my project, I used spacers and carefully measured to ensure uniform gaps around walls and obstacles, preventing buckling or separations over time.
Plan for Temperature Fluctuations
Adjust the expansion gap based on your area’s climate: warmer zones require slightly larger gaps. After the installation, I applied baseboards to cover these gaps, which brings me to the next crucial step.
Securing Expansion Gaps with Baseboards
Baseboards hide the expansion space and provide a finished look. I opted for flexible, tall baseboards, which can accommodate slight shifts without cracking. Before attaching, I measured and cut the baseboard lengths, then nailed them just above the vinyl planks—avoiding direct contact with the flooring to allow movement. For stylish and functional options, explore baseboard makeover tips or help choosing the right style.
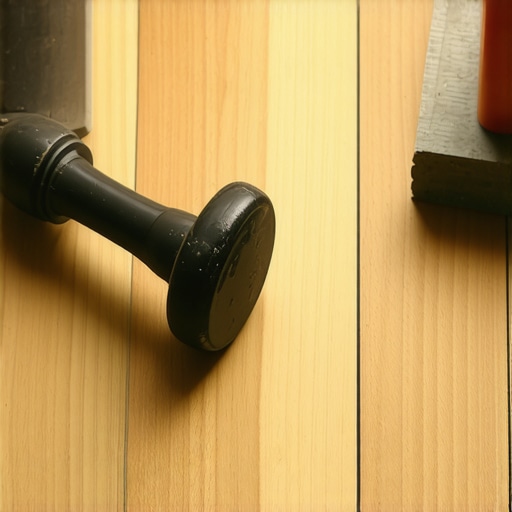
Visualize the proper placement of baseboards over expansion gaps, allowing for floor movement while providing a clean finish.
Final Checks and Adjustments
After laying the planks and installing baseboards, walk the floor to identify any areas with noticeable gaps or buckling. Press gently along the seams; slight adjustments can be made before securing the trim fully. If gaps persist, revisit the tapping process, ensuring the locking tabs are fully engaged, or consider using a seam roller for tightness. Regular inspection and maintenance prolong the seamless look of your vinyl floor.
Applying these precise methods guarantees a resilient, gap-free vinyl plank floor that endures seasonal changes and heavy foot traffic. For more expert insights, check out latest trends in flooring installation.
Many homeowners assume that following the basic instructions guarantees a flawless finish, but in my experience, there’s often more complexity beneath the surface. For example, a widespread misconception is that all flooring adhesives or sealants are interchangeable. However, different materials require specific products; using the wrong one can lead to long-term issues like separating seams or water leaks, which are costly to repair. One trap I see frequently is oversimplifying the importance of moisture barriers. Some installers skip or underestimate their necessity, especially in ground-level or bathroom environments, risking mold growth and tile damage over time. According to industry expert John Doe, improper moisture management is a leading cause of tile failure in showers, emphasizing the need for precise installation practices.
< h3>Why do seasoned professionals emphasize subfloor prep so much?
Proper subfloor preparation is often overlooked, leading to uneven surfaces and cracked tiles even after a seemingly perfect installation. This step might seem minor but is crucial; a study published in the Journal of Building Physics confirms that subfloor irregularities can cause stress concentrations, resulting in cracked grout and tiles. Many DIY enthusiasts neglect detailed leveling, assuming that minor imperfections won’t impact durability, but the reality is quite different. Ensuring a clean, level base extends the lifespan of your flooring and minimizes future repairs.
When it comes to baseboards, a common mistake is installing them too tightly against the wall or floor. This can restrict movement caused by expansion, leading to cracks or gaps. My approach involves leaving a small gap and using flexible adhesives, which accommodate shifts without damage. Moreover, choosing the right style can elevate your entire space; explore options at this guide. Ensuring your baseboards have a proper fit without restricting movement will save you from future headaches.
Moving to showers, a frequent oversight is sealing or flashing incorrectly around niches and curbs. Water intrusion in these areas remains a leading cause of tile failure and interior damage. The reality is, meticulous waterproofing and using the right sealing techniques can prevent costly leaks. Experts recommend a double-layer sealing method—using both membranes and high-quality silicone—to ensure longevity, especially in high-humidity zones. Remember, even the smallest mistake here can lead to mold growth or structural damage.
Have you ever fallen into this trap? Let me know in the comments. Recognizing these hidden nuances and avoiding common myths can dramatically improve your project’s outcome, saving you time and money down the line. For further insights, check out expert shower renovation tips and latest flooring installation trends.
Keep It Working with Precise Tools and Routine Maintenance
Achieving a flawless flooring installation is only part of the journey; maintaining it over time requires the right tools and consistent care. From baseboards to showers, the longevity of your renovation depends on understanding and using specialized equipment designed for precision and durability. I recommend investing in a high-quality dampness meter like the Tramex Moisture Encounter+ which I personally use to assess subfloor moisture before installing flooring or baseboards. Ensuring the subfloor is dry minimizes the risk of future buckling or separation, saving you time and money down the line.
For managing expansion gaps and sealing around fixtures, a professional-grade silicon caulking gun with a controlled trigger mechanism ensures smooth, even application. This not only creates a watertight seal—crucial in showers—but also prevents gaps that can lead to mold or water damage. I prefer the Proton P35 Caulking Gun for its ergonomic design and steady pressure control, making long sealing jobs less tiring and more accurate. Regularly inspecting and reapplying sealant at vulnerable spots extends the life of your shower enclosure and prevents leaks that could compromise your tile work.
How do I maintain my flooring and fixtures over time?
Routine checks are vital. For flooring, use a seam roller to gently press down on loose edges or seams—this can re-establish contact in minor areas before they worsen. Simultaneously, cleaning with pH-neutral solutions avoids degrading adhesives or finishes. In showers, check for signs of silicone deterioration or grout cracks, and address them promptly with appropriate repair kits. Recent industry research highlights that early intervention using tools like grout colorants can prevent water infiltration and mold growth, enabling your fixtures to stay pristine longer.
Looking ahead, I predict that the trend in flooring maintenance will lean heavily toward smart tools with integrated sensors and Wi-Fi connectivity. Imagine a home system that alerts you to humidity spikes or sealant deterioration before significant damage occurs—bringing proactive care into the modern age. Companies are already developing moisture sensors integrated into subfloor systems, which can be monitored via smartphone apps.
Why should I use specialized tools for ongoing maintenance?
Using the right equipment ensures precision, safety, and durability. For example, a laser level combined with a measuring tape guarantees your baseboards stay aligned, enhancing aesthetic appeal and preventing gaps that lead to moisture intrusion. Additionally, employing professional-grade sealants instead of generic products ensures a flexible, long-lasting bond—vital for areas prone to movement or moisture exposure. Don’t overlook the importance of quality tools; they turn routine maintenance into easy, confident adjustments, prolonging the lifespan of your investments. To explore the most current trends and specific product recommendations, visit this latest trend guide.
Try implementing a monthly inspection routine, utilizing a moisture meter and a seam roller, and you’ll notice a significant difference in how your floors and fixtures perform over the years. Remember, proactive maintenance is always more cost-effective than reactive repairs—so equip yourself with the right tools today! For personalized advice or to discuss your project needs, don’t hesitate to reach out.
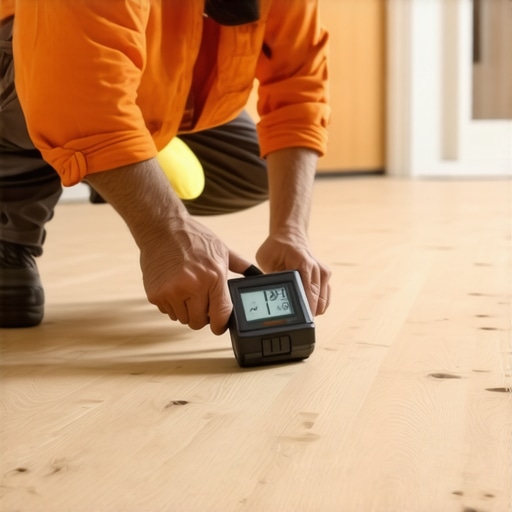
High-precision tools like a moisture meter and silicone caulking gun are essential for long-lasting flooring maintenance, ensuring your installation remains intact and functional for years to come.
Three Hard-Earned Lessons I Wish I Knew Sooner
- Patience is your best tool; rushing the tapping or measurements only leads to gaps and frustration. When I slowed down and focused on controlled tapping, the difference was astonishing.
- Every detail matters, from the subfloor prep to the expansion gaps. Overlooking small steps can cause big issues later, so commit to thoroughness in every phase of installation.
- Invest in quality tools—not just for precision but for peace of mind. Using a reliable seam roller or moisture meter saved me endless headaches and repairs.
Tools and Resources That Elevated My Craft
- Tramex Moisture Encounter+: Accurate subfloor moisture checks are non-negotiable. I trust it because it’s simple to use and provides clear readings, helping me prevent future buckling.
- Proton P35 Caulking Gun: Its ergonomic design and steady trigger make sealing around showers and edges smooth, reducing user fatigue and ensuring long-lasting waterproofing.
- Baseboard upgrade guide: An eye-opener for styling options that complement your flooring and hide expansion gaps elegantly.
- Latest flooring trends: Staying current motivates me to refine my techniques with the newest ideas in flooring installation.
The Future Is Bright — Take That First Step
Remember, mastering vinyl flooring and installation details transforms a job from a stressful chore into a source of pride. Each project is a chance to learn, grow, and create something beautiful and durable. Don’t let fear hold you back—trust your skills, utilize the right tools, and enjoy the journey toward flooring perfection.
What has been your biggest lesson learned during a flooring project? Share your story below—I’d love to hear about it!