

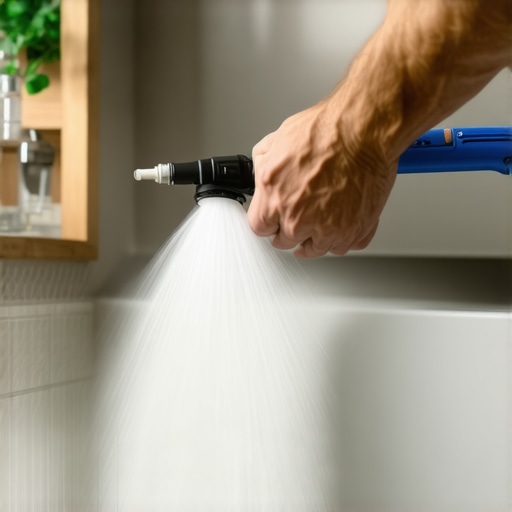
Ever sprayed water into your shower without a second thought, only to find a tiny trickle of water escaping through the niche and causing moldy, stained walls? I’ve been there. One weekend during a bathroom remodel, I squeezed into a tight corner, thinking I had sealed everything perfectly—only to wake up the next day to a damp, musty surprise. That frustrating lightbulb moment taught me something: sealing a shower niche isn’t just about slapping on some grout or silicone. There’s a critical step most pros routinely skip—and it’s the reason your shower leaks might be a ticking time bomb.
Why Your Shower Niche Keeps Leaking Despite the Seal
When I first started remodeling bathrooms, I thought sealing with the standard silicone was enough. Turns out, it’s not. A poorly sealed niche can let water seep behind tiles, into the wall cavity, and wreak havoc over time. The key is understanding how water actually travels and where the common failure points are. Most professionals overlook the importance of creating a dedicated water barrier or using the right sealing approach that prevents water from ever reaching the wall’s vulnerable spots. According to industry experts, improper sealing is among the leading causes of shower leaks, leading to costly repairs and potential mold issues (source: https://tilecraftsmens.com/shower-repairs-when-to-fix-vs-replace-for-longevity).
Have you ever experienced a shower leak that kept cropping up even after “professional” repairs? If so, you’re not alone. And you’re probably missing a simple, often-overlooked step—one that can make the difference between a dry bathroom and a mold farm.
Now, let’s get into the secrets of sealing your shower niche properly, so you can avoid soggy walls and keep your bathroom fresh and healthy. But first, I want to address a common doubt many folks have—
Is adding extra sealant really worth the fuss, or is it just overkill?
**Stay tuned, because I’ll share exactly what I did wrong early in my career and how a simple tweak made all the difference. Trust me, this crucial step is easier than you think, and it can save you a lot of headaches down the line.
Prepare the Area Thoroughly
Start by removing any old sealant or grout from the niche and surrounding tiles using a utility knife or grout remover. Clean the surfaces with a stiff brush and a mix of rubbing alcohol and water to eliminate soap scum, dirt, and mold spores. Ensuring a spotless, dry surface is essential for the sealant to adhere properly. Remember, a messy prep work leads to leaks later, so pay attention to every corner and joint.
Apply a Waterproof Membrane
Think of this step as creating a plastic wrap inside your wall. Use a liquid waterproof membrane or a peel-and-stick membrane designed for showers. If you opt for liquid, apply it with a brush in thin, even coats, covering all edges and corners of the niche, especially where water tends to seep through. For better protection, consider applying a second coat after the first dries. This added layer ensures water won’t penetrate behind the tiles, acting like a shield that water can’t breach.
Use Proper Taping Techniques
Apply a layer of waterproof tape over the membrane seams to reinforce the barrier. Overlap the tape at least 2 inches on each side of the joints, pressing firmly to eliminate air pockets. This step is akin to sealing the seams of a waterproof jacket, preventing water from slipping through tiny gaps. Don’t skip this detail—it’s where many DIYers falter, leading to future leaks.
Seal with Quality Silicone, Not Just Caulk
Choose a high-quality, 100% silicone sealant labeled for bathroom use. Carefully apply it along all edges, corners, and where the niche meets the tile. Use a caulking gun and steady pressure for a smooth, continuous bead. After applying, smooth the sealant with a damp finger or a caulk finishing tool to press it into the joints and remove excess. Think of this as giving your bathroom a strong, flexible bandaid, ensuring no water spots escape.
Let It Cure Properly
Patience is crucial. Allow the sealant and membrane to cure fully, usually 24-48 hours, before exposing the niche to water. During this period, avoid any contact or moisture that can compromise your work. Rushing this step is like rushing a glue job—you risk everything coming apart later.
Test the Seal
Once cured, perform a simple leak test. Cover the drain temporarily with a small cap or plastic, then pour a few inches of water into the niche. Wait 15-20 minutes to spot any signs of seepage. If water remains, your sealing job is successful. If you notice leaks, inspect for missed spots or gaps and reapply immediately, turning a small fix into a long-term solution.
Remember Your Hidden Layers
Many skip the waterproof membrane or skimp on sealing, leading to persistent leaks. Incorporate these steps into your project, and you’re less likely to face mold, stained walls, or costly repairs. A well-sealed niche is like building a moat around your castle—water stays out, and your bathroom stays dry and safe.
Many homeowners and DIY enthusiasts fall into common traps when installing flooring, showers, or baseboards, assuming they know the basics but missing nuanced details that can make or break the job. One widespread misconception is relying solely on surface-level sealing or adhesion techniques without understanding the importance of substrate preparation and environmental considerations. For instance, applying grout or sealant over a poorly prepared surface often leads to premature failures, as moisture seeps behind tiles or baseboards, causing mold and damage over time. Experts stress that proper underlayment, vapor barriers, and moisture control layers are critical, yet frequently overlooked by amateurs who focus only on the visible finish.
Why do some shower leaks persist even after sealing?
Research indicates that failure often stems from neglecting the waterproofing principles beneath the tile assembly, such as missing or improperly installed membranes and flashing. According to industry studies, approximately 75% of shower leaks are due to failed waterproofing layers rather than grout or sealant deficiencies (source: https://tilecraftsmens.com/shower-repairs-when-to-fix-vs-replace-for-longevity).
Another advanced mistake involves underestimating the impact of subfloor and wall movement. For example, baseboards installed without accounting for seasonal expansion and contraction can develop gaps or crack over time. This is particularly prevalent in regions with significant temperature variation, where wood and drywall expand or contract. Professionals recommend leaving expansion gaps or using flexible adhesives to accommodate movement.
How can improper transition between flooring types cause long-term issues?
This is a nuanced challenge—many overlook the importance of correctly detailing transitions, such as between tile and hardwood or carpet and vinyl. Improper transitions can lead to uneven surfaces, tripping hazards, or gaps that allow moisture ingress. Using specialized transition strips and shifting the flooring installation slightly beyond the wall or baseboard edge often results in more durable, aesthetically pleasing outcomes. For a closer look at the latest baseboard styles that complement high-quality flooring, check out this guide on baseboard styles that elevate your interior.
Paying attention to these advanced nuances means embracing a holistic view instead of piecemeal fixes. A comprehensive approach, combining proper substrate prep, moisture management, and strategic detailing, significantly extends the lifespan of your installations. Have you ever fallen into this trap? Let me know in the comments, and share your experiences!
Tools That Make Maintenance a Breeze
To ensure your renovations stand the test of time, investing in the right tools is crucial. For flooring, I rely on a high-torque oscillating multi-tool equipped with a grout removal blade. This allows me to carefully replace or refresh sealants without damaging surrounding materials, following proven methods outlined in this detailed flooring guide. For baseboard upkeep, a soft-bristled brush and a microfiber cloth are essential for regular dusting, preventing buildup that can compromise adhesion and appearance over time.
When it comes to maintaining showers, a handheld steam cleaner is my go-to. It effectively dislodges mold spores and soap scum in hard-to-reach corners, and using it periodically helps prevent mold proliferation—something often overlooked by DIYers. Supplement this with a quality silicone sealant remover, which simplifies re-sealing joints when wear becomes evident. Regular inspection and early intervention save major repairs later, echoing recommendations in this expert article.
Software and Documentation Tools for Planning and Tracking
In the digital age, I utilize project management software like Trello or Asana to track maintenance schedules, warranties, and upcoming upgrades. For example, setting reminders for re-sealing the shower niche or re-coating hardwood floors is a game-changer. Additionally, keeping detailed records of product warranties and installation dates helps identify when preventive measures are due, greatly reducing unexpected failures. These practices are supported by industry standards, such as those discussed in this comprehensive guide.
How do I keep my floors, showers, and baseboards in top shape over the years?
The secret lies in routine inspections and proactive maintenance. Regularly check for signs of wear, such as loose tiles, cracked grout, or gaps in baseboards, and address these issues before they escalate. Implementing a scheduled cleaning regimen, combined with the strategic use of specialized tools like silicone sealant removers and steam cleaners, helps extend the lifespan of your installations. For instance, a quick seasonal check of your shower’s waterproofing can prevent costly water damage. Don’t forget to document your maintenance efforts—this record-keeping makes troubleshooting and future upgrades much smoother, ensuring your home stays beautiful and functional for years to come.
In terms of future trends, I predict smart maintenance systems—like IoT-enabled moisture sensors—that will alert homeowners to leaks or humidity issues early on, much like advanced home security devices. Embracing these innovations can revolutionize how we care for our homes, making long-term upkeep more manageable and efficient.
< >
>
Over the years, I’ve learned that the tiniest oversight during installation can turn a beautiful renovation into an ongoing headache. The most memorable lesson was realizing that sealing a shower niche isn’t just about slapping on silicone; it’s about creating a system that works with your home’s moisture dynamics. This revelation transformed my approach, emphasizing the importance of properly layered waterproofing and meticulous prep work, which has saved me countless repairs. Remember, attention to these details pays off in long-term durability and peace of mind, especially when tackling complex areas like shower niches and floor transitions.
Unlocking Secrets That Pros Keep Hidden
- Triple-layer the moisture barrier—a single membrane isn’t enough, especially in high-traffic shower areas; layering creates a failsafe shield against leaks.
- Mind the movement joints—allowing for seasonal expansion prevents cracks and gaps in your sealing, which are often overlooked by DIYers.
- Use flexible sealants and sealant beads—rigid materials crack under stress, but good quality silicone keeps everything intact and water-tight.
- Don’t skip the test phase—performing a thorough water test after curing reveals tiny leaks before they become costly issues, and it’s simpler than most think.
- Seal transitions with care—transition strips and properly sealed edges prevent water migration, especially between different flooring materials or around niches.
My Toolbox for Success
- A high-quality waterproof membrane—trust in proven products has made my projects more resilient and easier to troubleshoot.
- A reliable silicone caulking gun—precision and ease of application accelerate the sealing process and ensure a professional appearance.
- Leak detection dye—detects invisible leaks early, saving you from extensive damage and repairs later.
- A moisture meter—helps verify dryness of substrates before sealing, ensuring optimal adhesion and durability.
- Proper tools for surface prep—a stiff brush, scraper, and alcohol wipes prepare your surfaces for flawless sealing and bonding.
Your Next Steps in Home Mastery
Building knowledge is the first step, but applying it transforms your home. Routine inspections, early repairs, and continuous learning about new products and techniques keep your installations leak-free and beautiful over time. Embrace the process—your bathroom, floors, and walls will thank you for years to come. From sealing niches to perfecting transitions, every detail contributes to a healthier, more functional space. And as technology advances, keep an eye on innovative solutions like smart moisture sensors, which can take proactive maintenance to the next level.
Insights from My Journey — Hard Lessons and Evolving Wisdom
- Patience beats haste: rushing curing or testing can cause overlooked leaks—taking extra time saves future frustration.
- Overconfidence can be costly: assuming silicone alone suffices often leads to failure; layering and preparation are key.
- Discipline is crucial: consistently performing maintenance like re-sealing and inspections prolongs the lifespan of your installations.
- Small investments yield big returns: investing in quality tools and materials saves money and stress in the long run, especially when sealing tricky areas like niches and transitions.
- Personalization matters: adapting techniques to your space—considering wall material, layout, and environmental conditions—makes every project uniquely successful.
Tools That Elevate Your Craft
- A high-quality silicone sealant—ensures flexibility and longevity in moisture-prone areas.
- A professional-grade caulking gun—delivers smooth, continuous beads that look neat and perform well.
- A moisture meter—detects embedded moisture that might undermine your sealing efforts.
- A good-quality waterproof membrane—the backbone of long-lasting waterproofing in showers and niches.
- A flexible spatula and sealant finishing tools—help achieve a professional, neat finish every time.
Keep Moving Forward, One Seal at a Time
Every project presents an opportunity to learn and improve. The key is to approach each sealing task with patience, meticulousness, and genuine curiosity. Your efforts today build a resilient, leak-proof home tomorrow. Remember, even the tiniest detail—like a correctly sealed niche or a well-placed transition strip—can make the difference between a durable finish and a recurring problem. So, get comfortable with your tools, stay informed about new techniques, and don’t hesitate to revisit and reinforce your work periodically. Your home’s longevity and your peace of mind are worth every extra step.
What’s Your Next Big Project? Let’s Talk About It
Have you ever struggled with sealing tricky niches or transitions? Share your experiences below and let’s exchange tips to help each other craft homes that stand the test of time. Your journey to a leak-free, beautiful space starts now—what will you tackle next?