

It was a typical Sunday afternoon, and I was fresh out of a shower when I noticed something unsettling—tiny cracks had started to appear along the grout lines at the bathroom floor. At first, I brushed it off as minor wear, but as days went by, those cracks multiplied, and water began seeping into areas I hadn’t expected. That moment sparked a lightbulb—cracked grout isn’t just a cosmetic issue; it’s a warning sign of underlying problems that can lead to costly repairs if ignored.
Understanding the Root Causes of Shower Floor Grout Cracks
Have you ever wondered why shower grout tends to crack, especially at the floor? It’s more common than most homeowners realize, and the reasons are often tied to installation flaws, structural shifts, or aging materials. Early on, I made the mistake of neglecting proper sealing and ignoring tiny hairline cracks—something you definitely want to avoid. Because when grout cracks, it creates a pathway for water to seep behind tiles, risking mold, rot, and even foundational damage. The key to preventing this is knowing what causes these cracks in the first place and how a flexible seal can serve as a reliable fix instead of an endless cycle of repairs.
Is the Fix Worth It or Just Temporary?|
Many skeptics fear that applying a flexible seal is just a band-aid, not a real solution. I used to think the same until I learned that a properly applied seal can actually accommodate the natural movement of your substrate and prevent further cracking. A common mistake I made was choosing the wrong type of sealant—some products lose their elasticity over time or aren’t suitable for wet areas. For the most durable fix, it’s crucial to select a high-quality, waterproof, and flexible sealant designed specifically for shower environments. Don’t forget, even the best sealant can’t fix underlying structural issues; addressing those is part of a comprehensive approach, which I’ll share in upcoming sections.
Prepare Your Workspace for Effective Repair
Begin by removing any loose grout around the cracks using a grout saw or a utility knife. Wear safety glasses and a dust mask to protect yourself from debris. Vacuum the area thoroughly to eliminate dust and loose particles, ensuring a clean surface for the new grout to adhere properly. For stubborn debris or residual grout, wipe down the area with a damp cloth and let it dry completely. This initial step is crucial to prevent future cracking caused by debris accumulation or poor adhesion. When I repaired my own shower, I discovered that a meticulous cleaning process significantly extended the lifespan of the repair, saving me from repeated fixes later.
Apply a High-Quality, Flexible Sealant
Choose a waterproof, flexible silicone-based sealant designed specifically for showers. Carefully squeeze the sealant into the cracks, ensuring they are fully filled without overflowing onto surrounding tiles. Use a caulking tool or your finger dipped in soapy water to smooth the sealant and press it into the cracks, creating a uniform surface. This flexibility allows the sealant to accommodate movement and prevent new cracks from forming. Remember, a good-quality sealant applied correctly acts as a dynamic barrier that adapts over time, much like a resilient skin that grows with your shower. I once sealed a crack with a poor sealant, only to find it deteriorate in six months—highlighting the importance of selecting the right product.
Re-grout for a Long-Lasting Finish
Mix a batch of high-quality, waterproof grout suitable for shower floors, following the manufacturer’s instructions. Use a rubber float to press the grout into the cleaned and sealed cracks, ensuring complete coverage. Wipe away excess grout with a damp sponge before it hardens, maintaining a smooth surface. Allow the grout to cure as recommended—usually 24 to 48 hours—then apply a grout sealer to protect against moisture and stains. Proper grout sealing is vital; it acts like a protective shield, keeping water out and preventing future cracking or mold buildup. When I re-grouted my shower, I paid close attention to sealing every joint, which made my bathroom look brand new and prevented recurring issues.
Consider Reinforcing Underlying Structures
If cracks persist despite sealing and grouting, investigate structural factors such as shifting subfloor or unstable tiles. Remove the affected tiles carefully to inspect beneath; if the substrate shows signs of movement or damage, repair or reinforce it before retiling. Applying a flexible membrane or unbonded mud bed can absorb future movement and prevent cracks from returning. Think of your shower floor as a house built on shifting soil—without foundation stabilization, cracks will continue to appear. I learned this lesson the hard way when my initial repair failed because I overlooked underlying structural issues. Taking the time to reinforce the foundation ensures a durable, long-term fix that withstands daily use and moisture exposure. For comprehensive insights on proper floor reinforcement techniques, visit [this detailed flooring installation guide](https://tilecraftsmens.com/step-by-step-flooring-installation-from-planning-to-perfect-finish).Many homeowners assume that proper installation techniques are straightforward, but often, misconceptions lead to costly mistakes. For example, a prevalent myth is that sealing grout is a one-time fix; in reality, neglecting the subtle movement behind tiles can cause cracks to reappear even after sealing. Additionally, many think that choosing the cheapest materials guarantees savings, but inferior products tend to deteriorate faster, leading to more expenses down the line.
Is Your Choice of Materials Sabotaging Your Home’s Longevity?|
One advanced mistake is overlooking the compatibility of different materials. For instance, using standard grout in high-moisture areas without considering its permeability results in moisture ingress and mold growth. Experts recommend selecting waterproof, flexible grouts and sealants tailored for their environments. According to a study from the National Association of Home Builders, material compatibility accounts for nearly 30% of tile failure cases, emphasizing the importance of informed choices during installation.<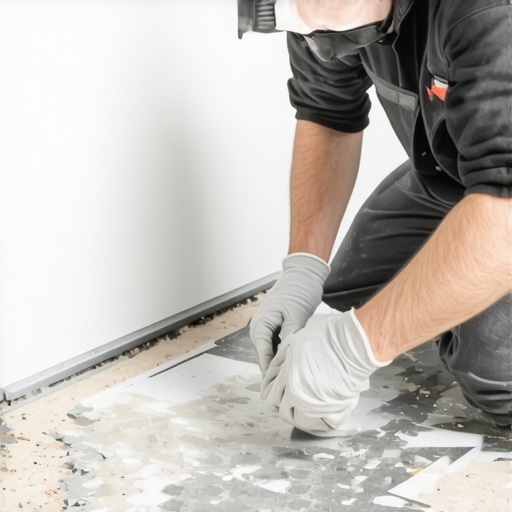 >Beyond materials, understanding the nuances of expansion and contraction is crucial. Many assume that once installed, floors and baseboards are static; however, temperature fluctuations cause these components to expand and contract. Without allowance for this movement—like using flexible caulks or expansion joints—cracks and gaps emerge over time. A common pitfall is sealing these joints rigidly, which traps movement and accelerates damage. To prevent this, professional installers often recommend incorporating movement gaps or using adaptable sealants, a practice supported by flooring specialists who highlight its role in extending the lifespan of your interior finishes.
Another nuance involves the techniques used in corner transitions and inside cuts. For example, mitering baseboards without proper back-beveling can create gaps that are impossible to conceal with paint or caulk. Learning the subtle tricks, like the back-beveling method, makes a visible difference, especially in intricate areas. For more on these expert tips, check out their comprehensive guide on selecting the perfect baseboards for your home.
Finally, realizing that even minor oversights, such as neglecting moisture barriers beneath flooring, can lead to significant problems is vital. For instance, failing to install a proper moisture barrier when laying vinyl or laminate flooring can cause warping and mold issues later. Experts stress the importance of meticulous prep work, as detailed in their guide to durable flooring.
Have you ever fallen into this trap? Let me know in the comments.Maintaining the beauty and integrity of your home’s finishes requires more than just the initial installation; it demands the right tools and a strategic approach to ongoing upkeep. When it comes to shower enclosures, baseboards, carpets, and flooring, having dedicated equipment can save you time, money, and headaches in the long run.
One of my go-to investments is a high-quality handheld multi-tool like the Dremel Multi-Max. Its versatility allows me to remove old caulk, scrape off damaged paint, or clean grout lines with precision. I personally prefer models with variable speed settings because delicate tasks—like re-sealing grout—benefit from a gentle touch. Using the right attachments, such as a carbide grout removal blade, helps me efficiently prepare surfaces without damaging adjacent materials.
For deep cleaning and maintenance, a steam cleaner proves invaluable. I rely on a Kärcher SC3 for its ability to effortlessly eliminate mold, soap scum, and dust from tiles, baseboards, and carpets. Steam penetrates crevices better than traditional cleaning agents, reducing reliance on harsh chemicals. Regular steam cleaning, especially in moisture-prone areas like bathrooms, can significantly extend the lifespan of your finishes.
Surface inspection tools like a moisture meter are essential to prevent hidden issues from escalating. I use a Digital Pinless Moisture Meter to monitor wall interiors and subfloor conditions. This helps me catch early signs of water intrusion or mold growth, enabling prompt intervention before things get expensive. Incorporating such diagnostics into your routine ensures ongoing structural health, particularly after repairs or renovations.
For flooring, especially carpets, I recommend a power stretcher like the Roberts 10-94 Push ‘N’ Pull. It ensures your carpet remains wrinkle-free and prolongs its aesthetic appeal. I use this tool for regular re-stretching—typically every 12 to 18 months—after installation, which keeps wrinkles and buckles at bay.
Looking ahead, the trend is shifting toward smarter, connected maintenance tools. Devices equipped with Bluetooth or Wi-Fi, such as digital leak detectors, can alert you immediately to water issues, preventing extensive damage. As these technologies become more affordable, integrating them into your maintenance routine will be a game-changer.
**How do I keep my finishes looking sharp over time?** A proactive maintenance schedule paired with the right equipment is key. Regular inspections, combined with tools like moisture meters and steam cleaners, help catch small issues before they turn into costly repairs. For example, monitoring moisture behind tiles with a digital moisture meter allows for early detection of leaks—a crucial step, as emphasized by expert waterproofing guides (see reference: [this technical waterproofing manual](https://www.certainteed.com/resources/Waterproofing.pdf)).
I encourage you to try using a moisture meter during your next maintenance session. It’s a simple step that can save you significant expense and preserve your home’s value. Remember, investing in quality tools tailored to your needs makes all the difference in achieving lasting results and enjoying your home’s beauty for years to come.When I first noticed those tiny cracks in my shower grout, I quickly realized that ignoring such issues can lead to serious problems down the line. Over the years, I’ve learned that understanding the root causes and applying the right techniques transforms a daunting repair into an opportunity to extend my home’s beauty and durability. In this journey, I discovered that high-quality, flexible sealants and meticulous surface preparation are game-changers—saving time and money. Moreover, investing in proper reinforcement beneath your tiles not only prevents future cracks but also provides peace of mind knowing your bathroom is resilient against daily wear and moisture. Remember, lasting results come from patience, knowledge, and the right tools—like a moisture meter or steam cleaner—that empower you to catch problems early and maintain your home’s integrity. The lessons learned from my own experiences have shown me that small tweaks and informed choices now can preserve the elegance of your finishes for years to come, turning DIY into a rewarding craft.