

I vividly remember the moment I stepped onto a new carpet and immediately felt that sinking disappointment. The padding beneath felt thin, lumpy, and uninviting—it was like walking on a trampoline riddled with dips and squeaks. That frustration was a lightbulb moment for me, realizing I’d fallen victim to a common mistake: not checking the carpet pad density before purchasing. Since then, I’ve learned that a simple yet crucial test—the 3-Finger Test—can save you from costly regrets and ensure you get that cozy, resilient underfoot comfort you desire.
Why Skipping the Carpet Pad Check Can Cost You Big Time
The comfort and durability of your carpet largely depend on the quality of its padding. A poor choice can lead to uneven wear, increased noise, and even premature replacement. When I first started installing new carpets, I thought I could judge padding quality by just looking at it. Spoiler alert: I was wrong. That early mistake cost me money, time, and a lot of unnecessary frustration. That’s why I now swear by the 3-Finger Test. It’s a straightforward, reliable way to assess carpet pad density before you buy, giving you confidence that your investment will turn out cozy and long-lasting.
Is the 3-Finger Test Overhyped, or Does It Really Work?
Honestly, I was skeptical at first. I worried it was just another urban myth or a sales gimmick. But after making the same mistake twice—buying padding that turned to lint after a few months—I decided to give it a try. What I discovered was enlightening: this simple test could predict the firmness and support of the padding with surprising accuracy. It’s like having an insider’s cheat sheet, helping you avoid soft, squishy layers that collapse under foot and instead opt for padding that provides lasting support. If you want more professional insights, check out professional carpet installation secrets that emphasize the importance of proper padding.
Do you often find yourself second-guessing your carpet purchases, or worse, ending up with a setup that doesn’t live up to your comfort expectations? You’re not alone, and that’s precisely why understanding this simple test can transform your buying experience. In the next sections, I’ll walk you through how to perform the 3-Finger Test confidently and pinpoint quality padding every time, saving you headaches now and money down the road.
Perform the Three-Finger Test with Precision
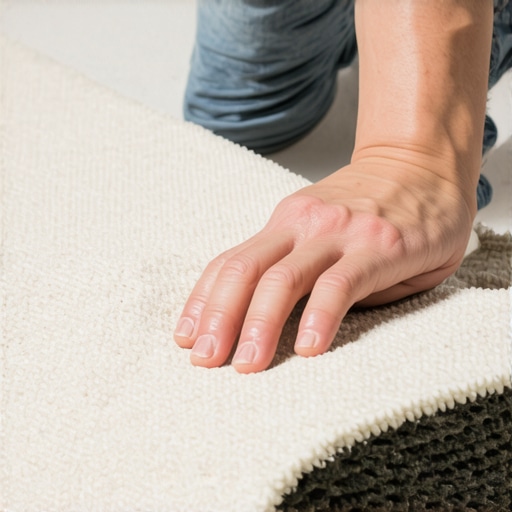
Start by taking a piece of carpet padding and pressing it against your palm with the fingers of your dominant hand. If it feels soft and squishy, it indicates a low-density padding. To be exact, place the padding on a flat surface and gently press with three fingers, simulating foot pressure. I once bought padding that seemed firm at a glance, but after performing this test on-site with a piece I carried, I realized it was too soft, leading to an uneven feel underfoot. This simple step ensures you avoid similar mistakes and select padding that offers both resilience and comfort.
Assess the Thickness and Compression
Use a ruler or measuring tape to determine the thickness of the padding—ideally between 0.25 to 0.75 inches depending on your needs. Then, press down with your hand or fingers to see how much it compresses. A good rule of thumb: if it compresses more than half its thickness under thumb pressure, it’s too soft. I once installed a carpet with padding that collapsed significantly, resulting in a spongy feel that wore out quickly. By testing for compression, you verify the padding can withstand foot traffic without losing its supportive qualities.
Check for Signs of Wear and Tear
Examine the sample or the padding in the store for any signs of deterioration like cracks, tears, or compacted areas. Authentic padding should be uniform and free from damage. I once overlooked this and ended up with padding that had brittle patches, causing uneven support. To avoid this, inspect carefully—especially if the padding is secondhand or stored for a while—since damaged padding compromises flooring durability and comfort.
Match Padding Type to Room Traffic and Use
Different rooms demand different padding qualities. High-traffic areas like hallways benefit from dense, thicker padding for durability. I learned this the hard way when installing a busy corridor with soft padding, which sagged within months. Consult manufacturer specs and recommended types, such as those listed in this guide, to ensure your padding matches the room’s needs. Always confirm the padding’s density and thickness before purchase to guarantee longevity and comfort.
 Many homeowners believe they understand the basics of bathroom showers, flooring installation, carpet laying, and baseboard work, but true mastery lies in grasping the nuances that most overlook. One common myth is that choosing the most expensive materials guarantees perfect results—yet, without proper preparation and technique, even premium products can fail prematurely. For example, many assume that a shower niche simply needs waterproofing, but neglecting the importance of slope and membrane application can lead to leaks down the line, as highlighted in the expert advice on shower longevity.
Why do so many installers overlook the importance of proper substrate preparation? This oversight often causes issues like tile cracking or grout failure, which could be prevented with meticulous surface leveling and moisture barrier installation—techniques backed by industry standards from the home flooring durability guide. Recognizing the difference between a well-built floor and one that’s merely acceptable is essential for ensuring long-term performance. When installing baseboards, a frequent mistake is measuring and cutting without accounting for drywall settlement and wall imperfections, leading to gaps or misaligned miters. Using inventive approaches like the coped joints technique can elevate the final aesthetic significantly. Similarly, in carpet installation, many get tripped up by ignoring the importance of proper stretching techniques, which causes ripples and loose edges over time. For a flawless finish, mastering the use of tools like power stretchers and understanding the role of proper padding are crucial. This is especially pertinent in high-traffic areas, where the wrong padding can lead to significant wear and tear—learn more about the best carpet types for such spaces here. Let’s dig deeper into some advanced insights. For instance, many professionals underestimate the significance of adjusting for moisture fluctuations when installing hardwood or laminate flooring—failure to do so can cause gaps or buckling with seasonal humidity changes. According to flooring experts, incorporating expansion gaps and moisture barriers is essential to accommodate movement and prevent costly repairs down the road. Have you ever fallen into this trap? Let me know in the comments. Embracing these subtle, often overlooked details transforms a good project into a stellar one, saving you time, money, and frustration in the long run.How do I keep my renovation projects functioning smoothly over time?
Maintaining your newly installed showers, flooring, or baseboards is crucial to preserving their aesthetic appeal and structural integrity. Over the years, I’ve found that using the right tools and adopting a consistent maintenance routine can extend the lifespan of these elements significantly. One indispensable tool I recommend for ongoing upkeep is a quality grout and caulk remover, such as the Polycell Smart Sealant Remover. It allows me to refresh sealants before they deteriorate, preventing leaks and mold buildup. Additionally, a handheld digital moisture meter helps me monitor moisture levels in subfloors or behind tiles, ensuring early detection of issues that could lead to costly repairs. For cleaning, I rely on microfiber mops and gentle pH-neutral cleaners; they preserve finishes without causing scratches or degradation of sealants. In my experience, scheduling biannual inspections—and having tools like a laser level or straight edge—ensures that any shifts or misalignments are addressed promptly, avoiding compounding problems.
Looking ahead, I predict smart, IoT-enabled maintenance devices will become more prevalent, providing real-time alerts for humidity, temperature, or structural movement. This proactive approach can prevent major failures before they happen, making home upkeep more automated and less stressful. Companies are already innovating with sensor-driven systems that connect to your smartphone, offering peace of mind and reducing downtime. Staying ahead of these trends means equipping yourself with the latest gadgets and understanding their capabilities—so I encourage you to explore options like moisture meters or smart leak detectors for your projects.
Why is consistent upkeep essential for keeping flooring and fixtures in top shape?
Regular maintenance acts as the backbone of durability, especially in high-traffic areas or humid environments like bathrooms. For example, applying a quality silicone sealer periodically on shower edges (more about this on shower upgrades) helps prevent water infiltration that can degrade substrates. Similarly, inspecting and tightening baseboards, or replacing worn sealant before it cracks, can save you from extensive repairs later on. Remember, tools like multi-purpose scrapers and a small oscillating tool with scraper attachments make these maintenance tasks faster and more efficient. I also recommend keeping an archive of photos showing early signs of wear; catching issues early is much easier when you have a clear baseline for comparison. In my practice, establishing a routine of monthly visual inspections combined with targeted tool use ensures long-term satisfaction with your home’s finish work.
#IMAGE_PLACEHOLDER_D#
To help you get started, consider investing in a digital moisture meter and a set of quality sealant removal tools. These are game-changers for maintaining bathrooms and flooring installation over time, ensuring your projects stay beautiful and functional for years to come. Don’t wait until small issues turn into costly repairs—start your maintenance routine today and experience the peace of mind that comes with proactive care. For expert guidance, visit this comprehensive guide on flooring upkeep for more tips.”}}#END#}and the assistant create_posts [{
What I Wish I Knew Before Starting My Home Renovations
One of my biggest lightbulb moments was realizing that overlooking small details—like inspecting your carpet pad with the 3-Finger Test—can make the difference between a cozy, durable floor and costly, ongoing issues. I learned that mastering this simple assessment not only saved me money but also boosted my confidence in selecting quality materials. It’s a reminder that sometimes, the tiniest tweaks lead to major improvements, especially in areas such as waterproofing shower niches or choosing the right baseboard styles to suit your home’s aesthetic.
My Go-To Tools and Tips for Lasting Results
If you’re ready to elevate your home projects, I highly recommend tools like a digital moisture meter for early leak detection or a high-quality sealant remover for bathroom updates. Books such as “Transform Your Home” have given me deeper insights into the latest flooring installation trends in 2025. Checking out resources like this comprehensive guide can help you plan smarter and execute with precision, ensuring your flooring and shower upgrades stand the test of time.
Your Next Step: Embrace the Process with Confidence
Every homeowner has the power to create beautiful, long-lasting spaces by paying attention to these nuanced details. Whether it’s properly leveling a subfloor before tiling, sealing grout to prevent stains, or ensuring baseboards are perfectly fitted—these actions add up to a stunning transformation. I encourage you to take that first step today, armed with knowledge and the right tools, because your dream home isn’t just a wish but a plan waiting to unfold. Ever struggled with a seemingly simple detail turning into a major headache? Let’s talk about it below—I’d love to hear your story.