

I’ll never forget the day I discovered a tiny leak in my shower pan. It was late at night, and I was excited to finally get that beautiful tile job done. But as I started the final inspection, a faint dampness on the subfloor sent a cold wave down my spine. The worst part? I hadn’t even tiled yet! That moment made me realize how crucial it is to catch leaks early, before the costly process of tiling begins.
Why Detecting Shower Pan Leaks Before Tiling Can Save You Big Bucks
Many DIY enthusiasts and even seasoned pros overlook the importance of testing for leaks before permanently setting those gorgeous tiles. A hidden leak can cause mold, structural damage, and the dreaded tile crackage—costing hundreds to thousands to fix later. Early detection, therefore, isn’t just a good idea; it’s a smart investment in your home’s integrity and your wallet. One simple yet effective method I stumbled upon is the soap-test trick, which I’ll walk you through shortly. Believe me, this technique has saved me from a lot of headaches, and I bet it will do the same for you.
Will the Soap-Test Trick Really Work? Here’s What I Learned
Initially, I was skeptical, just like everyone else. I thought, “How could soap possibly reveal a leak?” But after making a few early mistakes — like ignoring small signs of moisture and diving straight into tiling — I wished I had known about this trick sooner. It’s simple: you apply a soap solution around the edges of your shower pan and watch for bubbles or movement, which could indicate a leak. It’s a non-invasive, inexpensive method, and according to industry experts, early leak detection is vital to prevent more significant issues down the line (source). Now, you may be wondering if this test is truly reliable or just another DIY myth. Well, I’ll share my detailed experience and tips to make it as effective as possible.
As we dive deeper, I’ll explain how to perform the soap-test correctly and what signs to look out for. Trust me, catching a leak before tiling can mean the difference between a quick fix and a complete shower overhaul. So, before you start laying those beautiful tiles, let’s learn how to protect your project — and your budget — with this simple yet powerful trick.
Prepare Your Space for Leak Testing
Clear the shower area and remove any existing tiles or fixtures that might obstruct access. Ensure the subfloor and drain are dry; moisture can lead to false positives. Think of this step like preparing a canvas before painting—clean and dry surfaces give you the clearest results.
Apply a Thick Soap Solution
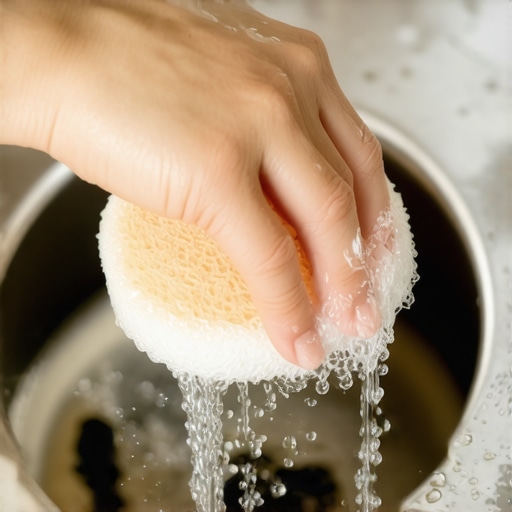
Mix a generous amount of liquid dish soap with water—about a quarter cup of soap per gallon of water—to create a sudsy mixture. Using a sponge or spray bottle, apply the solution evenly along the edges and seams of your shower pan, especially around the drain and corners. This creates a visual indicator for leaks, similar to how soap bubbles reveal small leaks in a boat’s hull.
Seal the Shower Door and Vents
Close all doors, curtains, and vents to prevent airflow that might disturb the soap bubbles. Think of this like sealing a jar—air drafts can cause false readings, so creating a controlled environment ensures accuracy.
Let It Sit and Observe
Allow the soap solution to sit undisturbed for about 15-20 minutes. During this time, watch closely for the appearance of bubbles, swirl patterns, or foaming that indicates water seepage. Remember, small movements can be subtle—use a flashlight for better visibility. I once applied this technique myself and noticed tiny bubbles forming at a seemingly dry seam; it turned out the drain was subtly leaking, saving me from tiling over a hidden problem.
Interpret the Results
If bubbles or movement appear, this suggests a leak in that area. Mark the spots with a piece of tape or a permanent marker for future repairs. No bubbles mean the area is likely watertight—but double-check after a few days, especially if the shower hasn’t been used.
Test Multiple Areas if Needed
If you suspect multiple leaks or want thorough verification, repeat the soap application process around other potential trouble spots like corners, seams, or the drain flange. Consider also inspecting the drain seal and caulking, as these are common leak sources. For critical repairs, reviewing detailed shower renovation tips can guide you through proper waterproofing techniques (additional reference).
Document and Address Identified Leaks
Take photos of bubbling spots or mark them clearly. For small leaks, re-sealing the drain or reapplying waterproofing membrane might suffice. Larger issues could require replacing the shower pan or consulting a professional. Catching these problems early can prevent costly damage and avoid tearing out tiles later—saving you both time and money.
Additional Tips for Accurate Testing
Perform the soap test during a dry period to avoid false positives caused by humidity or moisture from previous showers. Also, conduct the test soon after construction or waterproofing to ensure the integrity of your installation. Remember, patience and attention to detail here can make all the difference, as a little preventative step avoids a flood of future repairs.
 Many homeowners and even seasoned DIYers often fall prey to misconceptions about these critical finishing elements, leading to costly mistakes. One widespread myth is that using a uniform gap around baseboards ensures a perfect fit; in reality, walls are rarely perfectly straight, and ignoring this nuance can create gaps or uneven lines. Dive into the details at [baseboard styles that elevate your interior](https://tilecraftsmens.com/baseboard-styles-that-elevate-your-interior-design), where I discuss how choosing the right profile can compensate for imperfect walls and enhance visual harmony.
When it comes to flooring installation, a common mistake is neglecting to consider moisture fluctuations, especially with hardwood or engineered floors. Seasonal humidity shifts can cause gapping or buckling if expansion gaps aren’t properly maintained or if subfloors aren’t adequately prepared, as detailed in [flooring installation mistakes to avoid](https://tilecraftsmens.com/flooring-installation-mistakes-to-avoid-for-a-seamless-look). Preventing these issues requires a nuanced understanding of material behavior over time, beyond just following the basic DIY steps.
In carpet installation, many assume that stretching alone guarantees a flawless appearance. However, using improper tools or neglecting tack strip alignment can cause ripples or fraying. Scientific studies, such as those referenced in the [carpet installation secrets](https://tilecraftsmens.com/carpet-install-secrets-achieving-flawless-results-every-time), highlight that proper carpet stretching and seam seaming techniques are more nuanced than most think.
Showers might appear straightforward, but advanced errors—like incorrect slope or improper waterproofing—can lead to leaks down the line. A subtle but crucial aspect is ensuring the pre-slope and membrane layers are correctly installed, as outlined in [shower renovation tips](https://tilecraftsmens.com/transform-your-home-expert-flooring-installation-tips-for-2025). Overlooking these details isn’t just a rookie mistake; it’s an advanced trap that can cause persistent water issues.
Here’s a question for the more experienced among you: how does wall irregularity influence your installation process, and what methods do you use to compensate for it? For instance, some pros employ a technique called “field scribing” for baseboards—more details can be found [here](https://tilecraftsmens.com/how-to-choose-the-right-carpet-for-a-cozy-living-space). Recognizing these advanced nuances can elevate your work from average to professional-quality. Don’t forget: tiny details make huge differences. Have you ever fallen into this trap? Let me know in the comments.
Maintaining your home’s flooring, baseboards, and showers requires more than just occasional cleaning; it demands the right tools and a strategic approach to ensure longevity and flawless appearance. Over time, wear, moisture, and improper upkeep can diminish their appeal and functionality, so investing in specialized equipment and adopting proven methods is essential.
Invest in Quality Tools for Precision and Durability
When it comes to flooring installation and maintenance, I rely heavily on a premium laminate cutter and a high-quality tapping block. The laminate cutter, such as the Leuco Laminate Flooring Cutter, allows me to make clean, accurate cuts on vinyl planks and laminate, minimizing damage and waste. A reliable tapping block ensures that planks or tiles are seated tightly against each other without causing chipping or uneven seams. For baseboards, a detailed scribing kit including a painter’s pencil, hand sander, and a coping saw has been invaluable in achieving seamless joints, especially on irregular walls or too-tight corners.
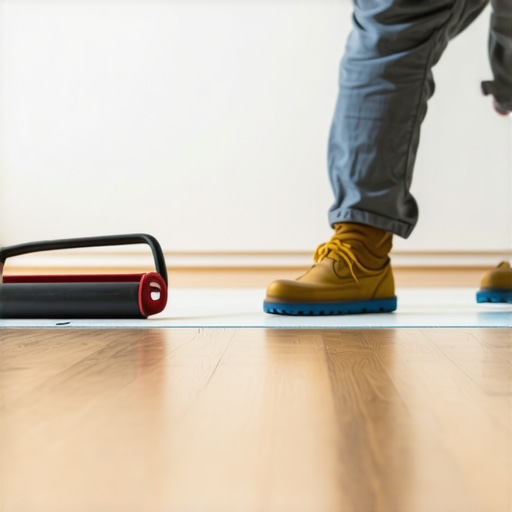
An often-overlooked tool is a professional-grade seam roller which helps press carpet seams or vinyl overlaps flat, reducing ripples over time. Investing in quality tools not only streamlines your work but also reduces ongoing repair needs, making your finishes more resilient.
Adopt Effective Techniques to Extend Their Life
One technique I swear by is regularly applying a protective trim sealant on baseboards, especially in high-traffic areas or near moisture sources. This prevents paint chipping and warping, keeping them looking fresh longer. For flooring, especially hardwood or engineered types, maintaining appropriate humidity levels is crucial. I use a digital hygrometer and a humidifier/dehumidifier combination to keep conditions within the ideal range—about 35-55% relative humidity—to control expansion and contraction.
Similarly, inspecting and sealing grout in showers every year with a high-quality sealant prevents water ingress that can cause damage beneath tiles, reducing long-term repair costs. Applying clear silicone caulk around shower niches and edges with a caulking gun ensures a flexible, waterproof seal that withstands movement and moisture.
Plan for the Future with Scalable Systems
As your home evolves, so should your maintenance approach. Modular or adjustable baseboards, for example, can be easily replaced or upgraded using a simple DIY-friendly system, saving money and effort down the line. For flooring, choosing tiles or planks with a reputation for resistant to fading, scratches, and moisture—and installing them with proper expansion gaps—can prevent much of the future wear and tear.
How do I maintain my flooring and baseboards over time?
Consistency is key. Routinely cleaning with non-abrasive products, inspecting for signs of moisture or damage, and re-applying protective sealants are routine practices that preserve your surfaces’ integrity. Additionally, using tools like a seam roller or scribing kit during installations can make future repairs or adjustments much easier, prolonging their aesthetic and functional lifespan.
Looking ahead, the trend is shifting toward smart maintenance systems—such as moisture sensors in showers or humidity trackers integrated with home automation. Staying ahead with these advancements ensures your investments stay pristine longer and simplifies upkeep.
For your next project, try using a professional seam roller on vinyl or carpet seams to prevent ripples and extend their life. It’s a small step that makes a significant difference. Remember, the right tools combined with consistent, informed maintenance can dramatically reduce future repair costs and keep your home looking beautiful for years to come.
The journey through meticulous installation and leak detection has taught me that the true mastery lies in the details most homeowners overlook. One of the most valuable lessons I learned was the importance of patience and thoroughness before moving on to aesthetic finishing touches. Rushing the prep stages, such as waterproofing or subfloor assessment, often leads to long-term headaches. Taking the time to master these foundational steps can save you from costly repairs and preserve the integrity of your home. Additionally, I realized that investing in quality tools isn’t just about convenience—it’s about ensuring long-lasting results that stand the test of time. Finally, embracing a mindset of continuous learning and seeking out reputable sources can transform your DIY approach from basic to professional-grade. These insights have profoundly changed how I approach home improvement projects, making them more satisfying and successful in the end.