

Imagine standing in a freshly renovated room, tools in hand, ready to add those final touches—only to realize the corners look more crooked than a drunken sailor’s knot. I’ve been there. The frustration of trying to get perfect baseboard joints on bullnose drywall can be a real eye roller, especially when a tiny miscalculation leaves gaps or uneven seams. It’s that moment when I knew I needed a better way—something reliable, simple, and repeatable.
Enter the 2-piece trick. When I first learned this technique, it felt almost too good to be true. It changed my entire approach to baseboard installation, saving time and avoiding the headaches of crooked corners. If you’ve ever struggled with achieving those crisp, professional-looking joints without resorting to creative filler or sanding, then stick around. Today, I’ll share exactly how the 2-piece method can elevate your craftsmanship, whether you’re a DIY enthusiast or a seasoned pro.
The Hidden Challenge with Bullnose Drywall Corners
Most of us underestimate the complexity of using bullnose drywall, especially when it comes to baseboards. Unlike traditional drywall corners, bullnose features a curved edge, making consistent joint creation a real task. Early on, I thought I could just measure, cut, and slap everything together. Spoiler alert: that rarely works smoothly. Gaps, uneven seams, and visible imperfections became my persistent foes.
Now, I approach it differently. The key is understanding that the curved surface demands a nuanced technique—enter the 2-piece trick. This method helps break down the process into manageable, predictable steps, allowing you to craft those tight, neat corners effortlessly.
But here’s a question—have you ever hesitated to try that special corner piece because you’re afraid it’ll be a mess? Believe me, that feeling is universal. And it’s valid—mistakes early on are typical. I recall making a big blunder during my first attempt, forcing me to redo an entire section because I didn’t account for how the curve impacts the fit. That’s when I realized that small miscalculations can snowball into costly fixes.
According to industry experts, proper planning and techniques like the 2-piece trick are essential for seamless finish work on curved surfaces (source: [Baseboards Makeover](https://tilecraftsmens.com/baseboards-makeover-elevate-your-interior-with-simple-updates)). So, if you’re tired of patching and sanding those imperfect joints, keep reading. We’ll explore step-by-step how to execute this technique confidently.
Ready to transform your next project? Let’s dive into the precise method that will make your curved corners look like they were installed by a professional.
Mark Your Cut Lines Precisely
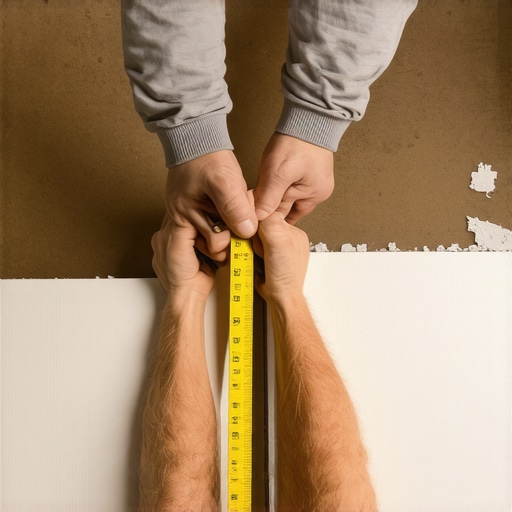
Start by measuring the length of your bullnose corner from wall to wall, then transfer this measurement onto your baseboard with a pencil. Use a square to draw a clean, straight cut line. Remember, accuracy here sets the foundation for a tight joint. I once rushed this step, which resulted in a gap that was nearly unfixable without re-cutting—a costly mistake you want to avoid.
Cut the First Piece Carefully
Using a sharp miter saw set at 45°, cut the first piece to length, ensuring the cut face is smooth and free of splinters. Think of this as your anchor piece—the one that will sit flush against the wall. When I cut my first piece, I always double-check the angle and measurement before finalizing; a minor miscut can propagate errors into the entire joint.
Prepare the Corner Piece with a Back Scribe
Place the second piece against the corner and gently scribe the back of the baseboard onto the wall shape. This back-scribing ensures that the baseboard contours perfectly to the bullnose curve. I recommend using a flexible carbon paper for transferring complex curves. During my first attempt, I neglected this step and ended up with gaps that required filler; now, I always back-scribe for those tricky curves.
Cut the Corner Pieces with Precision
Transfer your scribed line onto the second piece and cut carefully with a jigsaw or a coping saw for intricate curves. The goal is a seamless fit. I remember struggling with a crooked cut, causing the joint to look uneven, so I now take my time and double-check the fit before proceeding.
Test Fit and Adjust as Needed
Before attaching, dry-fit the pieces together on the wall. Wiggle and adjust to ensure tight contact without gaps. This step might seem tedious, but it saves time in the long run. I once skipped this step and had to do multiple corrections, which increased my frustration. Take your time for a perfect fit.
Attach Using Construction Adhesive and Finish Nails
Apply a thin bead of high-quality construction adhesive along the back of the baseboard and press firmly into place. Use finish nails for extra hold, ensuring nails are driven at an angle to avoid splitting. During one project, I used too little adhesive, causing the baseboard to loosen; now, I always give it a good squeeze for security.
Fill Gaps and Sand Smooth
If any tiny gaps remain, apply a flexible wood filler or caulk designed for baseboards. Once dried, sand lightly to seamlessness. I recall a time when I overfilled a gap, leading to an uneven surface—now, I use a putty knife to apply just enough filler for a flush finish.
Paint or Finish for a Professional Look
Finish with a coat of paint or stain that matches your decor. This final step hides any minor imperfections and elevates the entire installation. I’ve learned that taking my time with the finishing touches makes all the difference between a DIY job and a professional finish.
When tackling home improvement tasks like carpet installation, shower repairs, or baseboard finishing, many homeowners and even seasoned DIYers fall prey to misconceptions that hinder flawless results. Let’s dig deeper into some often overlooked nuances that can make or break your project success.
Contrary to popular belief, choosing the thickest carpet underlay or the splashiest tile design doesn’t automatically guarantee durability. In my experience, the underlying materials and installation techniques are far more critical. For uber-high-traffic areas, selecting a carpet like a low pile with a dense fiber count offers better longevity than opting for plush or thick designs that flatten quickly. You can read more about the best carpet types for high-traffic zones to make smarter choices.
Similarly, in shower repairs, many underestimate the importance of proper waterproofing. A common myth suggests that sealing grout alone suffices to prevent leaks—nothing could be further from the truth. Expert guides emphasize that incorporating a waterproof membrane beneath the tile, combined with high-quality silicone sealants, is essential for long-term durability. Neglecting this layered approach often results in costly water damage and mold issues.
When it comes to baseboards, a frequent mistake is to assume that simply mitering corners perfectly is enough for a professional look. What most overlook is the significance of surface preparation and precise measurements. Wobbly or uneven baseboards often stem from walls with irregularities, or from the use of improper tools. Advanced installers will use techniques like back-scribing or shimming to ensure a seamless fit, especially on uneven or textured walls. For example, the secret shimming technique can be a game-changer on bowed or wavy walls.
Flooring installation itself holds many pitfalls. Many assume that simply gluing or nailing down planks guarantees a tight, lasting fit. But the devil is in the details—such as adequate subfloor prep and expansion gaps. An often-overlooked nuance is the importance of controlling moisture levels before installation. High humidity can lead to wood or laminate swelling or gapping shortly after placement. For comprehensive guidance, check out detailed steps from planning to a perfect finish.
A common trap in all these projects is rushing through measurements. Small errors in length or angle, especially in corner joints or around irregular shapes, can cause glaring gaps or uneven seams. Using tools like a framing square, measuring tape, and proper marking techniques saves not only time but prevents costly rework.
Have you ever fallen into this trap? Let me know in the comments.
Remember, understanding these hidden nuances elevates your craftsmanship beyond ordinary DIY work to professional-quality results. It’s worth investing the time to master these details, which can save you money and frustration long-term. For more expert tips on flooring, see our guide on seamless flooring installation, and for finishing touches, check the baseboard makeover strategies.Maintaining your home improvement tools is essential to ensuring long-term performance and consistent results. I personally swear by investing in high-quality equipment like a carbide-tipped saw for precise cuts and a reliable cordless drill with adjustable clutch settings to prevent overdriving screws. These tools save me time and prevent frustration during installations of flooring, shower fixtures, or baseboards. Regularly cleaning your blades and bits with a steel brush and applying lubrication keeps them sharp and prevents rust, which can compromise cut quality over time.
How do I maintain my power tools over time?
Beyond routine cleaning, storing tools in a dry area and periodically checking for worn batteries or loose components extend their lifespan. For example, keeping your miter saw blades in a protective case prevents damage and maintains sharpness. When it comes to adhesives and sealants, always using the specified products and correctly storing leftover materials prevents spoilage that could affect adhesion or waterproofing efforts. Upgrading your toolkit with a digital moisture meter can be invaluable; it allows you to monitor subfloor or wall moisture levels before installing flooring or tile, ensuring a durable finish. As installation methods evolve, so will the tools—future trends point towards smart, connected devices that provide real-time feedback during projects, reducing errors and rework.
Mastering long-term results with proper maintenance
Consistent upkeep of tools and materials leads to superior craftsmanship and prevents costly repairs or replacements down the line. For instance, regularly inspecting your silicone caulk for cracking or mold signs ensures sealing remains effective, especially in showers and wet zones. Applying protective coatings to baseboard nails or screws can slow corrosion, which is especially relevant in humid environments. When scaling projects, investing in modular, easily portable tools such as cordless kits with interchangeable accessories can make large installations more manageable. I recommend the best practices for maintaining flooring tools; integrating these habits guarantees you’ll have reliable equipment ready whenever inspiration strikes.
Lessons from the Heart of My Projects
One of the toughest lessons I learned was realizing that no template or shortcut can substitute meticulous measurement and patience, especially with bullnose drywall. I once tried rushing the cut-and-fit process, only to end up with gaps that stubbornly refused to hide under paint. That experience taught me to double-check every measurement and trust my tools—and most importantly, my eye for detail. The second lesson? That sometimes, simplifying complex curves into manageable parts—like the 2-piece trick—saves incredible frustration and results that truly shine. It’s about embracing the process, not rushing through it.
Tools and Tips That Changed the Game
My essential toolkit for perfecting baseboards on curved drywall includes a high-quality miter saw, a flexible scribing method, and a good jigsaw for intricate cuts. For measuring, I rely on a digital angle finder to ensure precision—trust me, it pays off. When it comes to honing my skills, I recommend reading Carpet Install Secrets, which, despite the focus on flooring, shares invaluable tips on measuring and fitting curves accurately. Combining the right tools with curated knowledge transforms a challenging task into an achievable craft.
Unlocking Confidence in Your Finish
The most rewarding part of mastering this technique is the confidence it breeds. When I see a seamless, crisp corner that looks like a professional installed it, I’m reminded that patience, practice, and the right approach make all the difference. Now, I approach bullnose drywall with a calm, systematic mindset, knowing I can achieve great results. Remember, every project is an opportunity to refine your skills—and with each success, your confidence grows. Don’t shy away from those tricky corners; instead, embrace them as your next victory.
Curated Resources That Elevate Your Craft
For ongoing learning, I recommend exploring step-by-step flooring guides to understand how precise measurements lay the foundation for flawless results. My tried-and-true tools include a flexible scribing kit, a quality jigsaw, and a digital angle finder—tools I personally use and trust for consistent quality. Additionally, books like Finish Carpentry by Fine Homebuilding Magazine offer deep insights into detailed trim work. These resources foster confidence and elevate your craftsmanship, turning even the most complex curves into seamless, professional-looking joints.
Your Turn to Transform
Remember, the secret to perfect baseboard corners on bullnose drywall isn’t just technique; it’s patience, planning, and a willingness to learn from each mistake. Whether you’re tackling your first project or refining your skills, applying the 2-piece trick can significantly elevate your results. So, why not give it a try on your next wall? Share your journey, or ask questions—let’s grow together as DIY enthusiasts and pros alike.