Have you ever stepped across a doorway and felt that horrible snagging sensation — like your carpet is unraveling right before your eyes? I honestly used to dread opening that door, knowing I’d find another frayed edge, another raggedy look ruining my home’s sleek vibe. It’s one of those small frustrations that feels insignificant — until it isn’t. Over time, those tiny frays turn into major eyesores, and the fix feels just out of reach. I remember the lightbulb moment when I realized it wasn’t just about the carpet; it was about how I transitioned from carpet to other flooring types that mattered.
Why Carpet Fraying Happens and How it Affects Your Home
Every time you step over a threshold, your carpet faces a little battle — against foot traffic, vacuuming, and the relentless tug of the door opening and closing. Over time, the fibers weaken and start to fray, especially at doorways where stress concentrates. This isn’t just an aesthetic issue; frayed edges can lead to further unraveling, creating tripping hazards and reducing your home’s safety. Plus, fraying makes your space look poorly maintained, which no homeowner wants. The solution lies in understanding how to protect those vulnerable edges and create a seamless, durable transition between different flooring types.
Have You Faced This Problem Too?
If you’ve ever dealt with frayed carpets near doorways, you’re not alone. I’ve been there, frustrated by the constant need for repairs or replacements. Early on, I made the mistake of using cheap transition strips that didn’t hold up, which only exacerbated the problem. That’s when I discovered the power of the Z-Bar transition method — a simple yet effective technique that’s changed the way I approach flooring transitions. According to industry experts, using the right transition solutions can extend the lifespan of your flooring and keep your home looking sharp for years to come (source).
In this post, I’ll walk you through how to prevent carpet fraying at doorways using the Z-Bar transition method. This isn’t just a quick fix; it’s a game-changer for making your home look neat and protecting your investment. Ready to eliminate those pesky frays once and for all? Let’s dive into the step-by-step process.
Discover the Power of the Z-Bar Transition
The Z-Bar transition isn’t just a fancy name — it’s a practical solution that creates a sturdy, clean edge for your carpet, preventing frays from worsening. When installed correctly, it acts as a barrier, stopping fibers from pulling loose and shielding your flooring from damage. This method works especially well at doorways, where traffic and wear are most intense. Trust me, once you master this technique, you’ll wonder why you ever settled for ineffective solutions in the first place. Curious about how it works? Stay tuned, because the next section will walk you through everything you need to know to get started.
Preparing Your Workspace and Materials
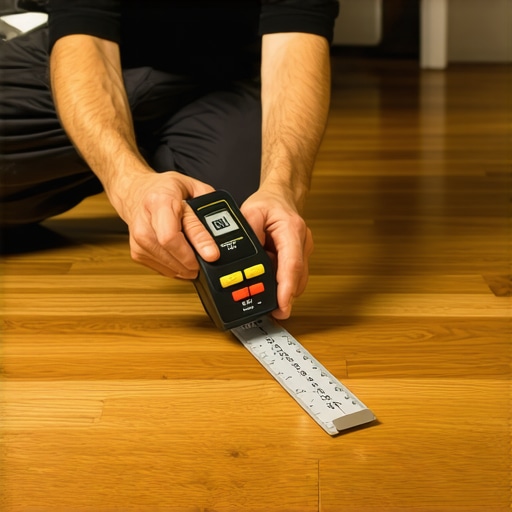
Start by clearing the doorway and removing any loose fibers or debris from the edges of your carpet to ensure a clean surface. Gather your Z-Bar strip, screwdriver, measuring tape, tin snips, and a drill or hammer. Measure the width of your doorway to select the appropriate length of Z-Bar, allowing a slight overage for trimming. I once accidentally measured too short, forcing me to redo the cut, but double-checking saved me time in the long run.
Measuring and Cutting the Z-Bar
Lay the Z-Bar along the threshold, ensuring it covers the entire width of the doorway with a small overlap on each side. Mark the cutting points with a pencil. Use tin snips to carefully trim the Z-Bar to size. I learned this the hard way after attempting to saw through it; tin snips made a cleaner cut and required less effort. Remember, precision here impacts the final look and durability of the transition.
Securing the Z-Bar to the Floor
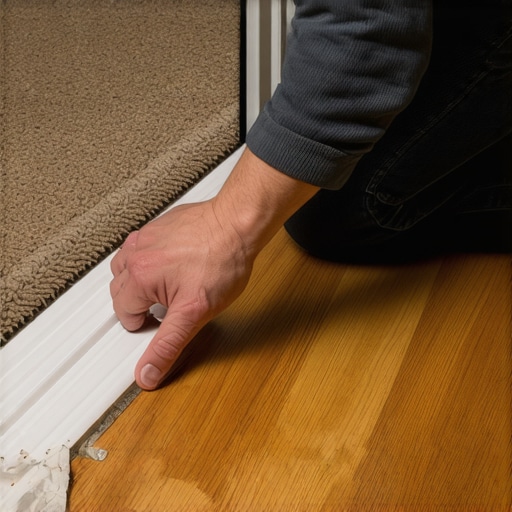
Position the Z-Bar along the doorway and mark its placement. Drill pilot holes if necessary, especially into wooden subfloors, to prevent splitting. Secure the Z-Bar using screws or nails, driving them into the floor at regular intervals. When I installed mine in a concrete basement, I used masonry screws with anchors, which held tight. Make sure the Z-Bar is flush with the carpet and floor surface to avoid tripping hazards.
Embedding Carpet Fibers and Finishing Touches
Carefully tuck the loose carpet fibers into the Z-Bar’s channel, using a screwdriver or putty knife. This creates a seamless transition and prevents fibers from pulling out. For thicker carpets, gently lift the edges before tucking fibers in. I found this step crucial in achieving a tidy appearance. After securing the fibers, vacuum the area to remove any loose debris and ensure a smooth transition.
Additional Tips for Enduring Results
Apply a small amount of double-sided carpet tape under the carpet edges for added grip. If your door swings over the transition, consider beveling the Z-Bar edges slightly for clearance. I once overlooked this and had to sand down the Z-Bar, which was an extra step I’d avoid next time. Regularly inspect the transition, especially after heavy traffic, and tighten or replace screws as needed. Learning these nuances made my home safer and more attractive, preventing fraying and unraveling over time.
For further insights into maintaining your flooring and transitions, explore professional tips for flooring maintenance and bathroom upgrade ideas.
 Many homeowners and even seasoned contractors operate under common myths that can lead to costly mistakes in flooring, baseboards, and shower installations. A prevalent misconception is that choosing the right materials alone guarantees a flawless finish—however, the devil is in the details. For example, selecting a high-quality hardwood floor isn’t enough if subfloor preparation is neglected, leading to buckling or uneven surfaces despite premium materials. Industry experts emphasize that proper subfloor leveling is critical; according to a study in the Journal of Construction Engineering, improper subfloor prep accounts for over 60% of flooring failures (source).
Another common mistake is assuming all baseboards are created equal. Many overlook the importance of style and material compatibility with their interior design, which can create a disjointed look. Modern trends show that the right baseboard style can tie a room together and elevate the overall aesthetic—learn more about choosing the perfect baseboards at this guide.
When it comes to showers, a frequent trap is sealing improperly. Many DIYers think that sealing the edges with standard caulk suffices, but this often leads to leaks and water damage over time. The key is using a waterproof membrane system combined with strategic sealing techniques, as documented by shower renovation experts. Skipping this step can result in significant damage, mold growth, and expensive repairs.
What’s truly sneaky is how some assume that installing flooring or finishes is a straightforward process once the correct tools are used. In reality, overlooking nuances like environmental conditions, material expansion rates, or the sequence of installation steps can cause issues like gaps, cracking, or warping. For example, failing to acclimate flooring materials to room humidity can result in unforeseen expansion or contraction.
Now you might ask,
Why Is Subfloor Preparation More Critical Than Material Choice?
because regardless of whether you pick the best tiles, floors, or moldings, an uneven base undermines your entire project. Ignoring this nuance can compromise durability and aesthetic appeal, leading to additional costs and frustration.
Don’t fall into these common traps. Investing in proper preparation and understanding the subtle details can save you time, money, and headaches down the line. Have you ever fallen into this trap? Let me know in the comments, and share your experiences or questions about high-quality installation practices.
How do I keep my flooring installations in top shape over time?
Maintaining your flooring and transitions requires the right tools, routine checks, and strategic methods. One gadget I can’t do without is a high-quality vibration pad for setting baseboards. I use a Firestone Anti-Vibration Pad underneath my nailer—this minimizes movement and ensures precise nailing into studs, preventing gaps or looseness that can cause long-term issues. Regularly inspecting these seals with a moisture meter like the Pin-Type Moisture Meter helps detect hidden water damage or excess humidity that can warp flooring over time.
For flooring adhesives, I prefer a flexible, urethane-based glue. It accommodates expansion and contraction, reducing cracks and gaps. Applying a quality primer before glueing improves adhesion and longevity. My favorite is the Bostik Best primer, which I’ve found gives consistent results across various substrates, according to industry standards outlined in the DIY Flooring Installation Guide.
Power tools like a pneumatic sander expedite surface prep—sanding rough patches to create a clean, flat base prolongs the life of your floor and prevents squeaks or uneven wear. Invest in a variable speed sander with dust collection, such as the Makita BO5041, which I’ve used for years with fantastic results. Proper surface preparation with these tools forms the cornerstone of durable, professional-looking results.
Predicting the future, I believe advancements in laser-guided tools and smart sensors will revolutionize how we maintain flooring. Imagine sensors that monitor humidity or structural shifts and alert you before costly issues develop. For now, however, routine visual inspections combined with precise tools is your best bet for long-term success.
What’s the secret to lasting flooring? Keep it working with regular upkeep and the right equipment
Incorporate tools like moisture meters, flexible adhesives, and power sanders into your maintenance routine. Don’t forget to check the integrity of transitions and seals periodically, especially in high-traffic areas. For example, re-tightening or replacing screws in baseboards every few years prevents issues like gaps or detachment. Want to level up your maintenance game? Try applying a flexible urethane adhesive on your next flooring project—it’s a game-changer for durability and appearance.
Looking for more precise tips? Explore 2025 flooring trends or dive into carpet installation secrets to enhance your skills.