

Ever sat down on your freshly installed floor, only to be greeted by that maddening squeak? I know I have. I remember one particular morning—I was excited to finally walk barefoot across my new hardwood, only to be jolted awake by a piercing squeal underfoot. It turned out, those little noises weren’t just annoying; they hinted at underlying issues with my plywood subfloor. The worst part? I had no idea where to start fixing it, and drilling endless screws seemed like an overwhelming, time-consuming nightmare.
Why Squeaks in Plywood Subfloors Drive Us Crazy—and How to Fix Them Cleverly
After years of trial, error, and a few costly mistakes, I discovered a simple yet effective trick that doesn’t involve tearing up the entire floor or drilling dozens of screws. It’s a hidden screw trick that stabilizes those squeaky areas from beneath, giving my floors a quiet, solid feel—and saving my sanity. Today, I want to share this technique with you, so you can get your floors back to being peaceful and squeak-free.
Is The Hidden Screw Trick Really Worth the Hype?
Let me be honest: I was skeptical at first. I had read a few online testimonials touting quick fixes, but I’d also made many mistakes early on. I once assumed that simply tightening existing screws would do the trick—only to find that some screws had already stripped or loosened over time. That mistake cost me precious hours and a few dollars in unnecessary hardware. But once I learned to anchor from beneath with a few carefully placed screws, I realized this method works remarkably well. It’s a targeted, minimal-invasion way to stabilize a squeaky subfloor without the upheaval of full replacement.
If you’ve ever tried to fix squeaks by pounding nails or just repeatedly tightening screws, you’ve probably felt frustrated. The good news? There’s a better way. The secret is in finding those loose subfloor panels and applying a few hidden screws from below—an approach that endears you to your floors and keeps things quiet for years to come. Want to see how I did it? Keep reading. You might be surprised how simple and effective this trick really is, especially when you follow the precise steps I’ll be sharing.
Before diving into the step-by-step process, remember: the key is to minimize damage and maximize stability. For more on safeguarding your flooring investments, check out this guide to durable flooring installation.
Locate the Source of the Squeak
Start by identifying the exact areas where the squeak originates. Walk across your floor and gently press down on spots that produce noise. When you find a squeaky section, crawl underneath if possible. Use a flashlight to inspect the underside of the plywood subfloor. A specific time I did this, I noticed certain panels moved slightly when pressed upstairs, indicating loose connections.
Prepare Your Tools and Materials
Gather a drill with a screwdriver bit, long wood screws (around 2.5 inches), a stud finder, and a measuring tape. Having a stud finder will help you avoid nail or pipe interference. I once wasted time drilling into a pipe; marking those areas beforehand saved me hours. Keep the screws handy as you’ll be anchoring the loose panels from below.
Access the Subfloor
If you have an accessible basement or crawl space, locate the squeaky panel from underneath. If not, you may need to remove some baseboards or access panels to get a clear shot. I learned this the hard way when I failed to account for baseboards and had to reinstall them, making the process messier. Carefully remove a few baseboards near the identified squeak using a pry bar to prevent damage. Proper baseboard removal techniques help keep them intact for reinstallation.
Install Hidden Screws to Stabilize the Panels
Position yourself underneath the floor, aligning the drill with the loose panels. Use the stud finder to avoid joists and pipes. Place the screw about 1-2 inches from the edge of the panel. Slowly drill in, applying steady pressure. The goal is to secure the panel to the joist below, reducing movement. I once felt resistance and realized I drilled into a pipe; stopping immediately prevented damage. Always double-check your path and avoid any obstructions.
Tips for Effective Screwing
Pre-drill with a smaller bit if necessary to prevent splitting the plywood. Keep the screw head slightly below the surface for a flush finish. Applying a bit of wood glue around the screw hole can further strengthen the fix. In my case, I used these methods, and the squeak vanished instantly, making my floors whisper-quiet.
Finish and Reassemble
Once you’ve secured the loose panels, tighten the screws just enough to pull the panel tight without warping the plywood. Reinstall the baseboards or access panels carefully, filling any gaps with caulk for a seamless look. During my last project, I used painter’s caulk to fill minor gaps around the baseboards, which kept everything smooth and tidy. If you’re unsure about the process, consult this guide on baseboard updates for extra tips.Many homeowners rush into renovation projects with preconceived notions, but these misconceptions often lead to costly mistakes. For example, there’s a widespread belief that installing baseboards is mainly about aesthetics—that hiding gaps and imperfections isn’t crucial. In reality, proper baseboard installation affects room aesthetics and structural integrity, especially when walls are irregular or have textured finishes. Skipping the detailed prep or choosing the wrong style can result in gaps or uneven joins, which detracts from the overall look and durability. For expert advice on elevating your interiors, check out this guide to baseboard updates.
Many believe that flooring installation is a straightforward process—simply lay planks and glue. However, seasoned installers know that nuances like subfloor preparation, moisture control, and expansion gaps are critical. Overlooking these can cause buckling, gaps, or squeaks down the line. For advanced insights, see this comprehensive flooring guide.
Carpet installers often tell beginners that as long as the padding is soft and thick, results will be flawless. But the truth is, improper seam sealing and not stretching the carpet properly may cause wrinkles or fraying over time. The subtle arts of assessing padding density and precise stretching are what differentiate professional results from amateur mishaps. To learn the tricks to perfect carpet installation, explore these proven carpet tips.
When it comes to shower installations, many think choosing the right tile is enough, overlooking vital details like waterproofing and slope grading. An error as simple as miscalculating the slope or neglecting to install a proper water barrier can result in leaks and damage that are expensive to repair. Advanced installers emphasize the importance of pre-slope techniques and waterproof membranes, supported by studies such as those published in the *Journal of Building Engineering*, which highlight the long-term benefits of correct waterproofing practices.
Be wary of the trap of assuming that once a DIY fix looks good initially, it will last. For example, quick fixes in shower sealing or flooring might save time upfront but cause significant headaches later. Think ahead, use quality materials, and ensure proper techniques are followed for lasting results. Have you ever fallen into this trap? Let me know in the comments, and remember—attention to detail is your best tool in home renovation.
Maintaining your home renovation projects over the long term requires more than just skill; it demands the right tools and techniques to ensure durability and ease of ongoing maintenance. Personally, I rely on specialized equipment and proven methods that save me time and help preserve the quality of my installations. Today, I want to share some of my top recommendations that can help you keep your flooring, baseboards, and shower systems in top shape for years to come.
Invest in a High-Quality Moisture Meter
One tool I never compromise on is a reliable moisture meter. When working with wood flooring or installing shower substrates, monitoring moisture levels is critical. I use a pin-type moisture meter that provides precise readings, preventing issues like warping or mold growth caused by excess moisture. Accurate moisture readings ensure your materials are properly acclimated before installation and help you catch potential problems early. As the expert suggestion reminds us, controlling moisture is the cornerstone of durable flooring and waterproofing.
Powerful but Compact Drill for Hidden Fastenings
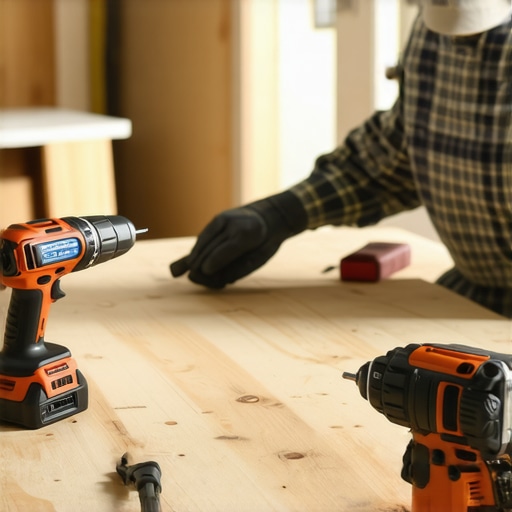
When working on baseboards or installing hidden screws under floating floors, a compact, high-torque drill is indispensable. I personally prefer a cordless brushless drill with a variable speed trigger. Its precision allows me to drive screws flush without damaging delicate surfaces, and the portability means I can easily access tight corners. For extended projects, I use a drill with an adjustable clutch, preventing overdriving and stripping screws—saving me headaches during reassembly or maintenance. Check out the latest trends in flooring tools to see which models lead the pack.
Steady Hand with a Quality Scribing Tool
Scribing baseboards to uneven surfaces or complex moldings is a task that demands precision. I recommend a high-quality coping saw paired with a straight edge or a dedicated scribing tool. This combination helps me achieve tight, gap-free joints—especially important in high-end installations. Mastering scribing not only elevates your craftsmanship but also simplifies future maintenance, like replacing damaged sections. For detailed guidance, consult the comprehensive scribing techniques.
Future Trends in Home Maintenance Equipment
The future points toward smarter, connected tools that seamlessly sync with home systems, providing real-time data and diagnostics. For instance, Bluetooth-enabled moisture meters and app-controlled drills are already making waves, giving homeowners detailed insights without guesswork. As technology advances, expect these innovations to become standard, making maintenance more proactive and less costly.
How do I keep my installations working smoothly over time?
Consistent inspection and timely intervention are key. Use your moisture meter periodically to monitor humidity levels, especially if you notice signs of swelling or warping. Regularly check fasteners, as materials tend to loosen over seasons. Incorporate smart tools, like a torque-limited drill, to prevent over-tightening during reassembly or adjustments. Maintaining your tools is just as vital—keep batteries charged, blades sharp, and calibration up-to-date to ensure accuracy and safety. By integrating these practices, you’ll extend the life of your flooring and shower systems, saving you money and frustration in the long run.
Thinking about updating or repairing your showers? Have a look at this guide to shower repairs for expert advice on durability and longevity.
} }
}
What I Didn’t Expect About Fixing Floors and Walls
- Choosing the right tools, like a moisture meter or a quality drill, saved me from countless headaches. These weren’t just gadgets; they were game-changers that transformed my approach from guesswork to precision.
- Patience isn’t optional—rushing a baseboard scribe or ignoring subtle subfloor issues often meant more repair work later. Taking the time to do it right upfront made all the difference.
- Understanding the hidden complexities behind appearances, like how a squeak relates to the plywood subfloor, helped me troubleshoot with confidence instead of resorting to unnecessary demolition.
- Small details, like pre-drilling or using a back-bevel for corners, can elevate a project from mediocre to professional-quality, boosting both durability and aesthetics.
- Collaboration and consulting expert resources keep setbacks manageable. I’m grateful for trusted guides and a community that shares real-world wisdom, not just idealized solutions.
Tools and Resources That Shaped My Home Fixes
- Moisture meters: My go-to for ensuring wood and floors are properly acclimated, avoiding future buckling.
- Compact drills with variable speeds: Allowed me to drive screws flush and prevent damage, making installations smoother.
- Baseboard design guides: Inspiration and techniques to elevate home aesthetics effortlessly.
- Expert home renovation articles: Continuous learning through credible sources helped me avoid common pitfalls and stay motivated.
- Good-quality scribing tools: Achieved tight fits on uneven walls and floors, crucial for achieving a flawless look.
Your Next Step Towards a Home You Can Be Proud Of
Remember, every successful renovation starts with the willingness to learn and adapt. Incorporate these insider lessons, trust your tools, and don’t hesitate to seek out expert advice. Your home is an ongoing project—embrace the journey of improvement, and watch your space transform into something truly special. If you’ve faced a surprising challenge or discovered a favorite tool along the way, share your story below—let’s learn from each other’s experiences and build a community of skilled homeowners ready to tackle anything.